
Pumpkin Scones
This post may contain affiliate links. As an Amazon Associate I earn from qualifying purchases. Please read my disclosure policy.
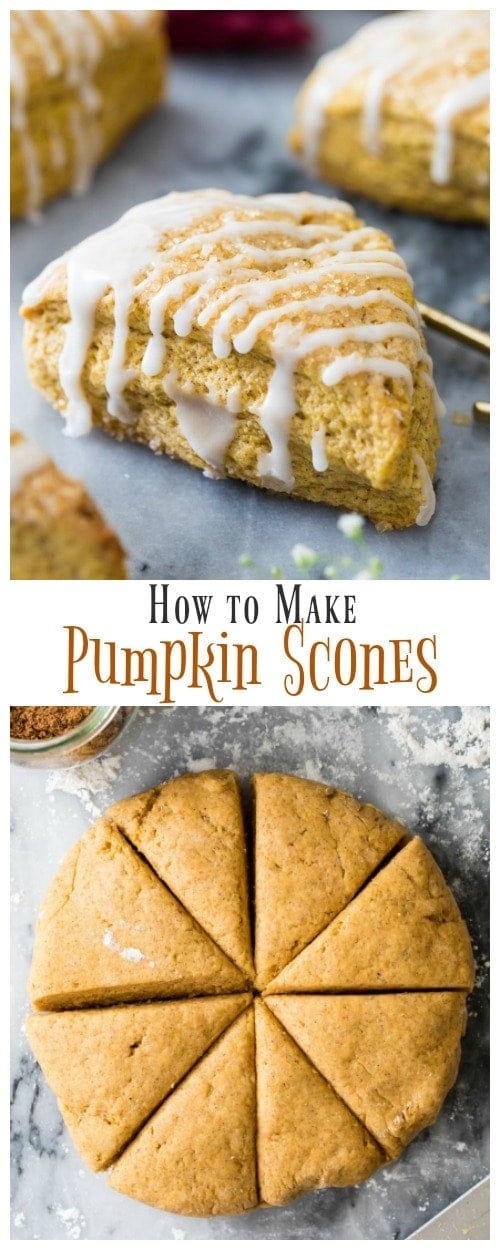
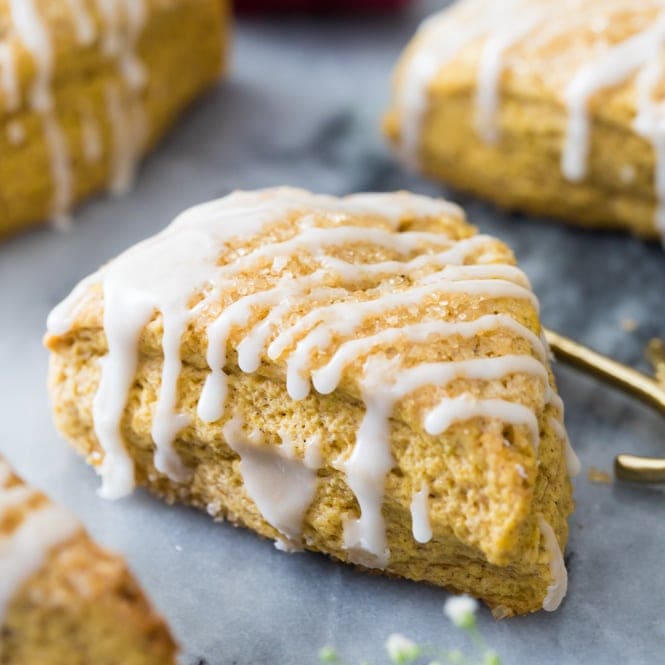
Pumpkin Scones packed with real pumpkin and pumpkin spice, and then drizzled with a simple vanilla glaze. Based off of my popular, easy, scone recipe and infused with Fall flavor, you’ll want to make these all season!
Recipe includes a how-to video at the bottom of the post!

My sister, Casey, has a pretty important job.
She makes scones.
I guess that’s not her official job (though I’d love to see a business card that says “pumpkin scone maker”), officially she works on film sets. She’s currently working on Mindhunter after finishing up some work on the new Wonder Woman 1984 (seriously is that not the coolest?), but, in my parents’ house, she is the official designated scone maker.
And here’s the thing about my sister the scone maker. While she’s a pretty enthusiastic baker when she’s home, she’s not at all very interested in trying my recipes. She’d much rather try something “new”, but after trying lots of different scone recipes, my critical, professional scone-making sister finally tried mine and, guess what I heard.

“Your scone recipes are the best”. I’m pretty sure that there’s no higher praise.
Tender, buttery, flaky, and packed with flavor. I won’t argue with her because honestly I agree! My scones are never dry or crumbly, they’re simple to make, and have been tested hundreds of times. Today I have a new, seasonal, pumpkin scone recipe I’m sharing with you and this is every bit as good as the others.
Let’s jump in to some tips.

Tips for Making Pumpkin Scones
Cold Ingredients are Key!
The best tender, flaky scones rely on cold butter (this is also key when making pie crust, if you recall!). It’s important that you don’t overwork this dough as you don’t want to melt the butter; cold butter pieces in our scone dough are key to flaky scones. Make sure your cream is also cold when you add it to help keep that butter as cold as possible.
Don’t Over-work Your Scone Dough!
Unless you want scones that are tough and dense, do not over handle your dough! If you aren’t using a food processor, you might want to check out my biscuit recipe for tips on cutting butter and working liquid into dry dough without over-working it as these two doughs are very similar (I recommend using a cheese grater!).
The more your handle it the warmer it will get and remember, we want our scone dough to be as cold as possible! If you feel that you’ve handled your pumpkin scone dough too much and made it too warm, after you’ve cut it into wedges and placed them on your baking sheet, pop that pan in the fridge or freezer for at least ten minutes before baking.

Can I Make Pumpkin Scones Without a Food Processor?
While I recommend using a food processor when making scones, you can make these pumpkin scones without one.
Use a grater to grate very cold butter over your dry ingredients. Then, use a pastry cutter to cut the butter into your dry ingredients until your mixture resembles coarse crumbs. If you don’t have a box grater you can just use a pastry cutter, but the grater trick worked for me for a long time before I switched over to using my food processor.
You’ll whisk together your heavy cream, pumpkin puree, and vanilla extract and work these liquid ingredients into your dough.
Don’t forget that you do not want to over-work your dough, and this is another reason I recommend using a food processor; the blade makes quick work of incorporating the wet ingredients into the dry. Keep in mind that it’s going to require a fair bit more effort to do this by hand. You may even find yourself wondering if you need to add more liquid — you don’t!

Enjoy!
Looking for more scone recipes? Check out my Chocolate Chip Scones, my Triple Berry Scones, or my Chocolate Scones!
Pumpkin Scones

Ingredients
- 2 cups (250 g) all-purpose flour
- ¼ cup (50 g) sugar
- ¼ cup (50 g) light brown sugar
- 2 teaspoons baking powder
- 2 teaspoon pumpkin spice
- ½ teaspoon cinnamon
- ½ teaspoon salt
- ½ cup (113 g) unsalted butter, cold or frozen cut into 16 pieces
- ¼ cup (59 ml) heavy cream , + additional for brushing
- ⅓ cup (85 g) pumpkin puree **, blotted***
- 1 teaspoon vanilla extract
- coarse sugar, for sprinkling
Glaze
- ½ cup (65 g) powdered sugar
- 2-3 teaspoons milk
- ¼ teaspoon vanilla extract
Instructions
- Combine flour, sugars, baking powder, pumpkin spice, cinnamon, and salt in the canister of a food processor. Pulse briefly until ingredients are well combined.2 cups (250 g) all-purpose flour, ¼ cup (50 g) sugar, ¼ cup (50 g) light brown sugar, 2 teaspoons baking powder, 2 teaspoon pumpkin spice, ½ teaspoon cinnamon, ½ teaspoon salt
- Sprinkle butter pieces over the top of your flour mixture and pulse until mixture resembles fine crumbs.½ cup (113 g) unsalted butter
- In a large measuring cup, whisk together heavy cream, pumpkin puree, and vanilla extract until smooth.¼ cup (59 ml) heavy cream, ⅓ cup (85 g) pumpkin puree **, 1 teaspoon vanilla extract
- Pour pumpkin/cream mixture over flour/butter mixture in your food processor, and pulse until mixture begins to clump together (see picture in post for visual).
- Carefully turn pumpkin scone dough out onto lightly floured surface. Fold the dough in half over itself and use your hands to gently flatten layers together. Rotate the dough 90 degrees and fold in half again, repeating this step 5 times and taking care to not overwork the dough. Use your hands to form into a disk about 6” wide.
- Using a large knife, cut into 8 wedges pressing knife straight down (don't saw with your knife! Just press straight down, this will help your scones to bake up straight).
- Place scones at least 2" apart on a parchment paper lined cookie sheet. Brush each scone with heavy cream and sprinkle with coarse sugar.coarse sugar
- Transfer to 375F (190C) oven and bake for 17 minutes.
- Allow scones to cool. Meanwhile, prepare vanilla glaze.
Glaze
- To prepare glaze, whisk together sugar, milk, and vanilla extract.½ cup (65 g) powdered sugar, 2-3 teaspoons milk, ¼ teaspoon vanilla extract
- Drizzle over cooled scones and allow to glaze to set (this should just take several minutes) before serving.
- Scones taste best fresh but can be stored in an airtight container at room temperature for 2-3 days. They will taste best when warmed up again before serving.
Notes
Nutrition
Nutrition information is automatically calculated, so should only be used as an approximation.
Like this? Leave a comment below!
This pumpkin scone recipe was originally published 09/16/2016. Photos have been updated and recipe slightly improved 10/06/2018


Finally found the best and easiest pumpkin scones I’ve ever made! Just curious why these pumpkin scones have so much more sugar than your other scone recipes. Don’t get me wrong…I loved how sweet these were but just really curious because I want to try some of your other scone recipes as well. Thanks so much!
I’m so glad you enjoyed them, Casey! I found that the extra sugar in these actually worked here while it made the others, like my traditional scones, a little too sweet.
These WOULD have been great had I had the patience to make sure the moisture of the pumpkin was truly soak out. I doctored them up the best I could and they still tasted amazing. I will give it another whirl and have patience the next time.
Love all your recipes!! It’s still a 5 star as it was easy to make and very tasty!
I’m so glad you were still able to enjoy them, April! 🙂
So good! Love the video with all the little tips! Thanks!
I’m so glad you enjoyed them so much, Gayle! 🙂
Do you have to use a food processor, and you use a pastry cutter?
Hi Yolanda! I actually give you a couple of ways to do it without a food processor in the post. 🙂
Another great recipe! I made these yesterday for the first time and they came out so perfect that I immediately made another batch and froze them! I love scones but haven’t attempted them much because they have always seemed like they would take extra work. This recipe is so easy, and quick to put together! The video was very helpful and made it seem easier than I expected. The scones are perfect! I didn’t even put the glaze on them, but I did do the whipping cream and I went very heavy on the sprinkle sugar top. Amazing!
I’m so glad you enjoyed them so much! 🙂
Just made this to have for the Thanksgiving weekend – a delicious and easy recipe! I added mini choc chips to a couple of batches (I made 3 batches, one as printed and two more in more of a mini size). Thank you for the easy and delicious recipe!
I’m so glad you enjoyed them so much, Jeannette! 🙂
OMG – I would give this recipe six stars if I could! These are the scones of my dreams. There is no one on Earth who wouldn’t love these. The technique of how to handle the dough is explained so well and is spot-on. I used White Lily flour for these, as I do with all my biscuits, and the inside was fluffy and creamy. I understand that “real” British scones have a coarser texture and are more craggy, but they ain’t got nuthin’ on these. Sam – thank you and your sister for being so generous as to share her secrets with us:)
I’m so glad you enjoyed them so much, Louise! 🙂
Would it work if I used whole milk instead of cream? I’d love to make these without having to go to the grocery now. Thanks.
Hi Libbie! It can work. You’ll need a little less milk and the scones will be slightly less tender but they should still turn out. 🙂
In your other scone recipes, it says to grate frozen butter. Would using a food processor & sprinkling with slices of frozen butter work in those?
Hi Wendy! That will work just fine. 🙂
These were AMAZING! I drizzled with a maple confectioner’s glaze…MAGIC! Thank you for sharing all these fantastic recipes!
That sounds absolutely delicious, Stacey! Thanks for trying our recipes 😊
I made these today for the first time and they are delicious!!! Thanks for writing such detailed instructions and also for providing the video. Your recipes are always the best!
Thank you so much, Lori! I’m so glad you enjoyed them so much! 🙂
Follow exactly, they came out perfectly! So easy!
We’re so glad you loved them, Debbie!
I’ve made these several times and they’re delicious, a family favorite! Can the dough be frozen ahead of time?
Hi Sarah! We’re so glad you like this recipe. To freeze, prepare the dough as instructed, cut it into wedges, and then wrap each scone in cling wrap and store in an airtight container (or Ziploc bag) in the freezer for up to 3 months. When ready to bake, there is no need to thaw, but you may need a few extra minutes in the oven. We always wait until just before baking before brushing them with cream and sprinkling with sugar. 😊