Have you ever made your own homemade granola bars? These are so much better than anything you can buy at the store, and I think you’ll be surprised at just how easy they are to make!
Today’s recipe includes a video at the bottom of the post showing you just how I make these in my own kitchen!
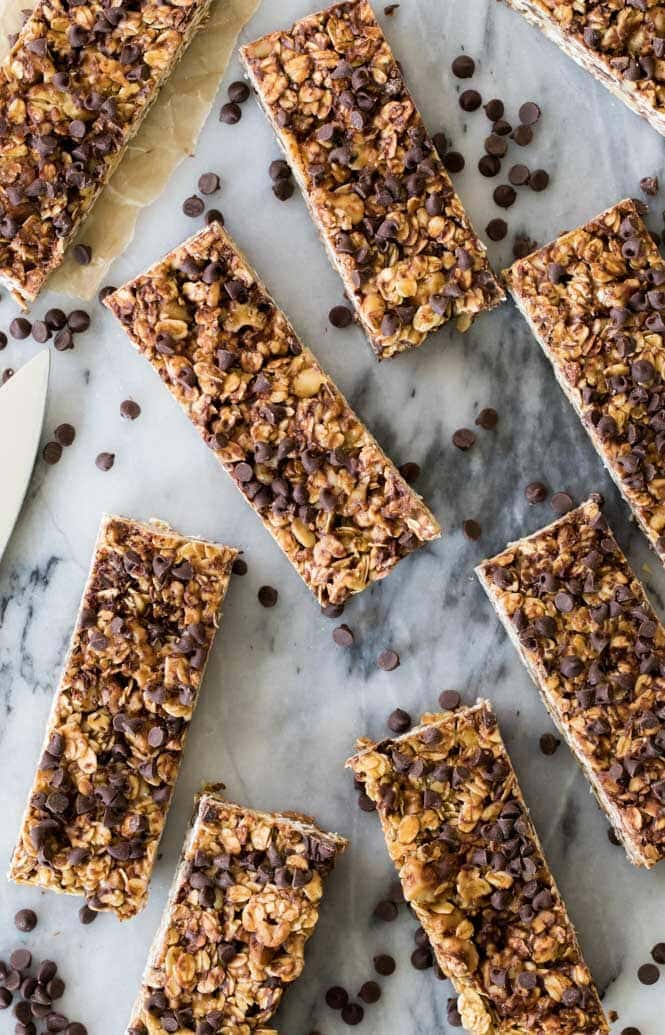
I’m just about tired of seeing these granola bars, to be honest.
Zach has been eating homemade granola bars every. day. for breakfast ever since I first made them a few weeks ago. I’ve been waiting for him to get tired of them, but he hasn’t (it probably helps that each time I make them differently with different add-ins to keep things from getting boring).
I’ve been making these pretty much non-stop for the past few weeks and even decided to make a video of the process, as you’ll see they’re super simple to make.
You’ll start with oats and nuts, which we’re going to combine and toast before we make our granola bars. You’ll want to use old fashioned oats/whole grain rolled oats, but you can use your favorite nuts.
I used walnuts for today’s recipe and coarsely chopped them (almonds are another great option). The oats and nuts will go into the oven for about 15 minutes to toast.
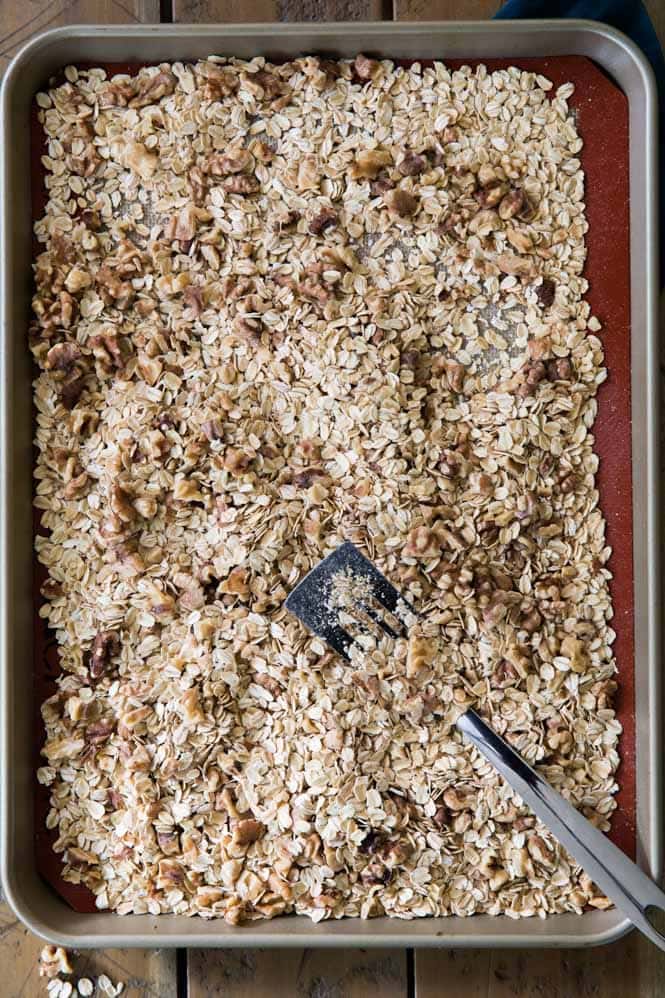
Once they’ve toasted, we’ll make our homemade syrup, which will serve to bind the bars together.
You’ll need unsalted butter, dark brown sugar (you can substitute light if it’s all you have on hand, but I prefer the flavor of the dark brown sugar), honey, and salt.
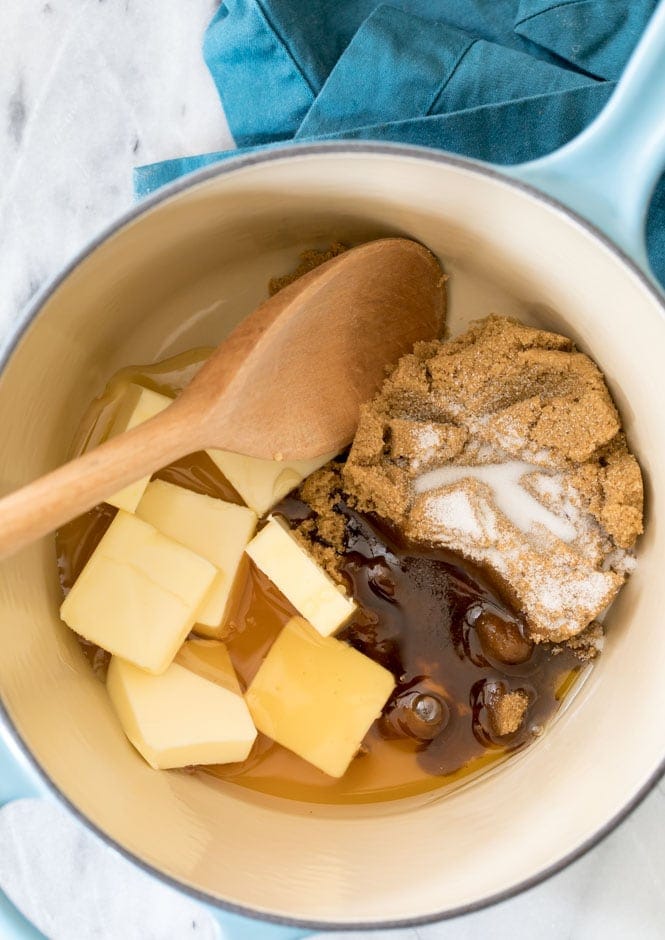
Melt these together until your sugar is dissolved and then stir in a splash of vanilla extract for flavor.
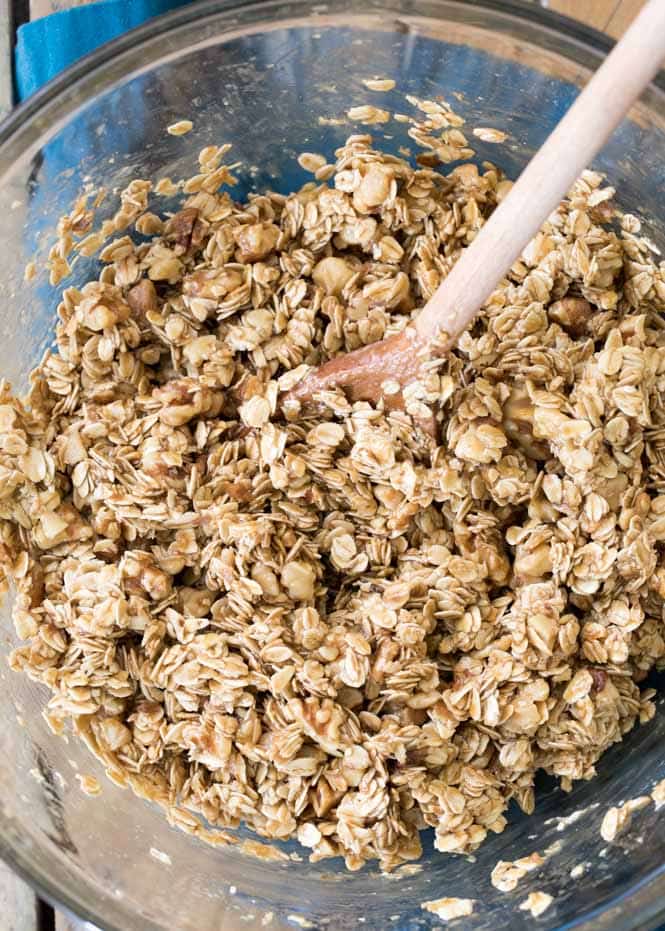
Next, combine your toasted oats and nuts and this syrup in a large bowl and stir everything together until all of the ingredients are well-coated by the syrup.
At this point, if you have any non-melting add-ins you’d like to add, such as dried fruits, you can stir them in as well. However, you’ll want to wait about 10 minutes before adding any chocolate chips. They’ll still melt a bit once you add them (which we want!), but if you add them too soon you’ll just have a runny melty mess.
Tips for Making Homemade Granola Bars
- Much like when making my granola recipe, you can substitute your favorite nuts for this recipe. I use walnuts but almonds, cashews, or pecans are all great choices!
- When preparing your 9×9 pan for these granola bars, make sure to leave parchment paper (or wax paper) hanging over each side of the pan so that, once they cool, you can easily lift the bars out of the pan and then slice them on a cutting board — this is much easier than slicing them directly in the pan.
- Use a large chef’s knife (if you have one) to cut your granola bars. I’ve found that using a smaller blade tends to cause my granola bars to crack while I’m slicing; it’s better to make fewer long cuts rather than a series of small ones.
- Even though you should refrigerate your granola bars to help them firm up quickly, you do not need to store them in the refrigerator. After cutting them, I wrap mine in a strip of parchment or wax paper (to keep them from sticking to each other) and then store them in a resealable Ziploc bag in my cabinet.
How Long Can You Keep Homemade Granola Bars?
We’ve found that homemade granola bars stay fresh for about 1 week when stored in an airtight container at room temperature. Any longer than that and they tend to become a little stale.
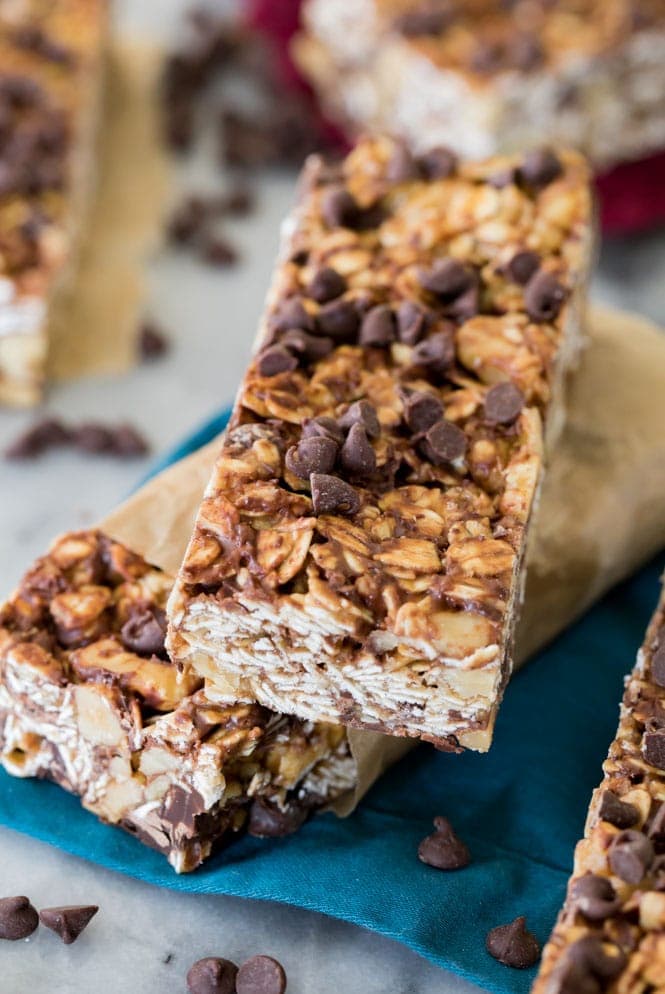
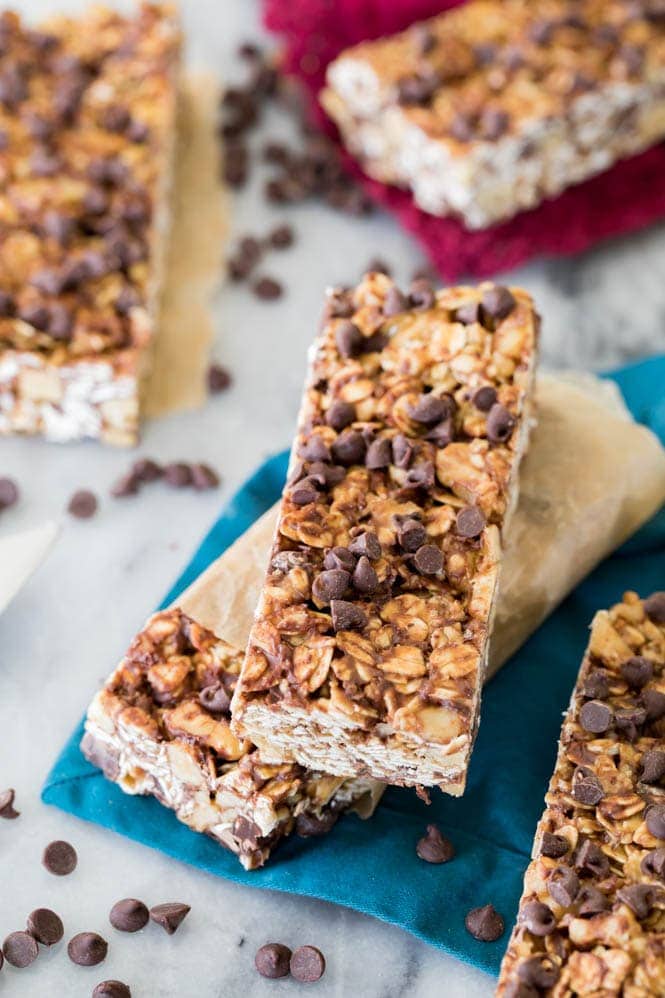
Enjoy!
How to Make Homemade Granola Bars 

If you enjoy watching these videos, please subscribe to my YouTube Channel to be notified each time I publish a video!
Homemade Granola Bars
Ingredients
- 3 cups (285 g) old fashioned oats
- 1 ½ cups (170 g) coarsely chopped nuts (I used walnuts, almonds would also work great!)
- 6 Tablespoons (85 g) unsalted butter cut into 6 pieces
- ½ cup (100 g) dark brown sugar tightly packed
- ⅓ cup (80 ml) honey
- ½ teaspoon salt
- 1 ½ teaspoon pure vanilla extract
- 1 cup (170 g) mini chocolate chips divided
Instructions
- Preheat your oven to 350F (175C) and line a cookie sheet with parchment paper or a silicone mat.
- Evenly spread oats and chopped nuts over the baking sheet and bake on 350F (175C) for 10 minutes. Use a spatula to stir the oats/nuts and return to the oven and bake another 5-7 minutes until lightly golden brown.3 cups (285 g) old fashioned oats, 1 ½ cups (170 g) coarsely chopped nuts
- Pour your oats and nuts into a large heatproof bowl and set aside while you prepare your syrup.
- To prepare the syrup, combine your butter, sugar, honey, and salt in a medium-sized saucepan over medium-low heat. Stir frequently until butter is melted and sugar is dissolved.6 Tablespoons (85 g) unsalted butter, ½ cup (100 g) dark brown sugar, ⅓ cup (80 ml) honey, ½ teaspoon salt
- Remove from heat and stir in vanilla extract.1 ½ teaspoon pure vanilla extract
- Pour syrup over your oats/nuts and stir until all ingredients are well coated. If you plan to add any dried fruits, stir them in now as well.
- Allow the mixture to cool for about 10 minutes. While it is cooling, prepare a 9x9 square pan by lining with parchment or wax paper, using enough that some of the paper hangs over the sides of the pan (so that you will be able to lift the bars out of the pan to easily slice them later).
- Once mixture has cooled for 10 minutes, stir in ⅔ cup (113g) of mini chocolate chips. Stir until just combined (the chocolate will begin to melt, this is OK).1 cup (170 g) mini chocolate chips
- Pour the mixture into your prepared 9x9 pan and use a spatula or the back of a spoon to evenly, firmly, press the mixture into the pan.
- Pour remaining ⅓ cup (57g) of chocolate chips over the mixture and use your hands to gently press them into the bars.
- Transfer pan to the refrigerator and allow to chill for 1-2 hours.
- Lift the bars out of the pan (using your over-hanging parchment paper) and use a large knife to cut into 5 evenly sized slices (about 1 ½" width) and then cut each slice in half so that you have 10 evenly sized granola bars.
- Wrap with a strip of wax or parchment paper (to keep bars from sticking to each other) and store in an airtight container at room temperature for up to 1 week.
Notes
Nutrition
Nutritional information is based on third-party calculations and should be considered an estimate only. Actual nutritional content will vary based upon brands used, measuring methods, cooking method, portion sizes, and more.


Lori Plank
GREAT RECIPE. Quick and easy and very tasty.
I love your website and your receipes are great. Everything I have made has been delicious. I wasn’t a fan of the no bake cheese cake but only becuase I like a really dense cheesecake. Flavor was good, texture not my cup of tea. 🙂
Thanks for putting the videos on there also. BIg help if its is a new process for me.
Sam Merritt
Thank you so much for your support, Lori! I’m so glad you’ve been enjoying the recipes overall. 🙂
Kale
I loved this recipe sooo much!! I tried to do it with regular sized chocolate chips but it ended up a little bit too sweet so I may lessen the quantity of choco chips next time. Will definitely make it again!!
Teri Lorraine
Would it work if I substituted avocado oil for the butter?
Sam Merritt
Hi Teri! I haven’t personally tried it, but I think that should work fine. 🙂
Teri Lorraine
Thanks! I’ll let you know how it goes!
Peter
I like your Ingredients. It’s so nice and sweet 😋
Ren
what about using sourdough discard as a binder?
Sam Merritt
Hi Ren! I have heard of people doing it, but I have never tried it so I can’t say for sure how to do it. If you do try it I would love to know how it turns out. 🙂
Sasha
Have you ever frozen them? I love them but don’t want to make them every week.
Sam
Hi Sasha! I have not personally tried it, but I think they will freeze just fine. 🙂
Kylie M
Hi Sam!
I’m so excited about this recipe! Curious though, is it possible to cocoa powder to this recipe to recreate the dark chocolate Kind bar? The softer oat ones.
Thanks!
Sam
Hi Kylie! I think it could potentially work, but I haven’t tried it myself to know for sure. Sorry I can’t be more helpful. If you do try it I would love to know how it goes. 🙂
laurie
Hi I am thoroughly enjoying your site and have used a few of your recipes.
on this granola recipe i was thinking about stirring in some peanut butter but wondered if i could just add 1/2 cup or if i should reduce or replace the butter?
Emily @ Sugar Spun Run
Hi Laurie! Without having tried it, we can’t say for sure how to do it. If you do try it we would love to know how you do it 🙂
Rachel
I made these today, and they turned out fantastic, like all the recipes I try of yours! I unfortunately didn’t have a 9×9, so I had to use an 8×8. As a result, they turned out somewhat thick. But still delicious, and they held together perfectly. Will be making these again!
Sam Merritt
I’m so glad you enjoyed them so much, Rachel! 🙂
Janice Brain
Hi Sam, love your recipes! I have been making a few of them now. Question about the granola bars, I have made them several times and every time I make them I cannot get them to hold together. I follow your recipe to the T and press them into my dish and put them in the fridge before cutting them. When I go to cut them, they fall apart. Any suggestions?
Sam
Hi Janice! That’s so frustrating! I have a few things to double check. First, make sure the sugar is fully dissolving in the syrup. Secondly, make sure you are pressing it firmly into the pan and finally make sure they have cooled completely before cutting in. I hope this helps. If there are no substitutions being made these are my best guesses. I hope this helps! 🙂
Christina
This granola bar recipe is AMAZING. I did modify it slightly but it turned out incredible. My husband and I pretty much ate it all in one sitting lol
Sam
I’m so glad you enjoyed it so much, Christina! 🙂
Lori
Love these granola bars, as does my Hubble and friends! I’m on my third batch now and for one batch I added a tablespoon of maple syrup to the syrup and also I’m using chopped baking chocolate instead of chips, both worked great!! This is a now go to recipe for me!! Thanks!
Sam
I’m so glad you enjoy them so much, Lori! 🙂
Dana
I an allergic to all Nuts & Peanuts; any recommendations? Also, if you have a recipe for a Maple-y, Nut-free Granola, I would worship the kitchen you cook in! 😉
Thank You-
Sam
Hi Dana! You could omit the nuts or substitute a dried fruit instead. 🙂
PW
Us too- nut free options and substitutions would be amazing for our household as well!!
Cathy
So I’m just wondering I really like this recipe but I used the Quaker old-fashioned rolled oats And I noticed a kind of aftertaste from the oats that I was not really liking, I did bake them at 350 for about 10 minutes they looked like they were getting brown, Do you think the full 15 minutes would take away that aftertaste? Or maybe a different type of oats? Thanks! Always love your recipes 🙂
Sam
Hmmm that’s odd. Is it possible that the oats were bad? I haven’t ever run into this issue. 🙁