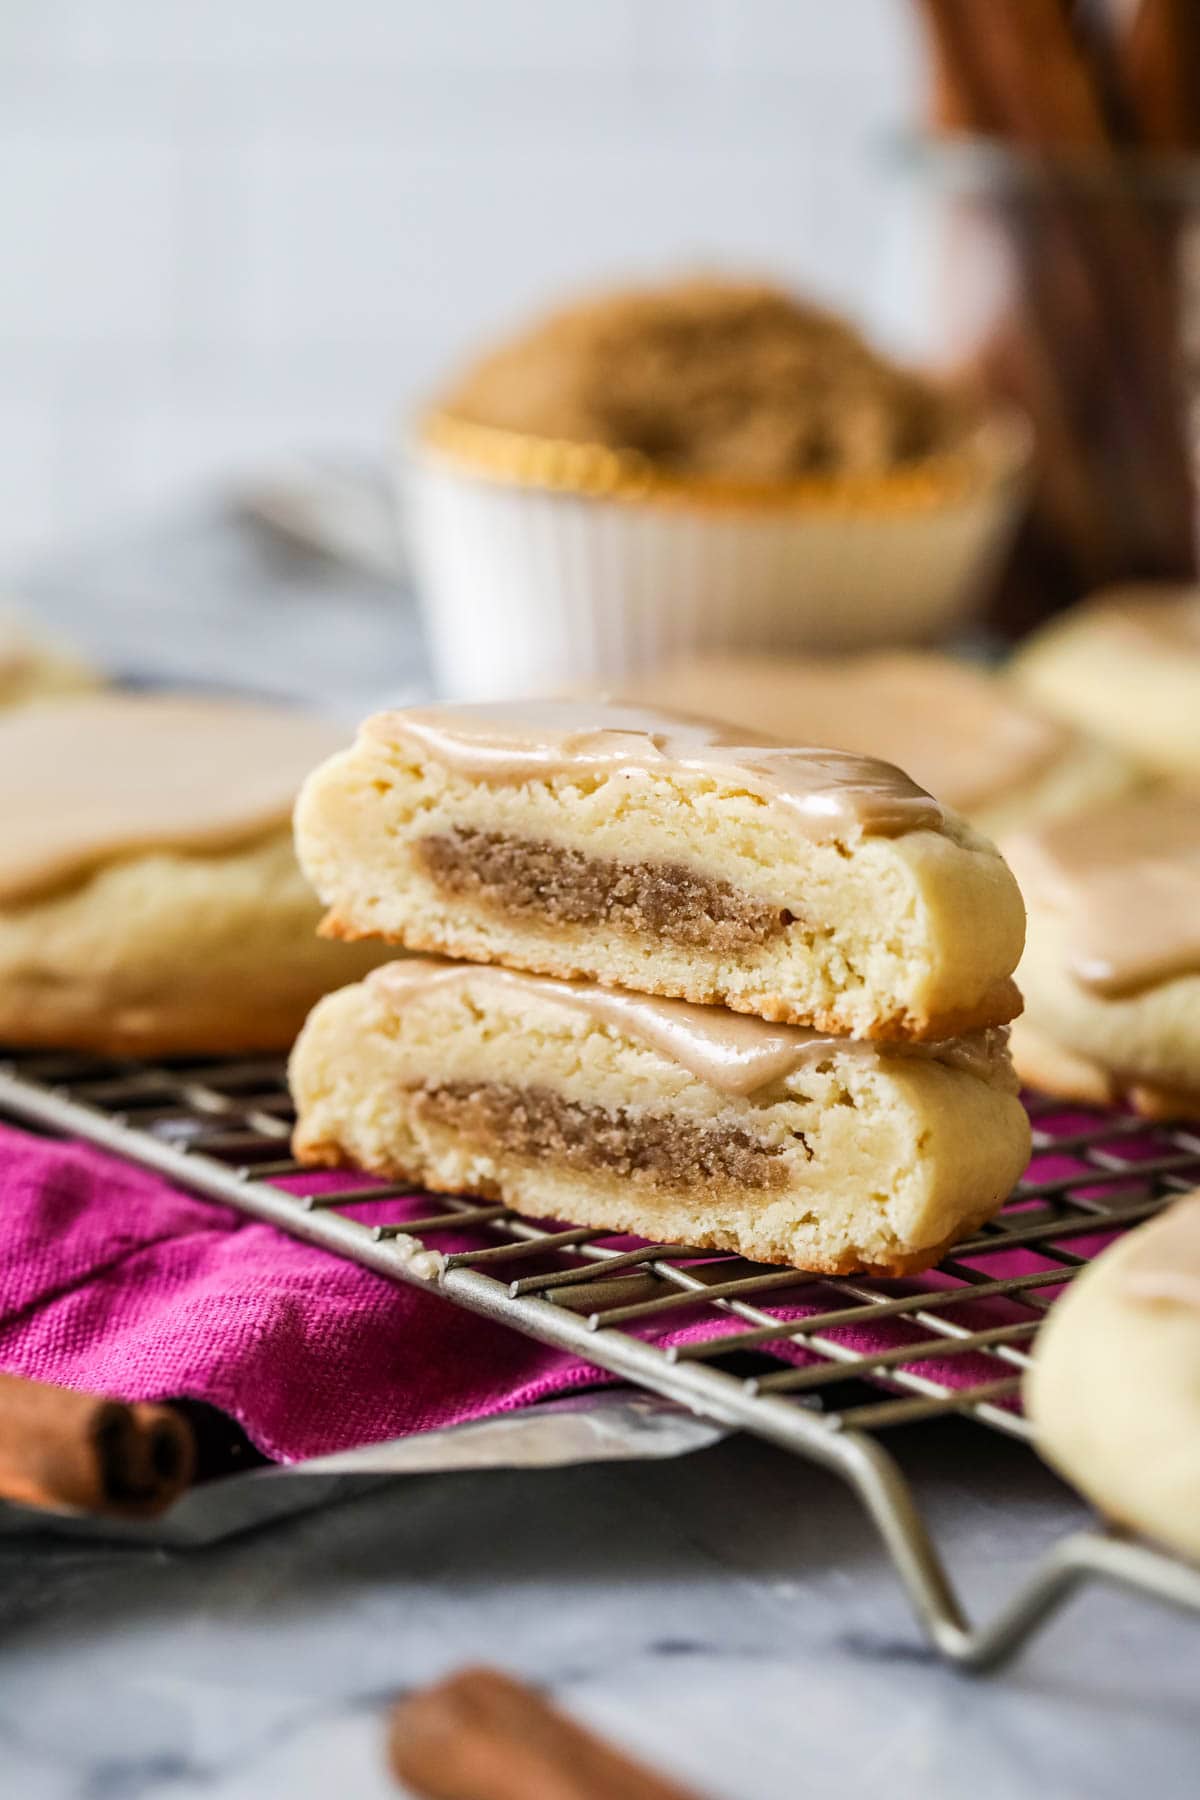
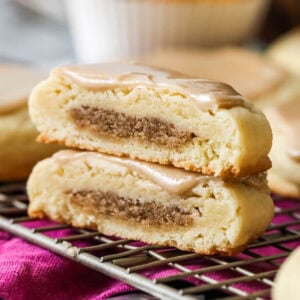
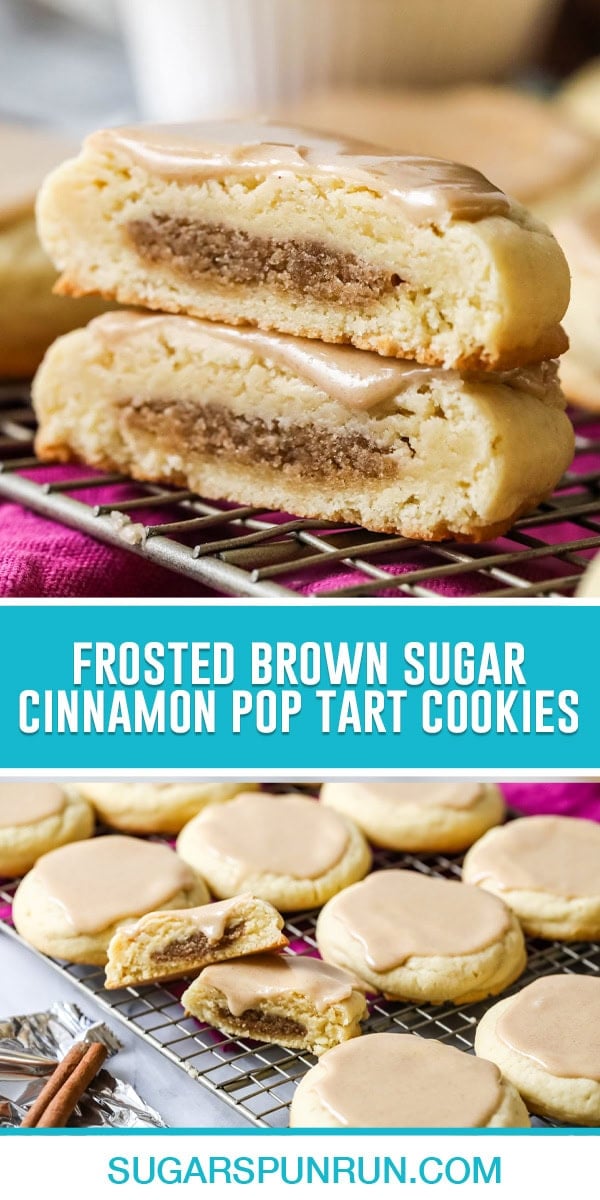
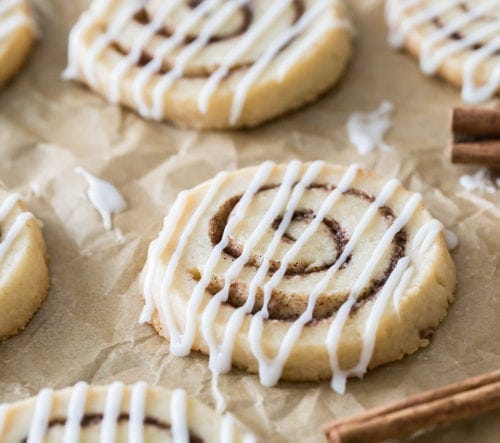
These buttery brown sugar cinnamon pop tart cookies will blow your mind! They taste like a gourmet version of the beloved breakfast treat (but SO much better!). Recipe includes a how-to video!
Why You Should Try These Cookies
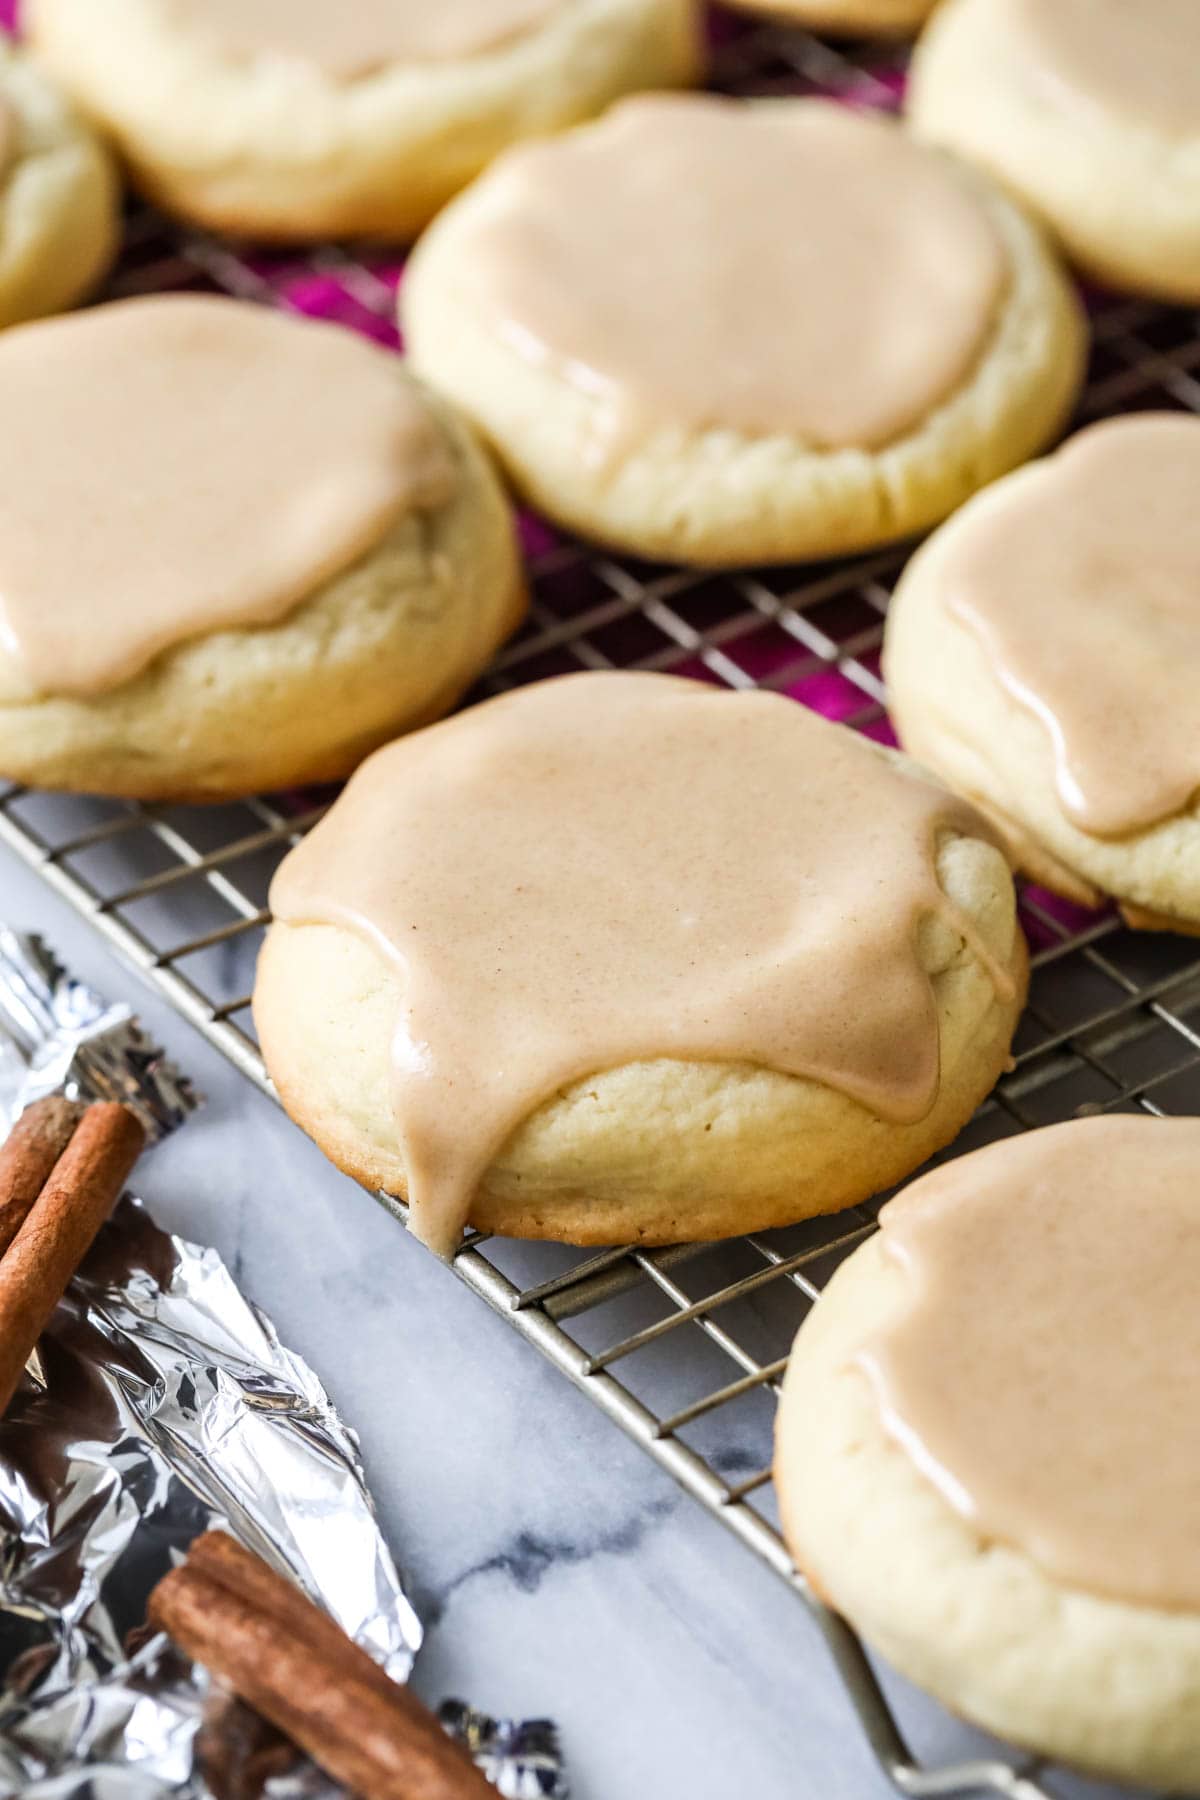
- Their nostalgic taste will bring you right back to your childhood! We really nailed the brown sugar cinnamon pop tart flavor and look here, right down to the shiny glaze (it’s the same one I use in my homemade brown sugar pop tarts).
- While the glaze dries nice and firm, the cookies are irresistibly tender, thanks to cake flour. Cake flour also makes for a thicker dough, which helps hold in the brown sugar cinnamon filling.
- They are a bit of a labor of love, but you can prepare them in stages so you don’t have to do everything at once. I also include instructions for freezing the dough, which can be done for several months.
- Impressive, bakery-style look and size. These will fly off the table at a bake sale!
Adding another gourmet cookie to my collection today! These brown sugar cinnamon pop tart cookies are equal parts impressive and nostalgic (like my cosmic cookies). They are a bit time consuming but well worth it, just like the rest of my gourmet cookie recipes. I can’t wait for you to try them, so let’s dive right in!
Ingredients
Before we get started, I’ll go over a few of the key ingredients that make these brown sugar cinnamon pop tart cookies so special.
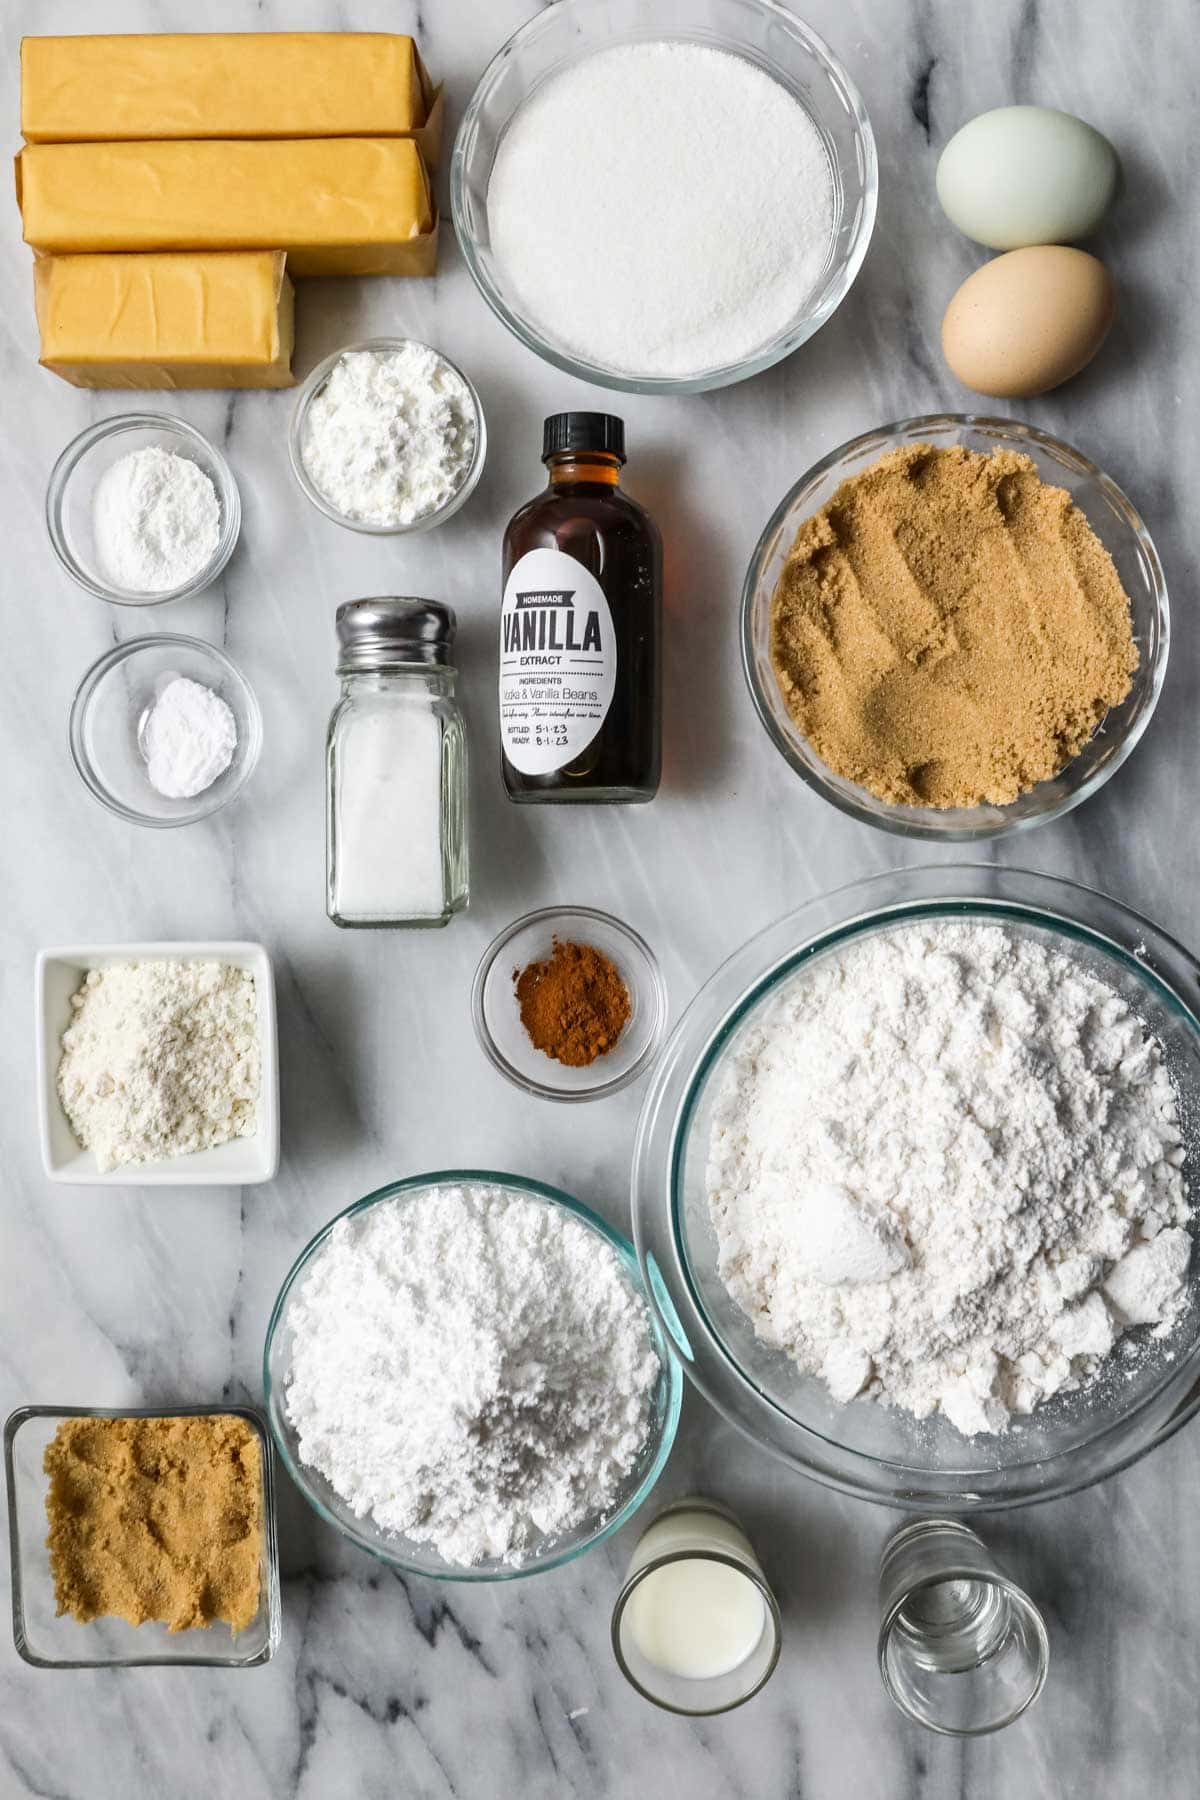
- Flour. We will use cake flour in the cookies and all-purpose flour in the filling. I tend to reach for cake flour when making many of my gourmet cookie recipes; this is because cake flour yields thicker, yet more tender results.
- Brown sugar. I found that dark brown sugar was too rich to use in the dough and the filling, but it worked nicely for color and flavor in the glaze. If you don’t have it on hand, though, you don’t have to run out and get more; light brown sugar will work.
- Cornstarch. This adds structure to the dough and helps it hold in that brown sugar cinnamon filling.
- Milk. This is for our icing; any kind will work. Start with only one tablespoon and add more as needed. You may need that full extra tablespoon, just a splash, or you may not need it at all.
- Corn syrup. Just a bit makes our icing the perfect consistency and gives it that shiny, pop tart look! This is a key ingredient in my sugar cookie icing as well. Remember, corn syrup is not the same thing as high fructose corn syrup! Glucose syrup will also work.
SAM’S TIP: You can skip the corn syrup in the icing, but just know that your icing won’t set as nicely or have that pretty shine (and you’d probably need more milk to get the right consistency!).
As always, this is just an overview of the ingredients I used and why. For the full recipe please scroll down to the bottom of the post!
How to Make Pop Tart Cookies
Make the Dough
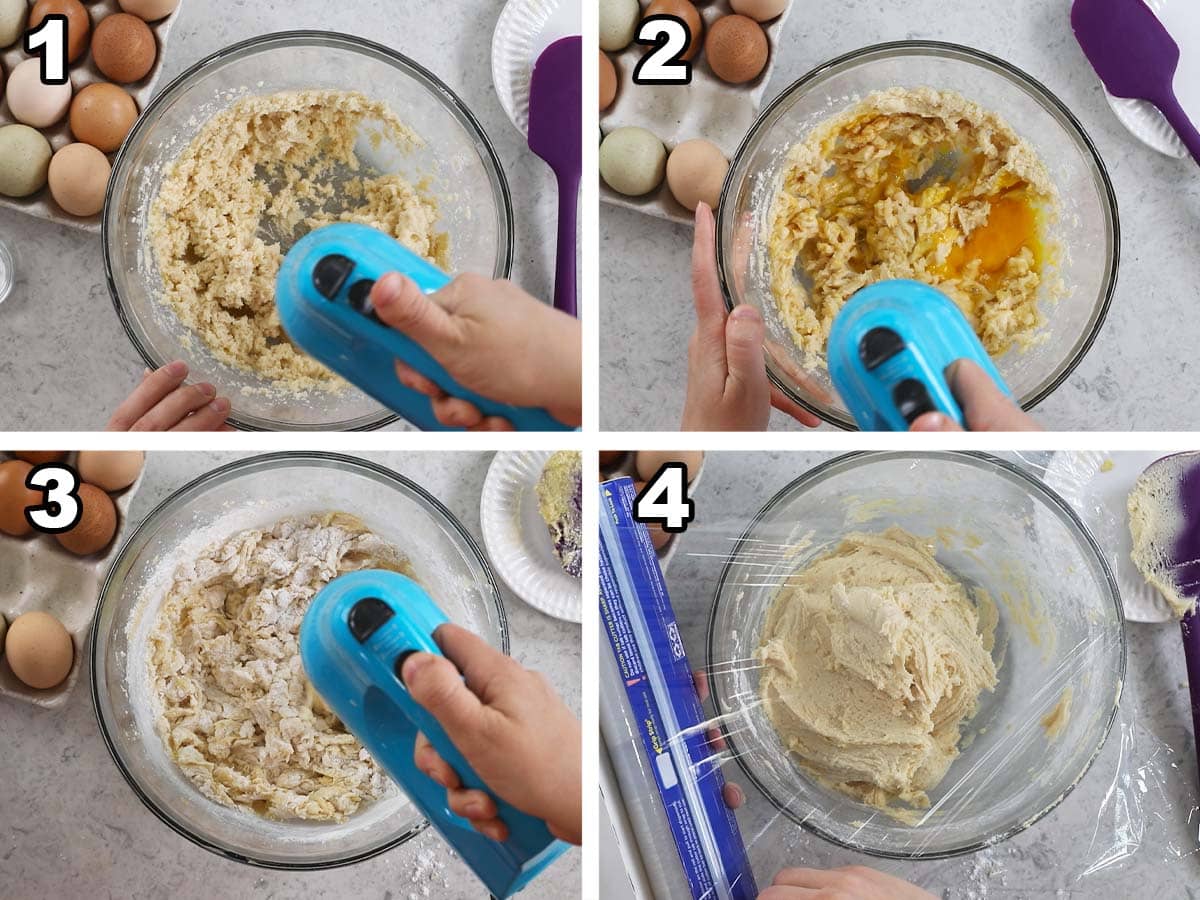
- Cream the butter and sugars until light and fluffy.
- Stir in the eggs and vanilla, then set aside.
- Combine the dry ingredients in a separate bowl, then gradually add them to the wet ingredients. Don’t add them all at once or you will be left with a very dry, stiff dough. I do this in 4-5 parts.
- Cover and chill the dough in the fridge.
Make the Filling
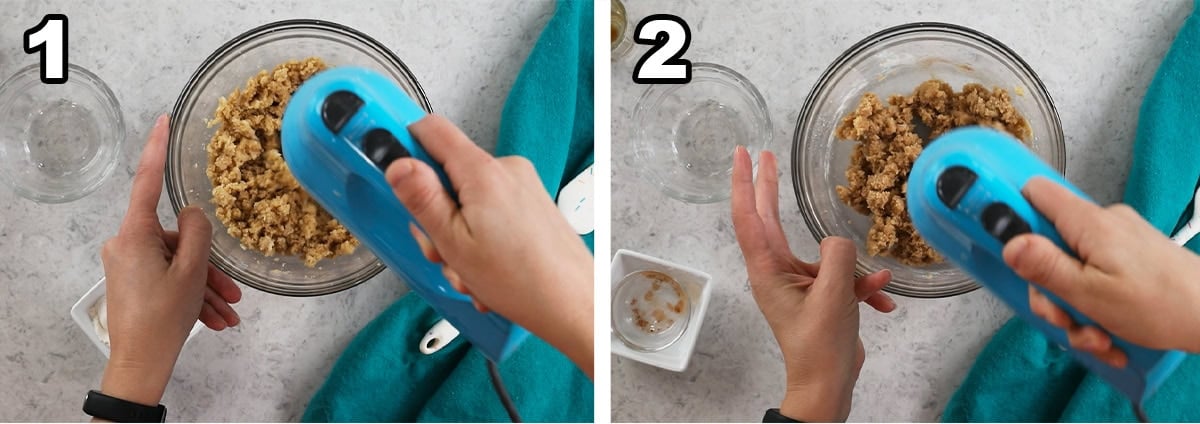
- Beat the butter, sugar and vanilla until smooth.
- Stir in the dry ingredients, then set aside.
Assemble & Bake
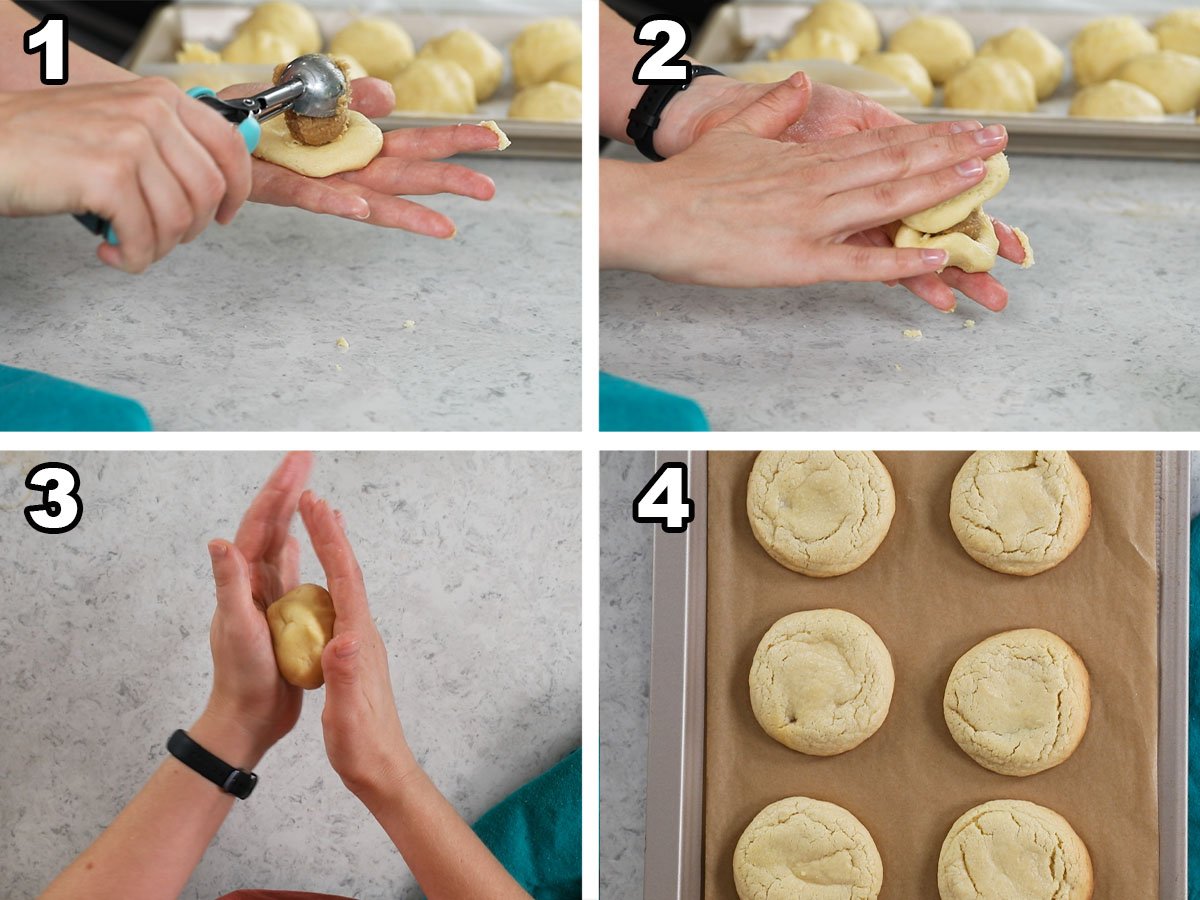
- Divide a large scoop of dough in half and make each half into a nest. Add a scoop of your filling into one nest. I demonstrate this in the video below, if you need more of a visual!
- Add your second half of dough over the filling then seal the dough into a smooth ball. Repeat with your remaining dough and filling.
- Freeze your cookies, then place on parchment lined baking sheets. I work with just 4-6 cookies at a time and recommend you do the same.
- Bake until light golden brown and let cool completely before icing.
Icing
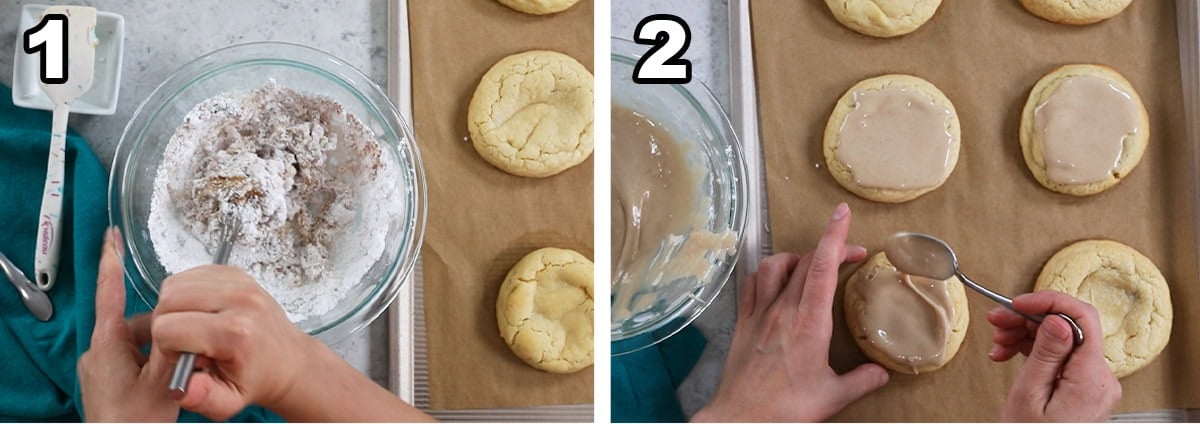
- Whisk the icing ingredients together until smooth, adding more milk as needed until the icing ribbons off your whisk.
- Drizzle over your cookies and let set before enjoying. We found that the cookies seemed too sweet when the icing was still wet, but they tasted perfectly balanced when it was set.
SAM’S TIP: Letting the cookies cool completely on the baking sheet is key to achieving a soft and chewy texture. We will slightly underbake them in the oven and let them finish on their baking sheets. As a result, they are very fragile when they are fresh from the oven, so don’t try to move them while they are still warm.
Frequently Asked Questions
Yes, but I don’t recommend chilling the dough itself longer than 30-60 minutes, since it becomes very difficult to scoop after chilling. Instead, I recommend freezing the cookie dough balls after stuffing them; you can do this for up to a few months if you follow the instructions in my how to freeze cookie dough post.
This can happen if you didn’t use enough dough when forming your cookies, didn’t place the filling properly (it really needs to be in the center!), or if your dough was too soft/warm. Definitely check out my video below if this happens to you so you can see exactly how I fill the cookies!
I highly recommend cake flour in this recipe for the best texture and results. Using all-purpose flour would yield cookies that aren’t quite as soft or tender. If you only have all-purpose flour on hand, I do include instructions for substituting in the recipe notes below.
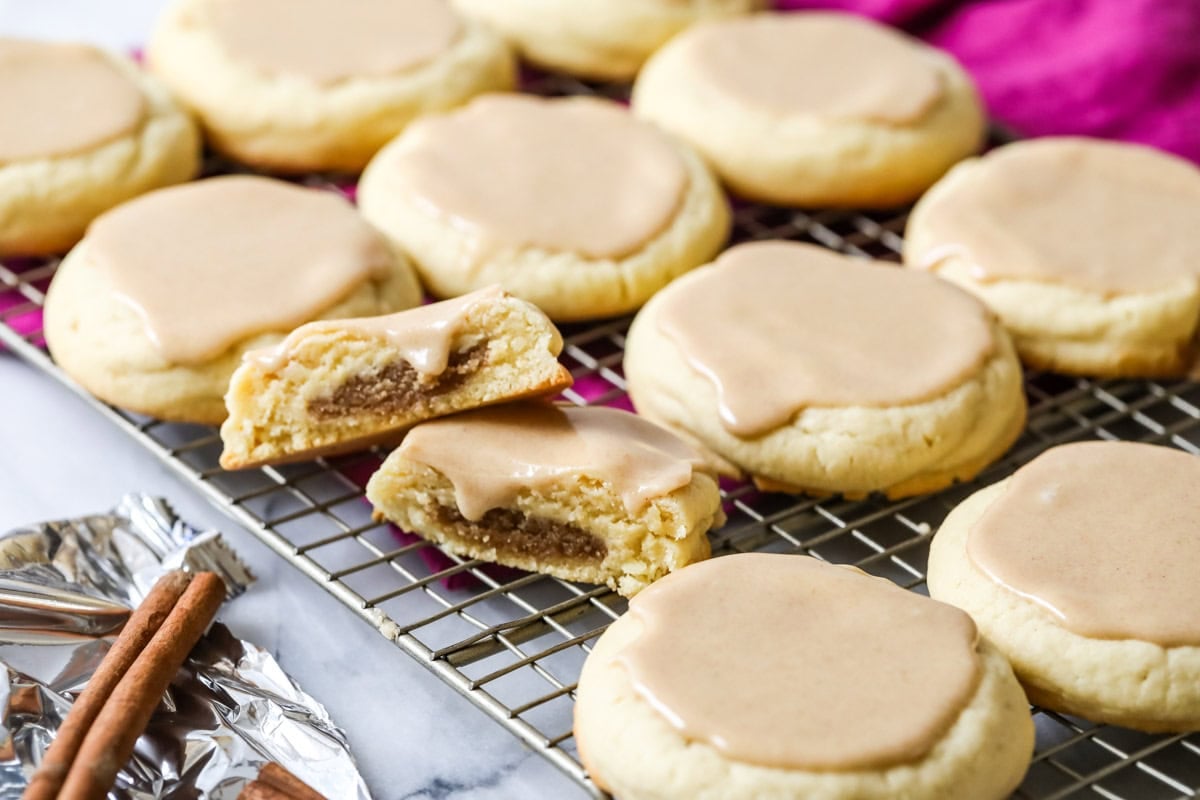
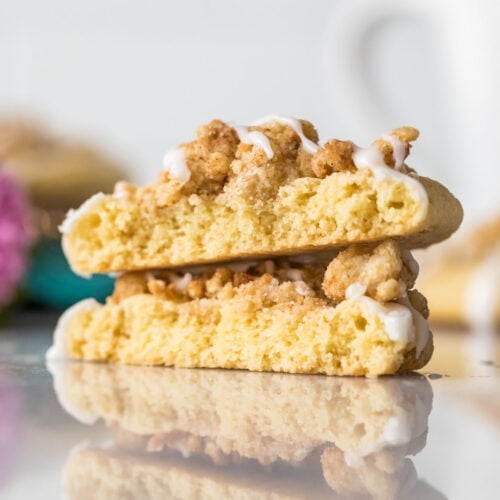
I’ve been having a lot of fun in the kitchen making up new flavors of cookies (like my blueberry muffin cookies and coffee cake cookies), let me know if there are any other fun flavors that you’d like me to tackle next!
Enjoy!
Let’s bake together! Subscribe to my newsletter to be notified of all the newest recipes, and find my free recipe tutorials on YouTube 💜
Frosted Brown Sugar Cinnamon Pop Tart Cookies
Ingredients
- 1 cup (226 g) unsalted butter softened (226g)
- 1 cup (200 g) granulated sugar 200g
- ½ cup (100 g) light brown sugar firmly packed (100g)
- 2 large eggs room temperature preferred
- 1 teaspoon vanilla extract
- 4 cups (450 g) cake flour 450g
- 2 Tablespoons cornstarch
- 2 teaspoons baking powder
- ¼ teaspoon baking soda
- ¾ teaspoon salt
Filling
- 5 Tablespoons (70 g) unsalted butter softened (70g)
- ¾ cup (150 g) light brown sugar firmly packed (150g)
- ¼ teaspoon vanilla extract
- 3 Tbsp (24 g) all-purpose flour 24g
- ½ teaspoon ground cinnamon
- ⅛ teaspoon table salt
Icing
- 1 ½ cups (190 g) powdered sugar
- 3 Tablespoons (38 g) dark brown sugar firmly packed (may substitute light brown sugar) (38g)
- 1-2 Tablespoons milk
- 1 ½ Tablespoons light corn syrup
- ½ teaspoon vanilla extract
- ⅛ teaspoon ground cinnamon
Recommended Equipment
Instructions
Prepare the cookie dough
- Combine butter and sugars in a large mixing bowl and use an electric mixer (or stand mixer fitted with paddle attachment) to beat until light, fluffy, and well-creamed.1 cup (226 g) unsalted butter, 1 cup (200 g) granulated sugar, ½ cup (100 g) light brown sugar
- Add eggs and vanilla extract and stir again until thoroughly combined. Set aside.2 large eggs, 1 teaspoon vanilla extract
- In a separate, medium-sized mixing bowl whisk together flour, cornstarch, baking powder, baking soda and salt.4 cups (450 g) cake flour, 2 Tablespoons cornstarch, 2 teaspoons baking powder, ¼ teaspoon baking soda, ¾ teaspoon salt
- Gradually add dry ingredients to wet (in 4 or 5 parts) stirring until completely combined.
- Cover dough tightly with plastic wrap and transfer to the refrigerator to chill for 30-60 minutes (note I do not recommend chilling longer than this, as the dough becomes difficult to manage).
- While the dough chills, prepare the filling.
For the filling
- In a medium-sized mixing bowl, combine butter, sugar, and vanilla and stir or beat with an electric mixer until smooth and creamy.5 Tablespoons (70 g) unsalted butter, ¾ cup (150 g) light brown sugar, ¼ teaspoon vanilla extract
- Sprinkle flour, cinnamon, and salt over the butter/sugar mixture and stir until well-combined.3 Tbsp (24 g) all-purpose flour, ½ teaspoon ground cinnamon, ⅛ teaspoon table salt
Assembly
- Remove chilled cookie dough from the refrigerator and scoop by ¼ cup (3 oz/85g). Break the scoop in half and form one half into a nest. Firmly scoop a Tablespoon of the brown sugar filling and scoop into the nest you just made in the center of the cookie dough. Take the other half of the cookie dough, likewise form it into a flattened nest shape and form it around the top of the filling to seal the filling inside in the center (I show how to do this in the video). Make sure the filling is completely concealed and centered. Repeat until all cookie dough and filling is used.
- Place cookie dough on large plate or baking sheet and place in the freezer for 15-30 minutes (see note to if you wish to chill longer). Meanwhile, preheat your oven to 375F (190C) and line a baking sheet with parchment paper.
- Once cookie dough has chilled and oven is preheated, remove from freezer and place on parchment paper lined baking sheet, spacing cookies at least 2” apart (I only bake 4-6 cookies at a time). Transfer to center rack of 375F (190C) and bake for 14 minutes, until the very edges of the cookies are just beginning to turn a light golden brown. Remove from oven and allow to cool completely on baking sheet (cookies are fragile when warm!) before icing.
For the Icing
- In a small bowl, combine powdered sugar, brown sugar, 1 Tablespoon of milk, corn syrup, vanilla extract and cinnamon. Whisk until smooth, adding additional milk as needed until mixture is smooth and ribbons off the whisk (the ribbon that falls should hold its shape for several seconds before dissolving back into the bowl, any thinner and it will take painfully long for your icing to set on the cookies!).1 ½ cups (190 g) powdered sugar, 3 Tablespoons (38 g) dark brown sugar, 1-2 Tablespoons milk, 1 ½ Tablespoons light corn syrup, ½ teaspoon vanilla extract, ⅛ teaspoon ground cinnamon
- Immediately drizzle over cooled cookies. Allow to set before enjoying (note it could take up to several hours for the icing to harden completely, depending on how thin/thick your icing is).
Notes
All-purpose flour
I highly recommend using cake flour for best results, the cookies will be softer and more tender this way. However, if you must substitute cake flour you would use 3 ⅔ cup (450g).Storing
Store in an airtight container at room temperature for up to 4 days.Freezing cookie dough
After filling your cookie dough balls you can freeze for longer than 15 minutes, it will keep for several months in the freezer. If freezing for longer than an hour, I recommend following my instructions on how to freeze cookie dough and note that it will likely take longer to bake when baked straight from the freezer.Nutrition
Nutritional information is based on third-party calculations and should be considered an estimate only. Actual nutritional content will vary based upon brands used, measuring methods, cooking method, portion sizes, and more.

Kevin
These are so good!
Maddy
My boyfriend and I loved these! They tasted like the pop tarts but better! I halved both the recipe and the size of the cookies and it was perfect.
Emily @ Sugar Spun Run
We’re so happy you both enjoyed them so much, Maddy! Thanks for the review 🩷
Autumn
Made them for work, everyone loved them!
Sam Merritt
I’m so glad they were such a hit, Autumn! 🙂
Natalie S.
These are insanely delicious! Like a Lofthouse cookie and a Poptart had a baby, in the best possible way. Obsessed!
Sam Merritt
I’m so glad you enjoy them so much, Natalie! 🙂
Jess
The way I morphed into Kirby and INHALED this cookie was embarrasing. Thank you for this excellent recipe! I need to give away the rest for my own wellbeing.
Sam Merritt
🤣 I’m so glad you enjoyed them so much, Jess! The visual gave me a good chuckle. 🙂
Nancy hartmann
I want to make for my son wedding in October 2025 can I freeze them baked or should I freeze raw and bake a couple days prior to the wedding I made a batch today to test
Sam Merritt
Hi Nancy! You can really do it either way. I always personally prefer freshly baked cookies, but sometimes you just don’t have the time for that. 🙂
Robin Michaels
These are delicious! My friends could not stop eating them! Brown Sugar Cinnamon is my favorite!
Morgan
I was thinking about making scooping out the filling into balls and chilling them first BEFORE making the dough. That way the filling wont’ fold or break while putting dough around it. Thoughts?
Sam Merritt
Hi Morgan! This isn’t really an issue I have ever encountered, but if you are having this problem it won’t hurt to freeze the filling for a little bit. 🙂
Liz
I ended up making about 45 cookies out of this recipe, excellent flavors but the suggested size was just way too much for bringing as a shareable dessert at work. I made balls about the size that would be appropriate for peanut butter blossoms and used a 1/2 tsp as the filler scoop.
Burkuagh
Made a double batch of these for work and they were a big hit.
Sam
I’m so glad everyone enjoyed them so much! 🙂
Susan
I have 20 cookie balls. I plan on keeping them in the freezer for a week. since mine are smaller, do I need to adjust the temperature or just the time? Thanks!
Sam
Hi Susan! They may need to bake a little bit longer but the temperature will remain the same. 🙂
Susan Tillander
Do you think these would be good with cake flour substitute (14 Tbs AP flour sifted twice with 2 T of corn starch)? Cake flour is very expensive right now.
Sam
Hi Susan! I think it could work if the weight comes out the same.
Vicky
What could I use in place of the corn syrup. I would love to make these tomorrow but I don’t use or have corn syrup. Thanks
Emily @ Sugar Spun Run
Hi Vicky! We actually discuss this in the post 😊
Anna
It was soooo yummy! ( :
Sam
I’m so glad you enjoyed them so much, Anna! 🙂
jodi
these look ah-maz-ing!! and I can’t wait to try them…
but did I see that right? almost 600 calories in one cookie?!
I realize they are on the large size for a cookie, but is that correct?
I’m still making them, though!! ;0)
Sam
Hi Jodi! Nutritional information is based on third-party calculations and should be considered an estimate only. Actual nutritional content will vary based upon brands used, measuring methods, cooking method, portion sizes, and more. 🙂
Amanda
I highly highly recommend putting the note about AP flour vs cake flour in the actual recipe and not the notes. I was making this and did not realize until the dough was made that if you are using AP flour, you are supposed to use 3 2/3 cup instead of 4 cups. Now my dough tastes floury. Most folks I imagine will reach for AP flour for the entire recipe given the filling uses it and most people have that more readily on hand.
Sam
Hi Amanda, I’m not sure what you mean. The recipe specifically calls for cake flour (discussed in the post as well) and that is what is written in the recipe and what will give you best results. I do offer substitution options in the notes as a courtesy, but the recipe is correct as written. I would recommend using the flour called for or following proper substitution practices; unless you are using a scale you would never substitute all purpose flour for cake flour as a 1:1 substitute. All-purpose will also not yield the best results. I hope this helps!