
The Best Dinner Rolls
This post may contain affiliate links. As an Amazon Associate I earn from qualifying purchases. Please read my disclosure policy.
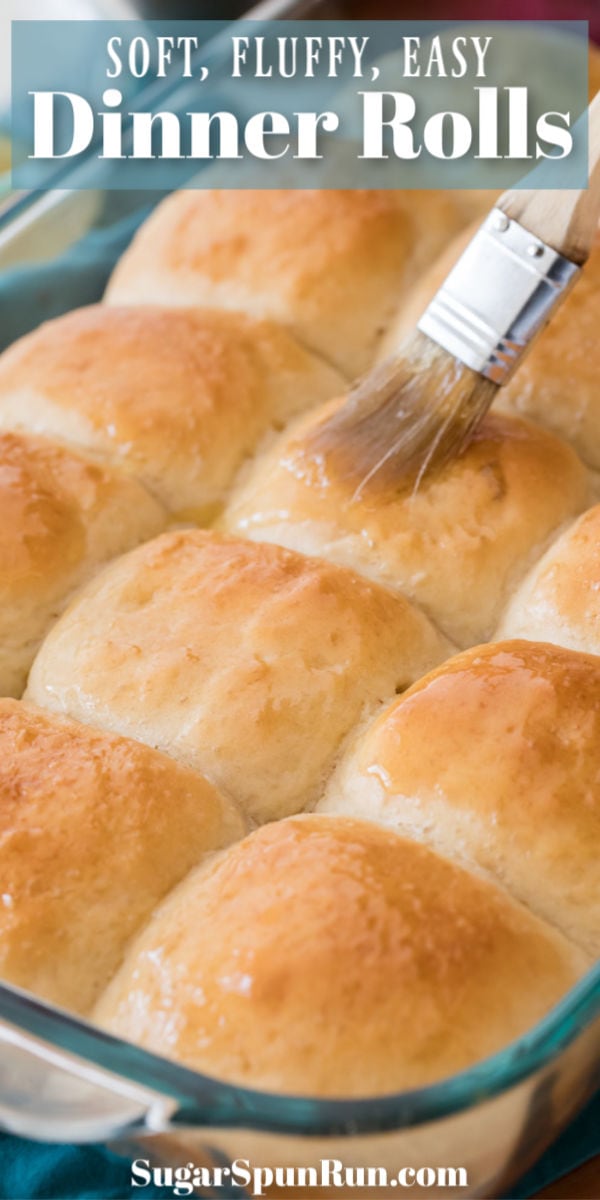
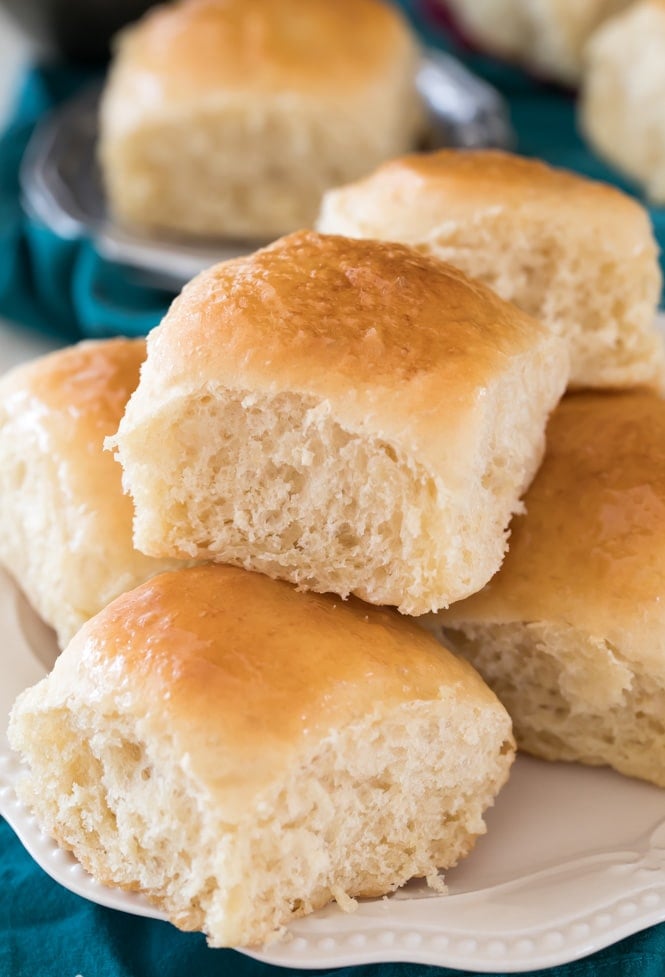
Soft, fluffy, and easy homemade Dinner Rolls! Today I’m sharing a step-by-step guide (and video) to making this easy recipe at home. These rolls can be ready in under an hour and would be the perfect companion to your Thanksgiving dinner!
A Soft & Fluffy Dinner Roll Recipe
Baking with yeast used to make me nervous for the longest time, but it’s really not that difficult, honestly! I’ve slowly overcome my fears with recipes like my easy pizza dough, cinnamon rolls, and garlic knots and today I’m sharing this easy yeast recipe for homemade dinner rolls.
Super fluffy, tender, and just melt-in-your-mouth soft, this recipe can be ready in under 60 minutes, and the best part is your stand mixer does most of the work! Bake them until golden brown and then brush (generously) with melted honey butter… just… yum.
If you’ve ever been intimidated by making dinner rolls or by baking with yeast I’ll walk you through this recipe step-by-step; I think you’ll be surprised how easy it is.
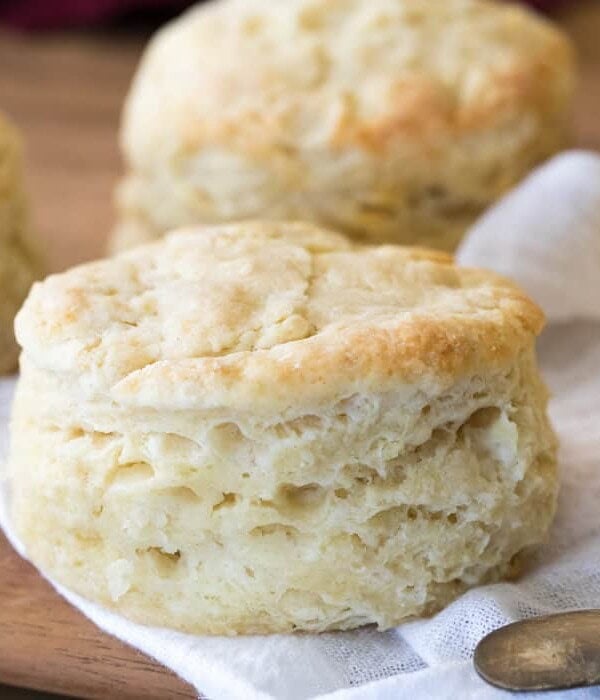
Still worried about baking with yeast? You can always try out my easy biscuit recipe instead!
A Few Words on the Ingredients
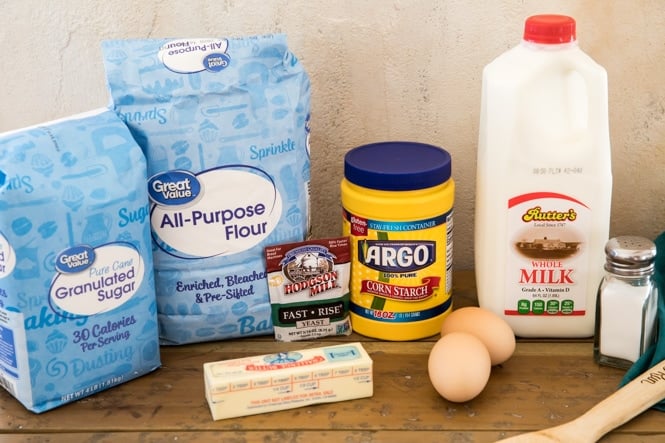
There are a few key ingredients that I use for my dinner roll recipe that you might not recognize from your average bread dough, so I thought I’d address them here:
- Cornstarch. Helps to make our rolls extra soft and melt-in-your-mouth. I discovered how helpful cornstarch can be to yeast doughs when making my cinnamon roll recipe.
- Rapid rise yeast. You’ll need 2 1/2 teaspoons for this recipe, some yeast sachets only contain about 2 1/4 which will work, but I really recommend 2 1/2. The Hodgson Mill brand that I have pictured above has recently become my favorite to work with.
- An extra egg yolk. This helps with the development of our gluten and encourages nice, tender rolls.
Other than that everything else is pretty standard for dinner roll dough.
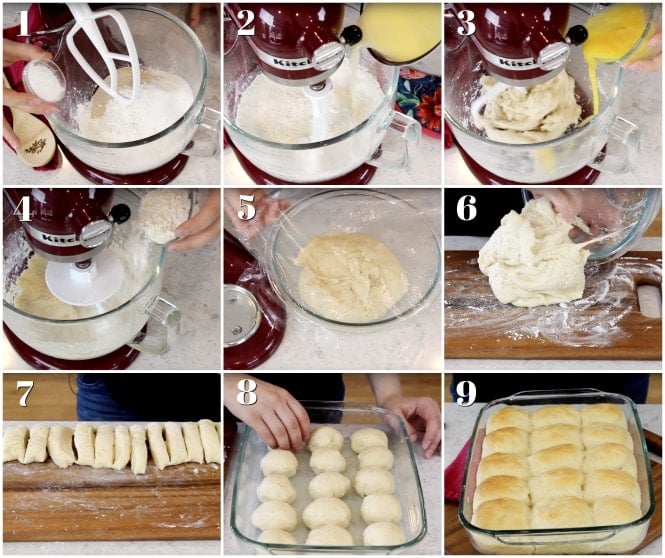
How to Make Homemade Dinner Rolls
The photos above are step-by-step shots of the process (taken from my video below the recipe)! Each step corresponds to the numbered photo above.
- Combine sugar, cornstarch, yeast, salt, and 3 cups of flour. Stir to combine.
- Heat milk, water, and butter to 110-115F and then stir into dry ingredients.
- Stir in 1 lightly beaten egg + 1 lightly beaten egg yolk. The extra yolk helps make our rolls extra tender and soft!
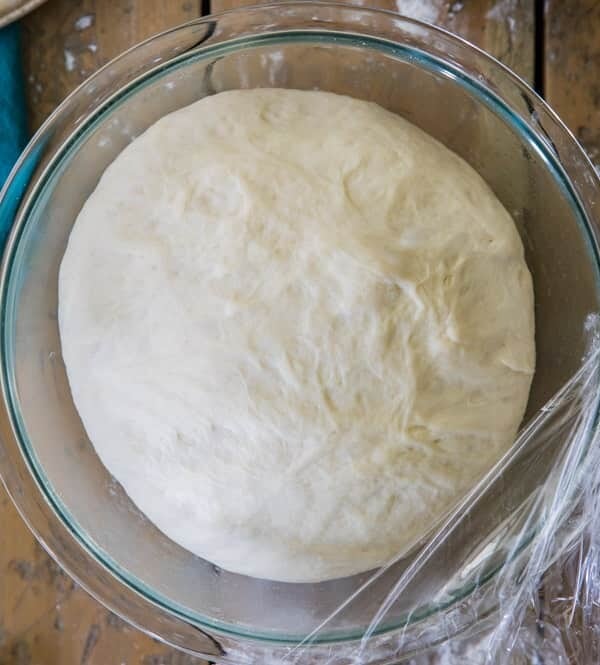
- Add more flour, as needed. With many yeast recipes, the amount of flour you may need in your own kitchen can vary. You should be adding flour based off of the feel of your dough rather than just based off of what the recipe says. You want to add flour until the dough is clinging to itself and pulling away from the sides of the bowl. It should be slightly tacky to the touch, but not so sticky that the dough is coming away on your fingers when you touch it.
- Transfer to a lightly oiled bowl, cover tightly, and let rest in a warm place for 10 minutes. While the dough is resting I like to prepare my baking dish by melting 1 1/2 Tablespoons of butter in a 9×13 glass dish.
- Transfer dough to a lightly floured surface.
- Divide into 15 even pieces.
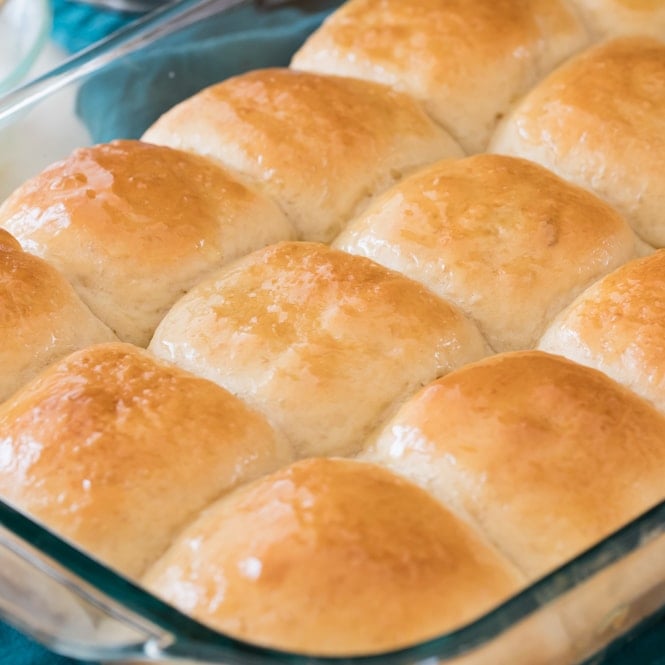
- Roll each piece into a tight even ball and place into prepared baking dish.
- Brush with milk and bake until lightly golden brown and cooked through. Do not over-bake your rolls! That’s the quickest way to make them tough and dry!
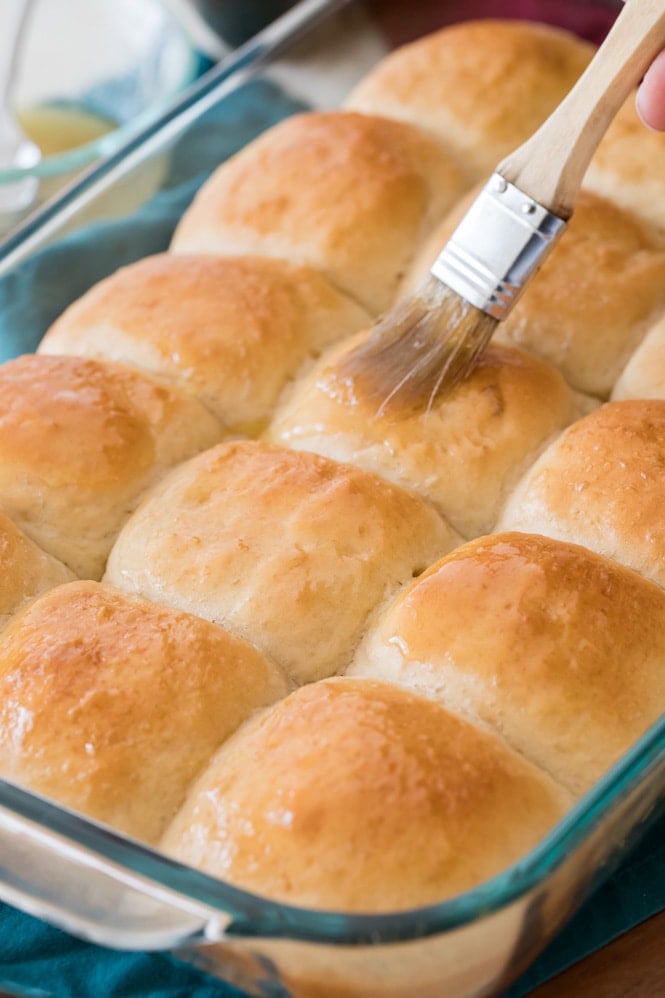
As a slightly sweet bonus I like to brush a little bit of melted honey butter over the top of these dinner rolls while they’re still warm. Simply melt together two tablespoons of salted butter and 1 tablespoon of honey, mix well, then use a pastry brush to brush over the rolls while they are still warm. SO good! IF you love this recipe, learn how to make your own burger buns, too!
How to Make Dinner Rolls Golden Brown On Top
When making dinner rolls I like to brush the tops with a bit of whole milk before putting them in the oven. This encourages a light browning on top. However, you can achieve a deeper, more golden brown if you’d like to brush the rolls with egg wash instead (1 egg beaten with 1 or 2 teaspoons of water).
While the egg wash on top might look a bit more attractive, I recommend using the milk because it doesn’t weigh the tops of the dinner rolls down the same way the heavier egg wash can.
Enjoy!
More Recipes You Might Like:
Let’s bake together! Follow me on my YouTube channel where I’ve already uploaded over 150 recipe videos that you can watch for free!
Dinner Rolls

Ingredients
- 3 1/2 cups (375 + 65 g) all purpose flour, divided
- 2 Tablespoons granulated sugar
- 1 Tablespoon cornstarch
- 2 1/2 teaspoons rapid rise/instant yeast
- 1 1/4 teaspoons salt
- 1/2 cup (120 ml) whole milk (+ additional for brushing tops of rolls)
- 1/2 cup (120 ml) water
- 7 Tablespoons unsalted butter, divided
- 1 large egg + 1 large egg yolk lightly beaten, room temperature
HONEY BUTTER GLAZE (optional)
- 2 Tablespoons salted butter
- 1 Tablespoon honey
Instructions
- Preheat oven to 200°F (95C).
- In the bowl of a stand mixer fitted with a paddle attachment, combine 3 cups (375g) flour, sugar, cornstarch, yeast, and salt. Stir until ingredients are well-combined.3 1/2 cups (375 + 65 g) all purpose flour, 2 Tablespoons granulated sugar, 1 Tablespoon cornstarch, 2 1/2 teaspoons rapid rise/instant yeast, 1 1/4 teaspoons salt
- In a small saucepan¹ combine milk, water, and 5 ½ Tablespoons butter (reserve remaining 1 ½ Tablespoon for greasing the pan) on the stovetop over low heat. Stir occasionally until butter is melted and mixture reaches 110-115°F / 43-46°C (If the milk mixture becomes too hot, just remove it from the heat and allow it to cool down to the correct temperature range before proceeding)1/2 cup (120 ml) whole milk (+ additional for brushing tops of rolls), 1/2 cup (120 ml) water, 7 Tablespoons unsalted butter
- With your stand mixer on low speed, slowly pour milk mixture into the bowl, stirring until combined.
- Add lightly beaten egg and egg yolk and increase speed to medium, stirring until completely combined (be sure to scrape down the sides and bottom of the bowl as needed to ensure all flour is absorbed).1 large egg + 1 large egg yolk lightly beaten
- If you have one, switch your paddle attachment out for a dough hook and continue to stir on medium-low speed. Gradually add up to remaining ½ cup (65g) flour + additional as needed. What you are looking for is a dough that clings to itself and pulls away from the sides of the bowl. It should develop a soft, elastic texture and will still be slightly tacky to the touch but shouldn’t be very sticky. You may need less or more flour than the additional ½ cup indicated, go by the texture of your dough rather than measurements.
- Transfer your dough to a lightly oiled, heatproof bowl and cover tightly with plastic wrap. Allow to rest in a warm place (I usually place mine on top of my preheating oven) for 10 minutes.
- While your dough is resting, prepare a 9x13 glass² baking dish. Use your remaining 1 ½ Tablespoons of butter and melt this in your dish. I like to just set the butter in my baking dish and pop it in the oven for a few minutes (since my oven is already running) until melted.
- Once dough has rested, transfer to a clean, lightly floured surface and divide into 15 pieces, shaping each into a smooth, round ball.
- Arrange into prepared dish and cover with aluminum foil
- Transfer covered dish to 200F oven and turn off your oven. Leave the covered dish in your warm (but now turned-off) oven to rise for 15 minutes.
- After 15 minutes, remove dish from oven but leave it covered. The rolls will continue to rise while your oven preheats.
- Preheat oven to 350F (175C).
- Once oven is preheated, remove foil and lightly brush rolls with additional milk, if desired (helps encourage a browned top).
- Transfer to 350F (175C) oven and bake for 18-20 minutes or until rolls are cooked through and beginning to turn a light golden brown on top (do not over-bake rolls or they will be dry).
- Serve warm, if desired prepare honey butter glaze by melting together 2 Tablespoons salted butter and 1 Tablespoon honey and brushing over rolls while they are still warm.2 Tablespoons salted butter, 1 Tablespoon honey
Notes
Nutrition
Nutrition information is automatically calculated, so should only be used as an approximation.
Like this? Leave a comment below!


I made these this weekend and they were perfect in every way!
I am so glad you enjoyed them so much, Audrey! 🙂
Made these delicious rolls several times without any issues. Thank you for such a great recipe!!
I am so happy you enjoyed, Tania! Thank you so much for commenting 🙂
Hi Sam! I LOVE your recipes, and thank you so much for all of your wonderful instructions and encouragement. I’d like to try making these dinner rolls tonight. The only yeast I have, though, is regular-old dry/active yeast – like what I’d use to make bread. Can I use this for the dinner rolls? And if so, my guess is that it would need longer to rise, so how much more time would you suggest? Any advice you have would be greatly appreciated!
Hi Jennifer! Sorry for the delayed response! You can use the active dry yeast but you will need to proof it with the warm liquid first and it will take a little while longer to rise. 🙂
I made these rolls on Christmas Eve. They were delicious and disappeared quickly! Thank you for the recipe!
I’m so glad everyone enjoyed, Deanna! 🙂
Just made some to go with dinner. Felt wierd only letting them rise for such a short time, but oh my…so worth it! Thank you
I am so glad you enjoyed them so much, Julie! 🙂
My ovens lowest setting is 250 degrees, how long should I leave them in the oven if it is at this temperature?
I would turn off the oven just before opening the door and adding the rolls and then use the time indicated. Enjoy!
Hi!!
If I made these rolls right before I put them in the oven and stored them over night. How would you recommend me storing them and would you recommend me getting the rolls to room temperature before baking them in the oven? I want to have these fresh for Christmas.
If you are vegan, what can you substitute for the egg yolk?
Ooh, honestly I’m not sure and I’m hoping someone else can chime in with some advice! You can leave the egg/egg yolk out, but the rolls will lose some of their richness/tenderness.
Hi Helen,
Just type in search vegan eggs they sell some on Amazon or Thrive Market and other places.
Thank you Connie, I’ll do that
Hi
I have substituted an egg accidentally as I was out of eggs for a mashed potato and they turned out really good. Try and see if it works for you.
I thought I found the “best” dinner roll recipe about a year ago which in fact I made two batches and put in freezer to bake for Thanksgiving. I get on your website now and then and I found these dinner rolls….I made them this afternoon which took about an hour from start to finish and OMG these are by far the easiest and most moist and delicious dinner rolls ever….they almost taste like the ones from a certain restuarant that we have here in ohio and also in a few other states. I used bread flour in mine and they are so moist ….and EASY!! I’m 72 and have cooked and baked for many years and I’ve also made your banana nut bread and was also the most moist and best I had ever eaten. Keep up the great work you are doing and I will keep making your recipes. Take care and please stay safe in these rough times we are all going through.
Thank you so much, Diana! I am so glad you enjoyed them so much! 🙂 I hope you love everything you try. 🙂
These were so easy, and so tasty! I had a problem with adding the flour though. I only make yeasted bread once or twice a year, so I don’t have much experience. The rolls tasted great but were very heavy and dense.
I had my mixer on medium-low for about 20 min and in that time, I slowly added a whole cup of flour (rather than the approx. 1/2 the recipe says). Even after that amount of time and flour, the dough was still very sticky, both to the touch and still stuck to the bowl. I weighed my flour and used the right amount of liquids, and I stirred it with a spatula to make sure no flour was in the bottom of the mixer. At that point I decided that was enough and just let it rise, even though it was still very sticky. Do you think I stirred it for too long/not long enough? How long should it take for the flour to become incorporated and make the dough slightly tacky, rather than sticky? Thank you!
Hi Liza! I’m sorry this happened. It sounds like the dough may have been over-mixed and it may have needed a little more flour. I can’t really give you a set time for how long it takes for the flour to become incorporated. Once you don’t see the white flour any more it is incorporated. Baking with yeast can be tricky. You may end up needing slightly more or slightly less flour than the recipe calls for. It may be helpful to watch the video. I hope they turn out better next time. 🙂
Thank you! I absolutely plan to give them another shot, and will watch out for overmixing. It is tricky- some recipes out there say to mix/knead for a long time, others say just give it a few quick turns. I appreciate your suggestions!
I have tried a bunch of different roll recipes and some were really good but these are hands down the best ever!
I am so glad you enjoyed them so much, Joe! 🙂
can you freeze some of the dough and bake later?
Hi Joe! I haven’t tried it but I think that should work just fine. 🙂
Hi! Can I make the rolls up to the part before they go in the oven and store them overnight to bake the next day?
Hi, Shannon! Yes, you can. You just want to be sure that they are well wrapped or covered. Enjoy! 🙂
I love your recipes! But I’m not sure if I’m making this the right way. I did everything exactly as you, but my dough was not dry enough. I used almost another half cup of flour. I haven’t baked the rolls yet but I’m a little scared
Hi Charly! It’s not uncommon with bread recipes for the amount of flour to vary, and sometimes it can vary quite a bit which is why it’s best to go off of the consistency of the dough. It sounds like you did the right thing by adding more flour and I wouldn’t be scared! I hope they turned out perfectly for you 🙂
(PS I do have a video in the recipe card that might be helpful when looking for the proper consistency)
Good but very dense. Followed the recipe but was not light.
Hi Ron! I’m sorry to hear it. Bread can be very tricky sometimes. Even if it’s baked a minute too long your results can be subpar. 🙁
Hi Sam!!
Loved this recipe!!! I have already tried your Pizza Dough recipe and its a Winner!!!
My 8 yo son loves to help me in baking and reading out the instructions! We just baked the dinner rolls and they came out amazingly well!!
Definitely a ‘Go To’ recipe!!!!
Thanks! Love from Singapore! 💖💖
I am so glad everyone enjoyed it so much, Manasi! 🙂
Sam- I love your recipes and my family loves how much I am cooking/baking lately and succesfully! I just made these rolls and I did something wrong but not sure what. I do not have a stand mixer and wondering if that is the issue. They didn’t rise as much as I think they should have, and they have more of a biscuit texture, instead of a light soft roll. My yeast is fresh and good, as I just made your cinnamon rolls and they were the bomb. I will certainly give these another go, and I hope to have better results.
Hi Lisa! I’m so sorry that happened! If your yeast is good there are just a couple of things I think could have happened. If your water was too warm you may have killed the yeast which would prevent it from rising. Your dough may have also just needed a little extra time to rise. If your kitchen is cool or drafty it may take a little bit longer to rise. I hope this helps. 🙂
I have tried several of your recipes and they were all great. I tell everyone about you. I have a question I hope you can help me with it has nothing to do with baking though. What is the thing that people marinate meat in? It looks like a plastic bag and they put it I water. I want to make steak and your rolls thank you
I think you are talking about Sous Vide. I personally don’t have experience doing this so I can’t advise on how to do it but I hope you love the rolls! 🙂