
Kitchen Tips: Easy Graham Cracker Crust Recipe
This post may contain affiliate links. As an Amazon Associate I earn from qualifying purchases. Please read my disclosure policy.
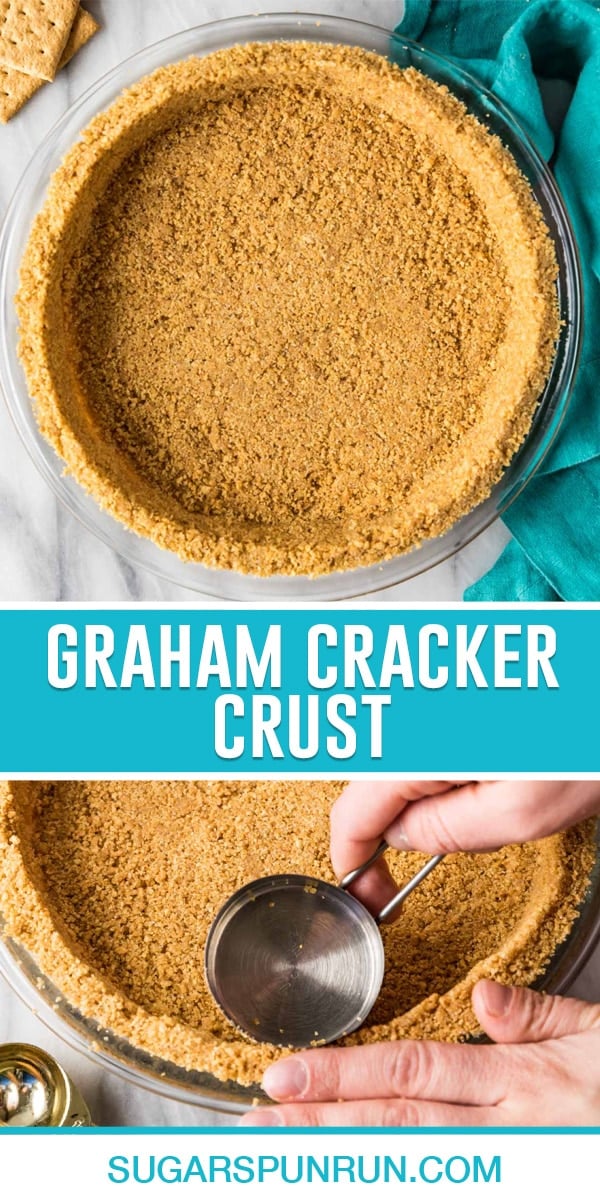
Skip the stale, store-bought crusts and make your own! My Graham Cracker Crust recipe takes 5 minutes to make and can be used for pies, cheesecakes, and more. Includes a how-to video!
A Quick & Easy Pie Crust
I can understand being intimidated by a traditional pie crust recipe, with all the rolling, chilling, and blind baking. But a graham cracker crust? That’s easy! There’s rarely an excuse to ever buy one from the store; they don’t taste nearly as good as homemade, and they are so supremely simple to make from-scratch!
Today I’m walking you through the four simple steps of my go-to pie crust recipe. The entire process takes about five minutes, and once you try the final result, you’ll never want to go back to the store-bought crusts.
Why use my recipe:
- Can be used for baked or no-bake recipes.
- Cuts nicely without crumbling apart.
- Just four basic ingredients!
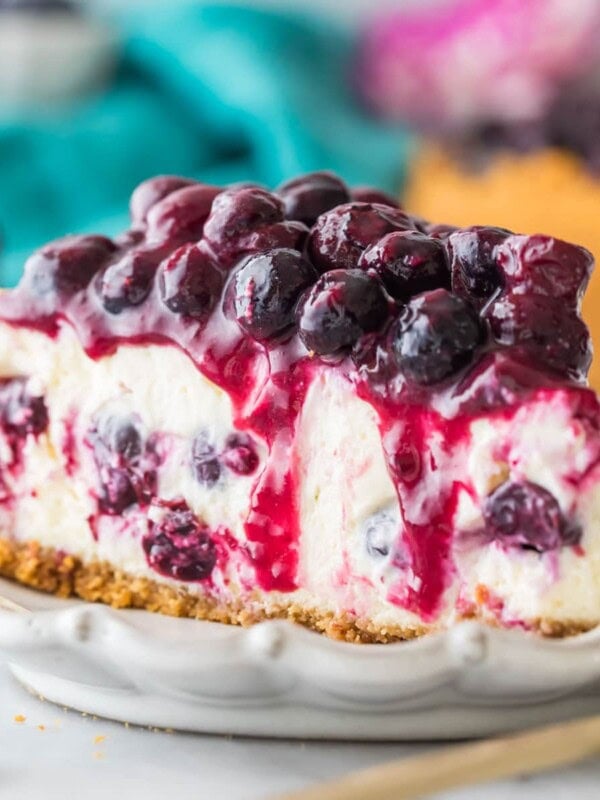
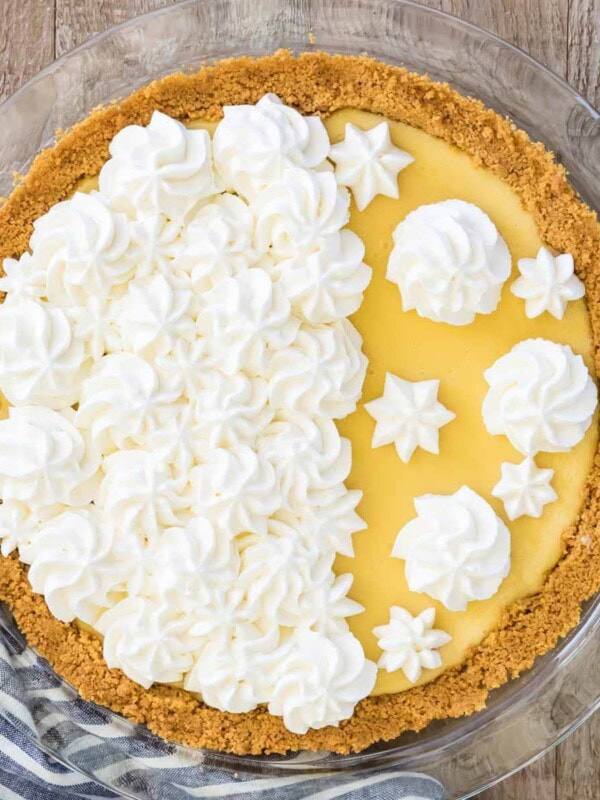
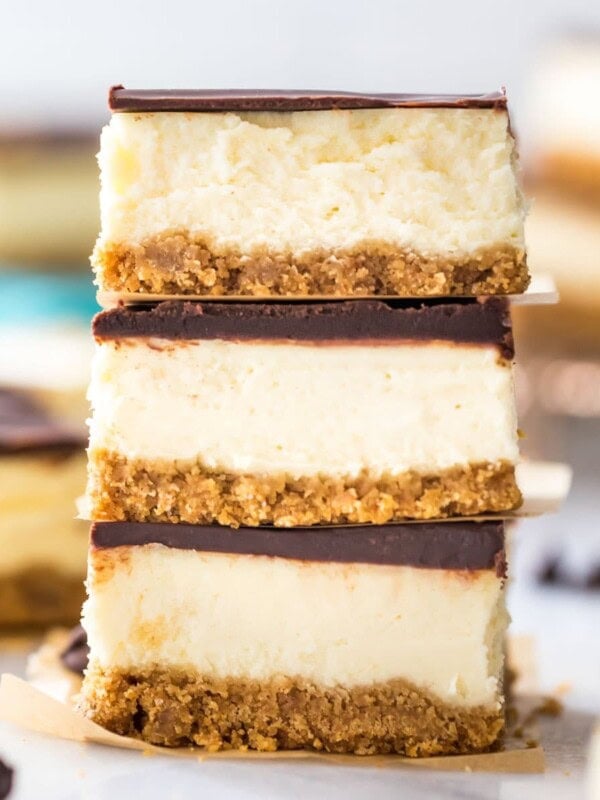
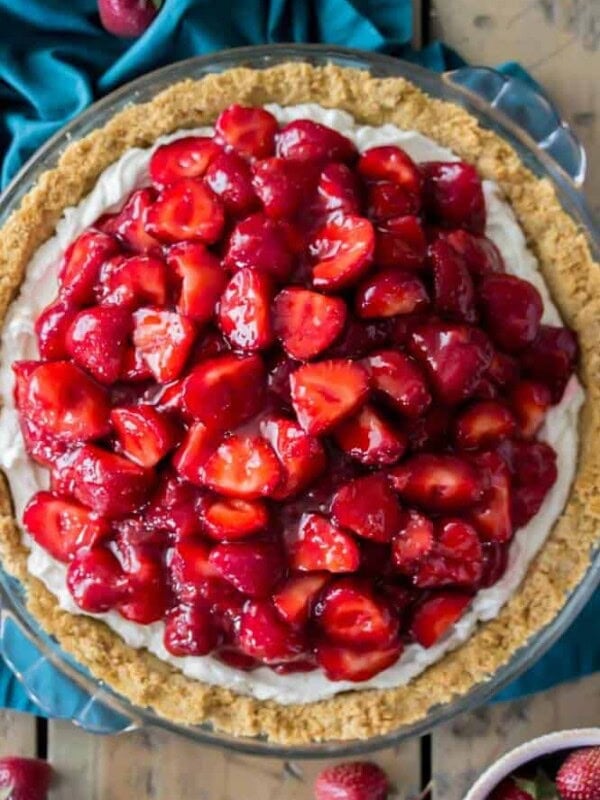
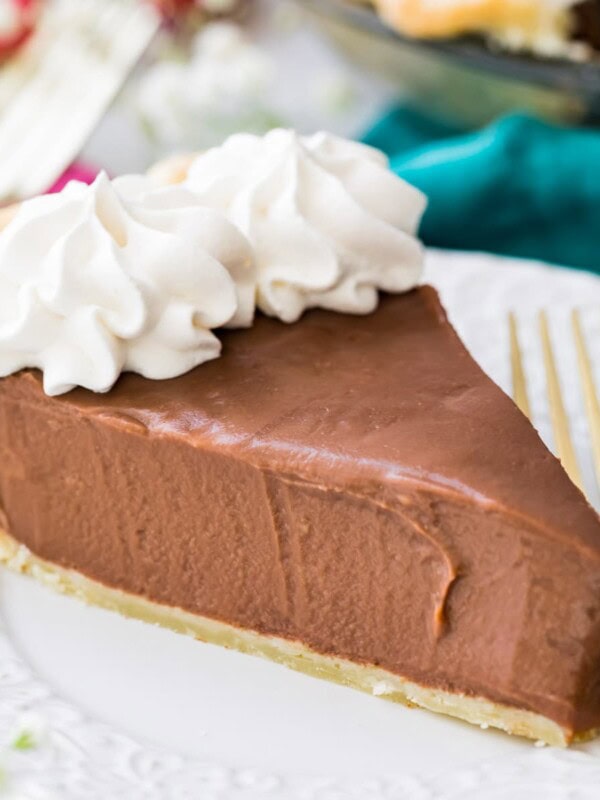
- Works for both pies (like my chocolate pie) and cheesecake.
- Takes minutes to prepare and tastes SO much better than store-bought!
What You Need
Just a few ingredients come together to make this easy crust! It’s so simple to make and 100% worth the (very little) effort. Here’s what you need:
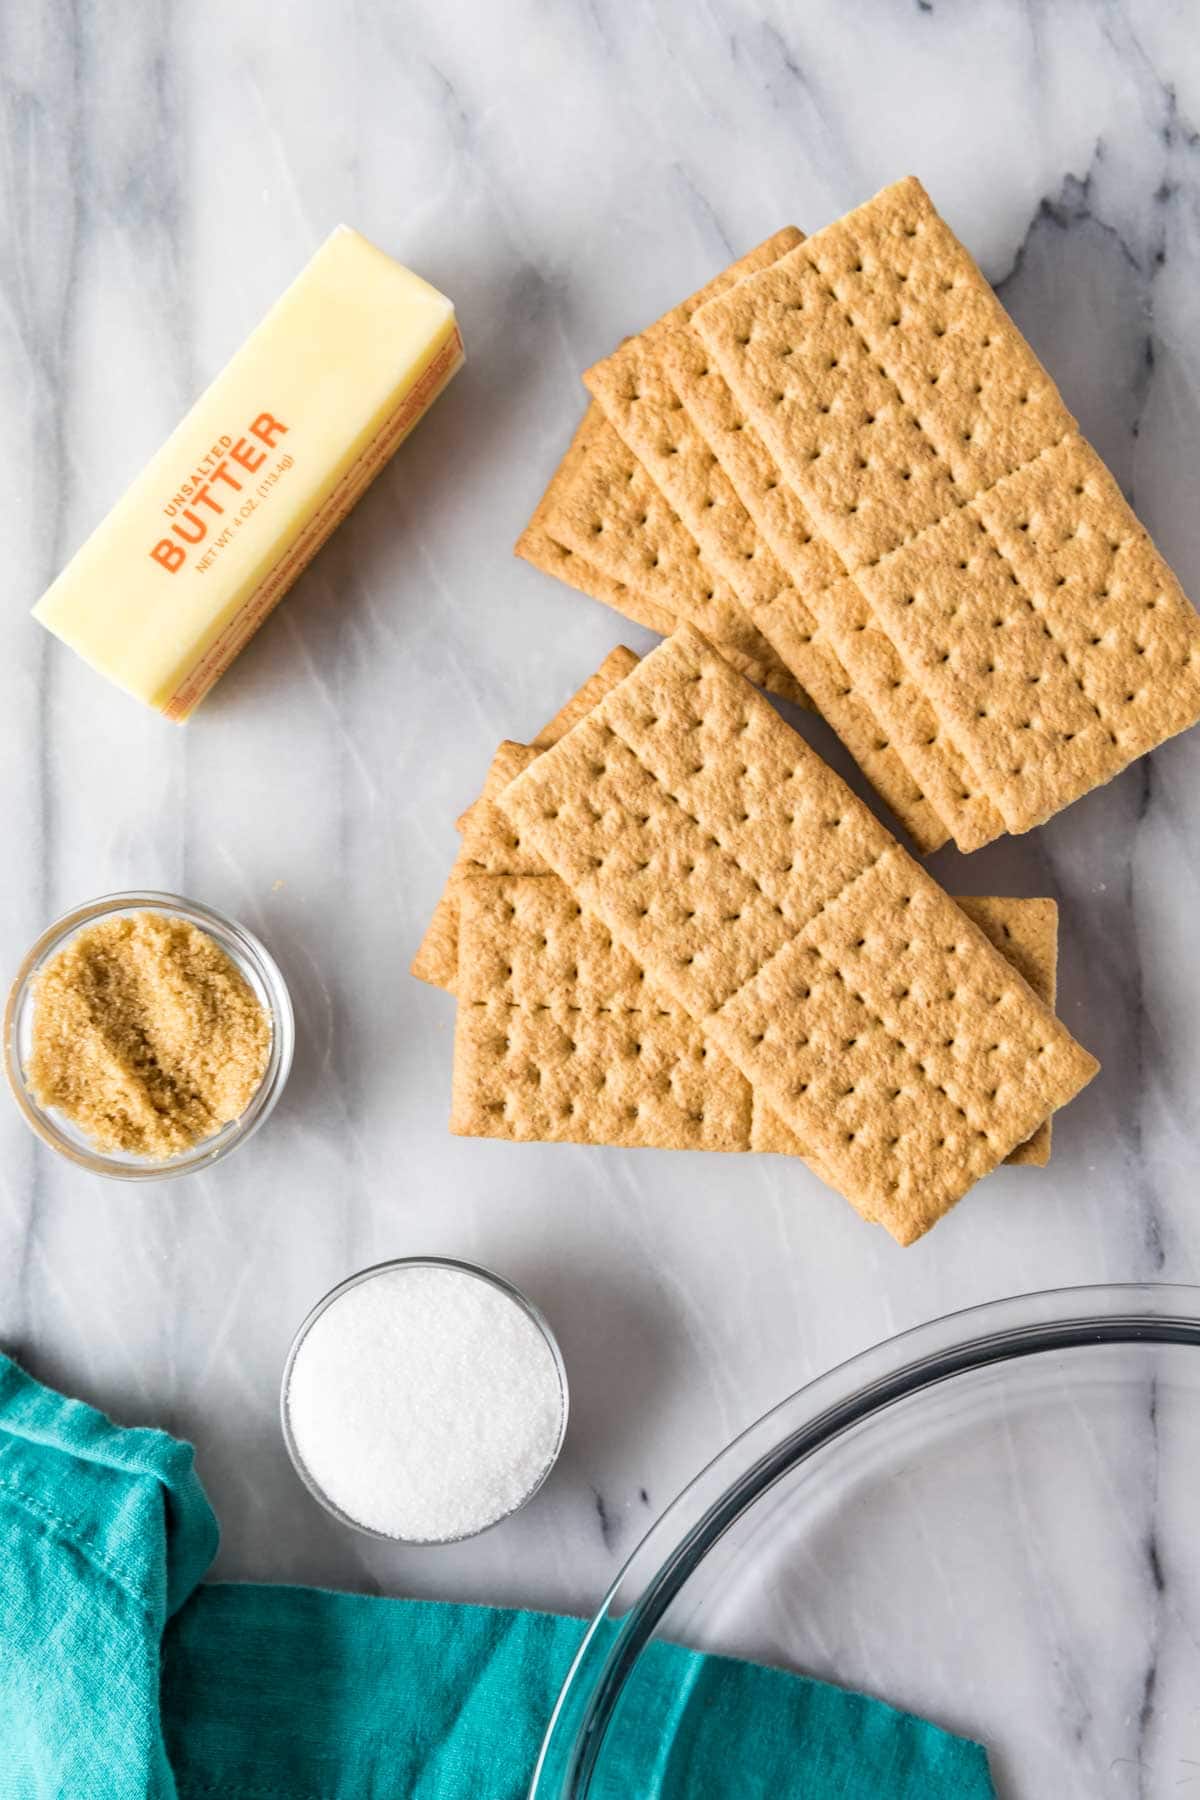
- Graham crackers. You can pulverize graham crackers or use pre-crushed graham cracker crumbs. If you are pulverizing your own crackers, you will now need 11 graham cracker sheets to reach the 1 1/2 cups; I previously recommended using 10, but it turns out graham crackers are shrinking (isn’t everything in the supermarket these days?). If you don’t have graham crackers where you live, digestive biscuits will also work (more on this below).
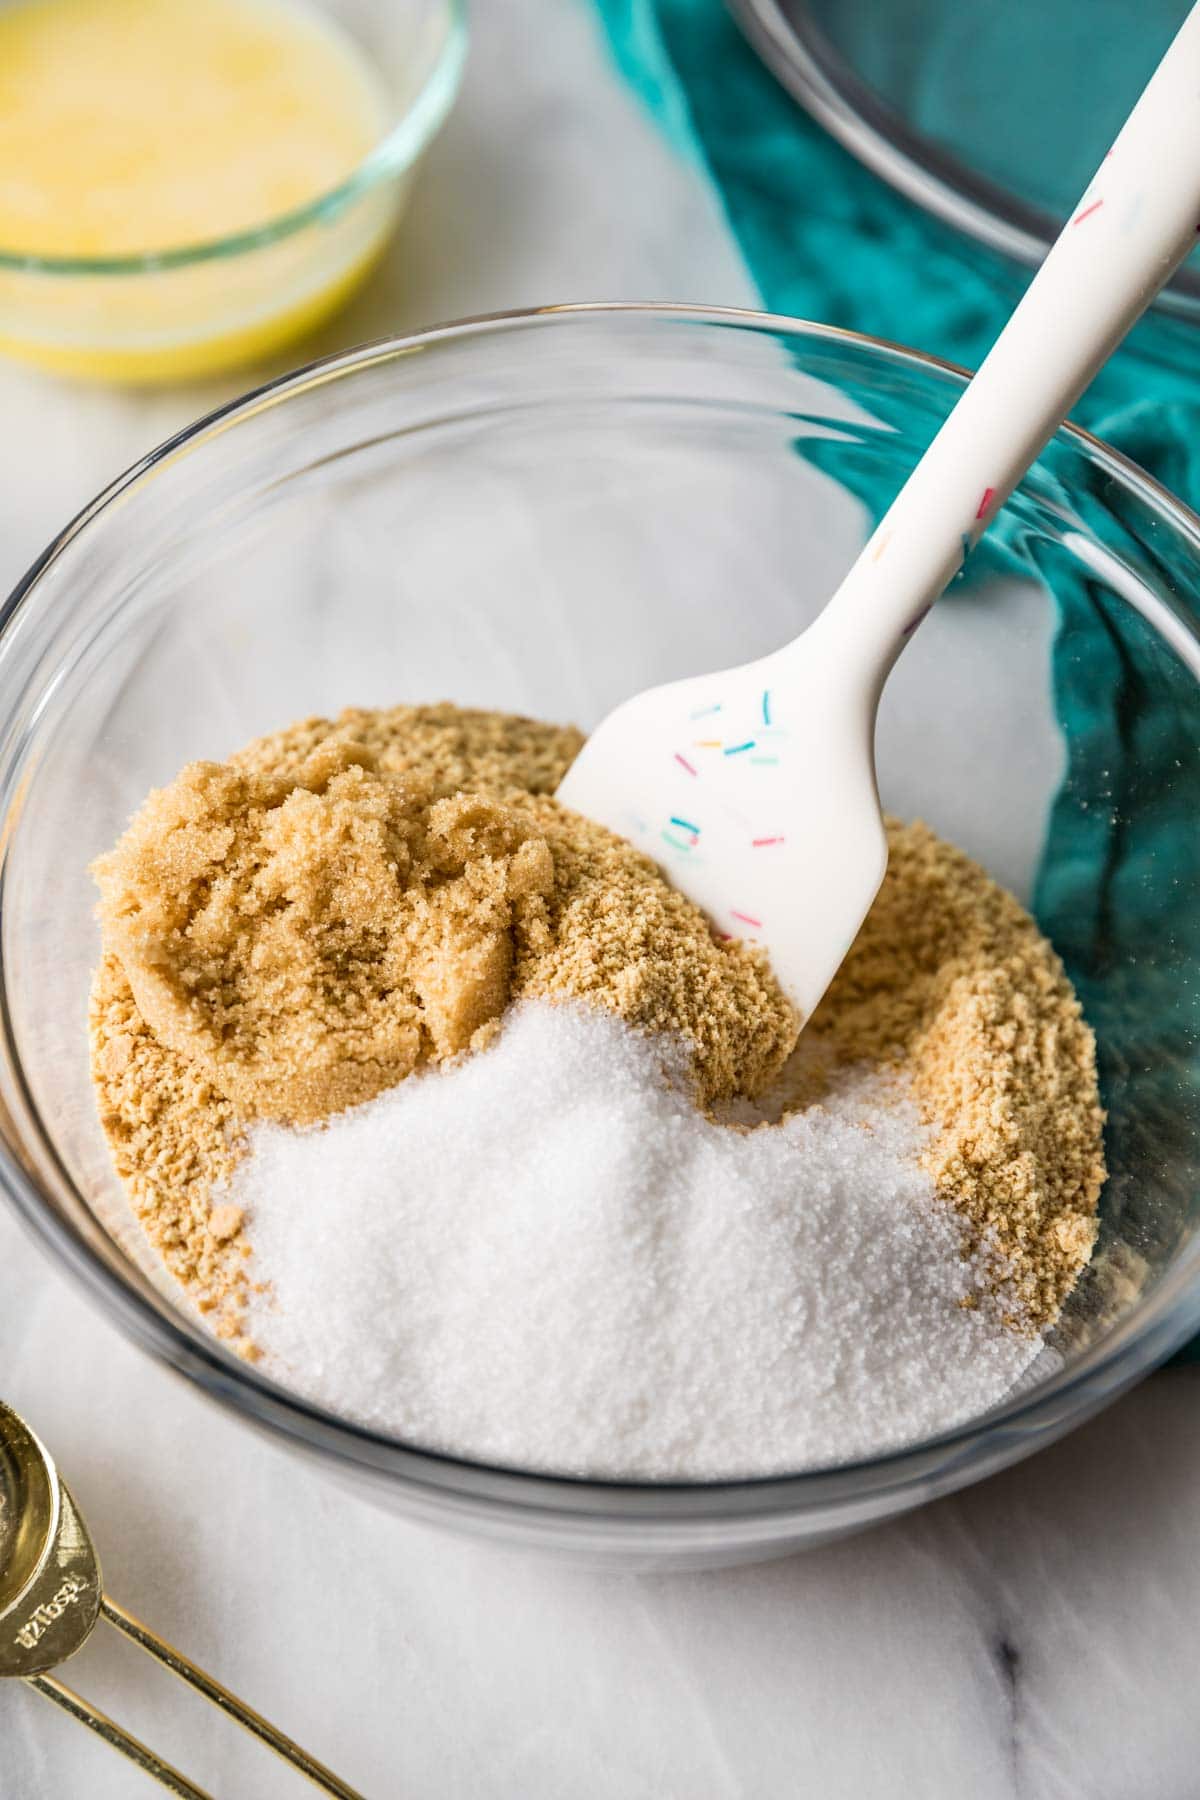
- Sugar. I like to use a mix of both white sugar and brown sugar, but you can use just one or the other if you like. The brown sugar adds a slightly richer flavor (something you don’t get from a semi-stale store-bought crust!).
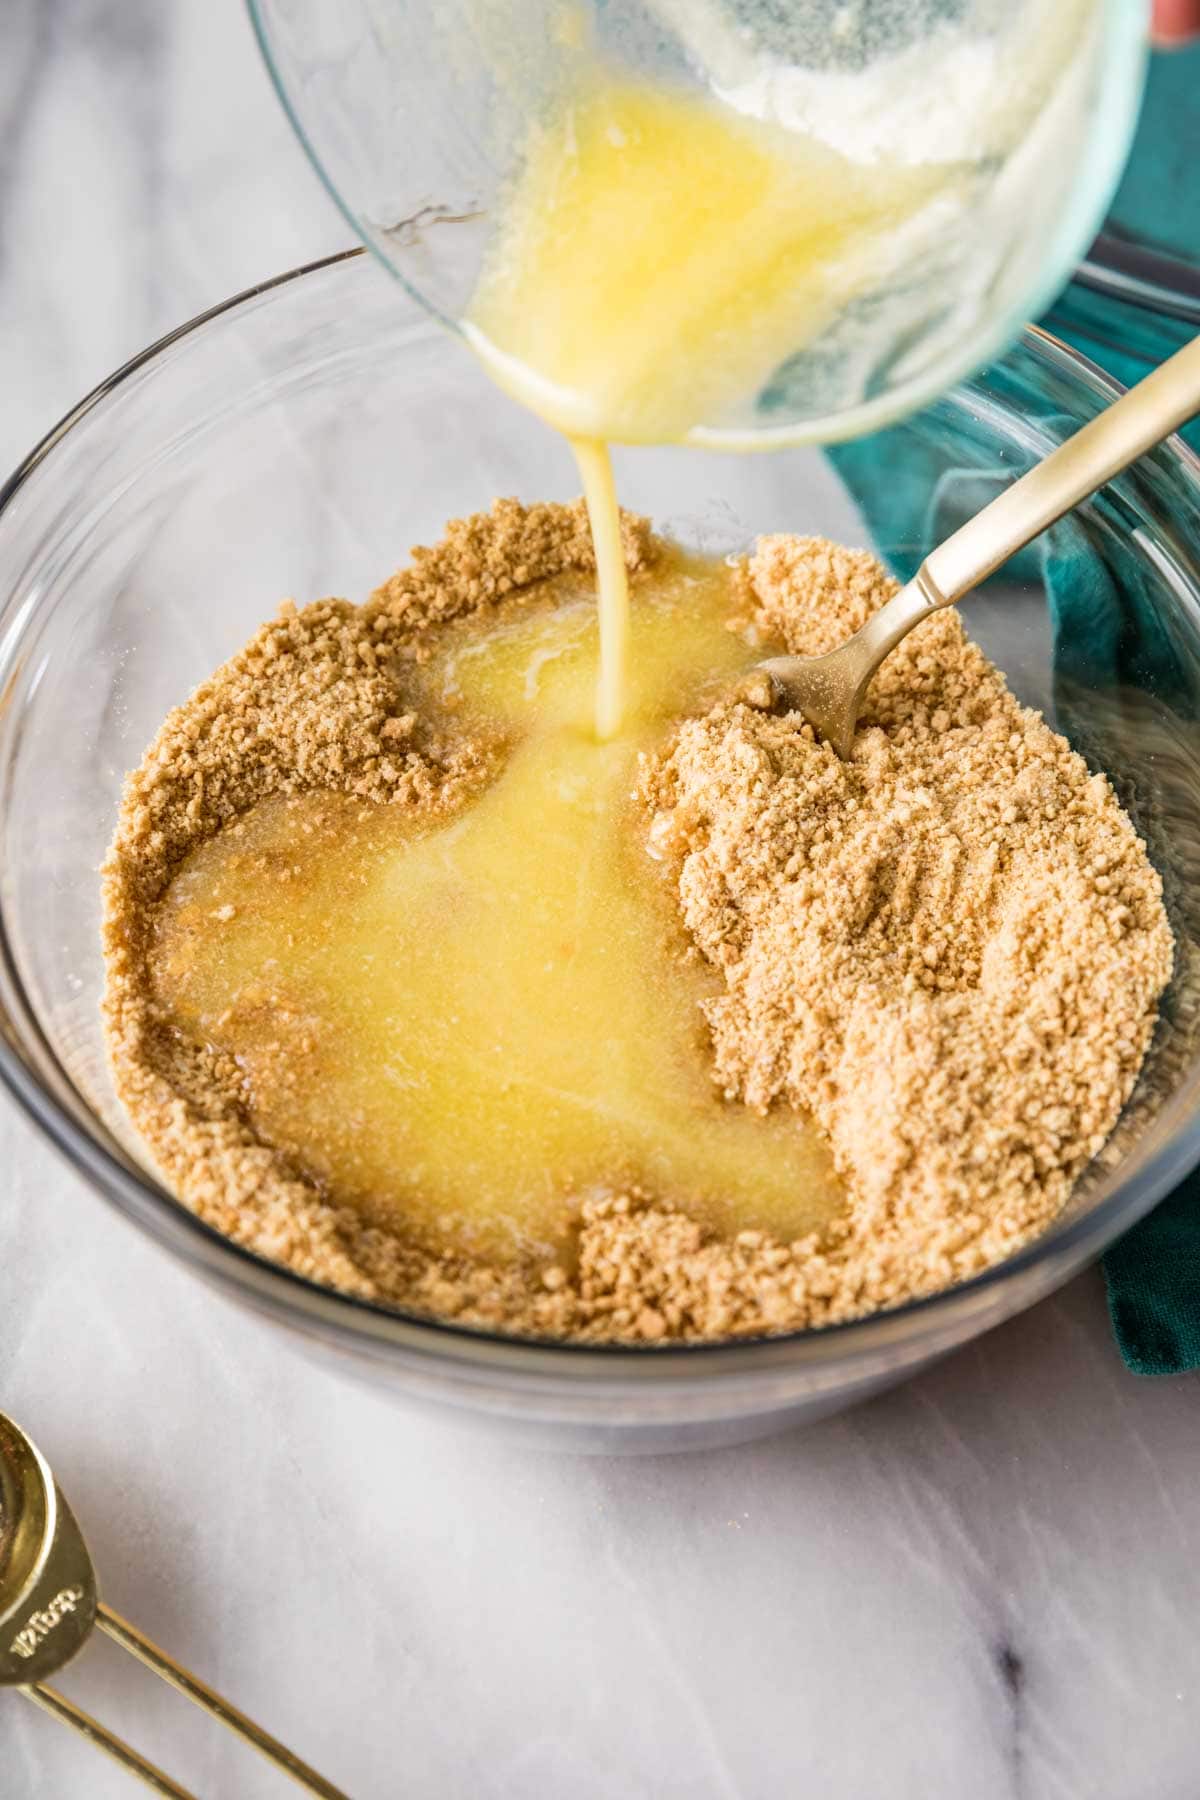
- Butter. This acts as the glue that holds the whole graham cracker crust together. You can use salted or unsalted butter, but I tend to prefer salted here (it helps balance the sweetness of the dessert!).
SAM’S TIP: Still buying your Oreo crusts from the store? I also have a recipe for an easy Oreo crust that tastes so much better than the pre-made version.
Remember, this is just an overview of the ingredients I used and why. For the full recipe please scroll down to the bottom of the post!
How to Make a Graham Cracker Crust
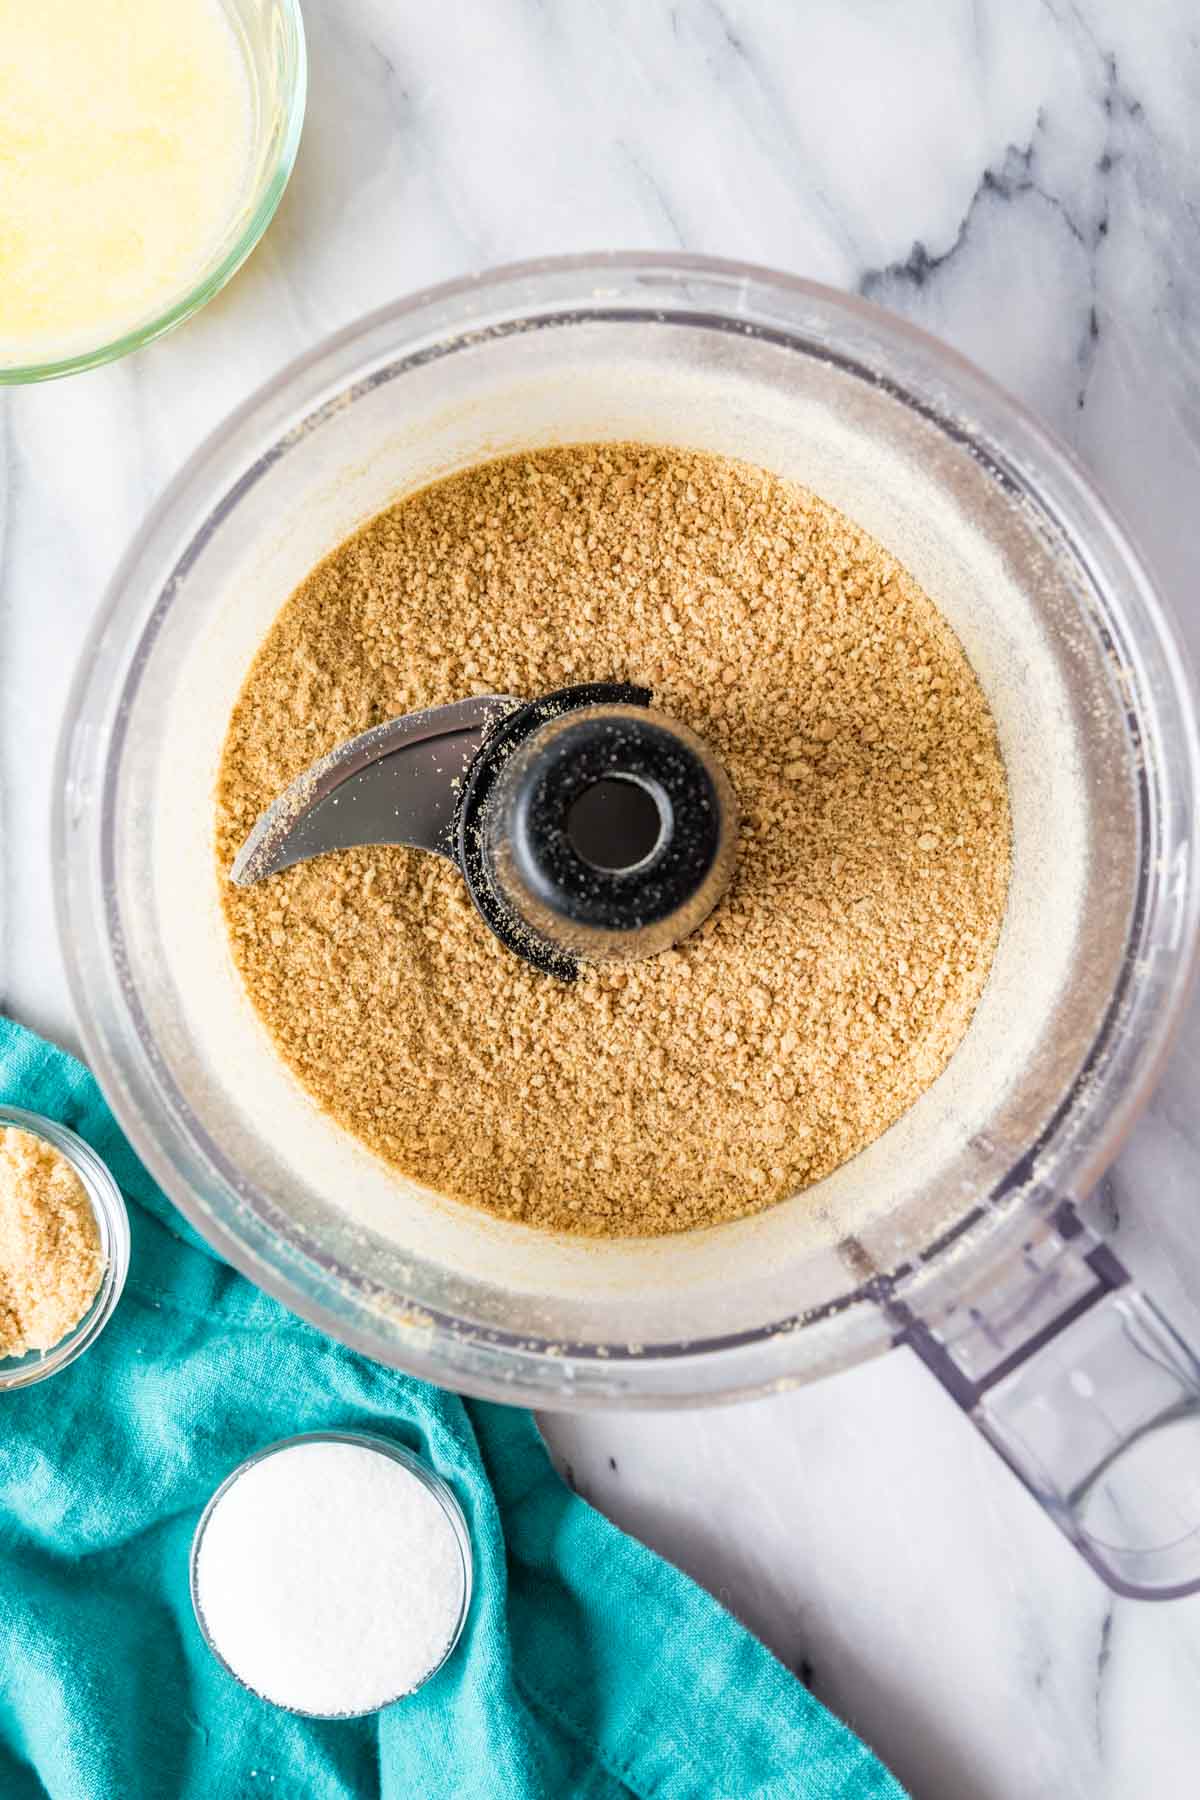
- Crush the crackers – Process your graham crackers in a food processor (or place them in a large ziploc bag and use a rolling pin to crush them) until you have fine, sandy crumbs.
- Add the sugars – Transfer your crumbs to a bowl and stir in the sugars.
- Melted butter – Pour in melted butter and toss everything together with a fork.
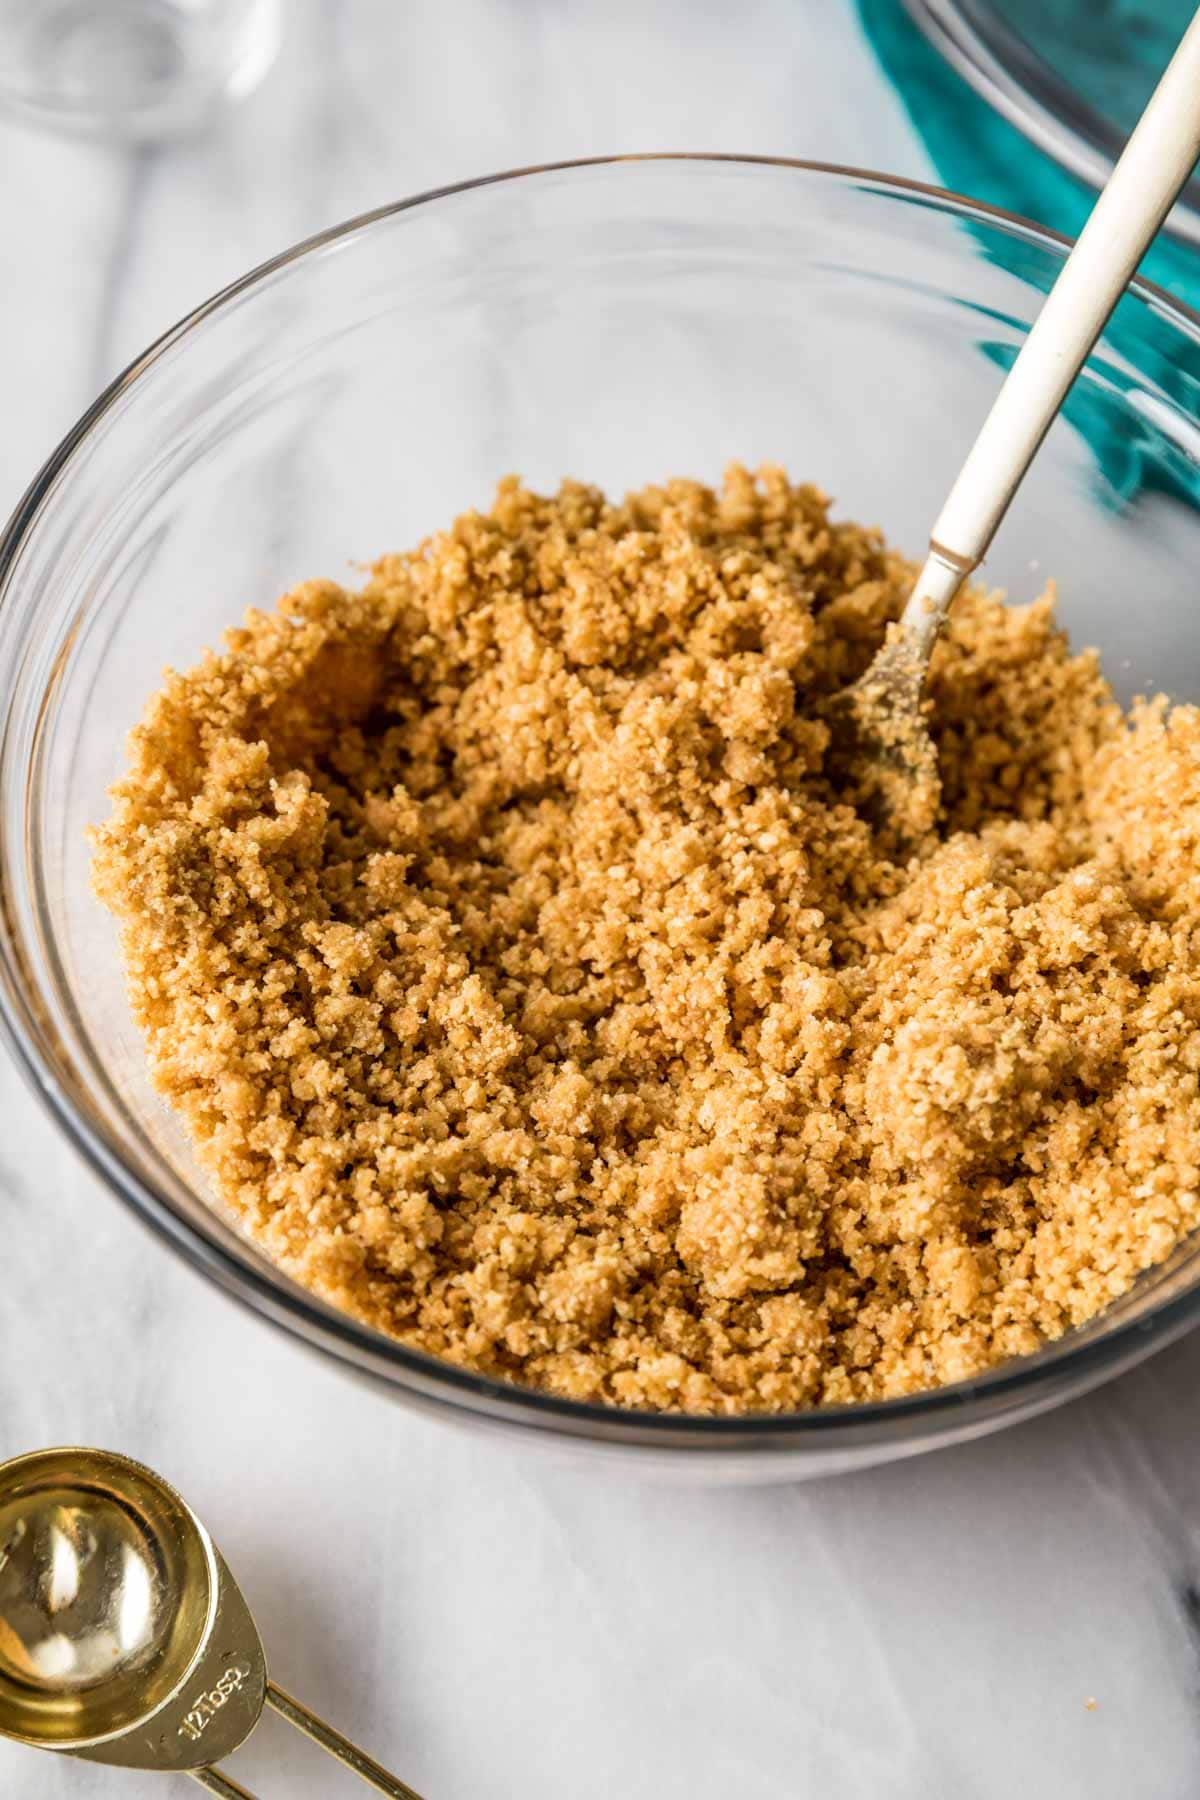
- Mix it up – Toss the ingredients together until all of the crumbs are moistened and the mixture is well-combined.
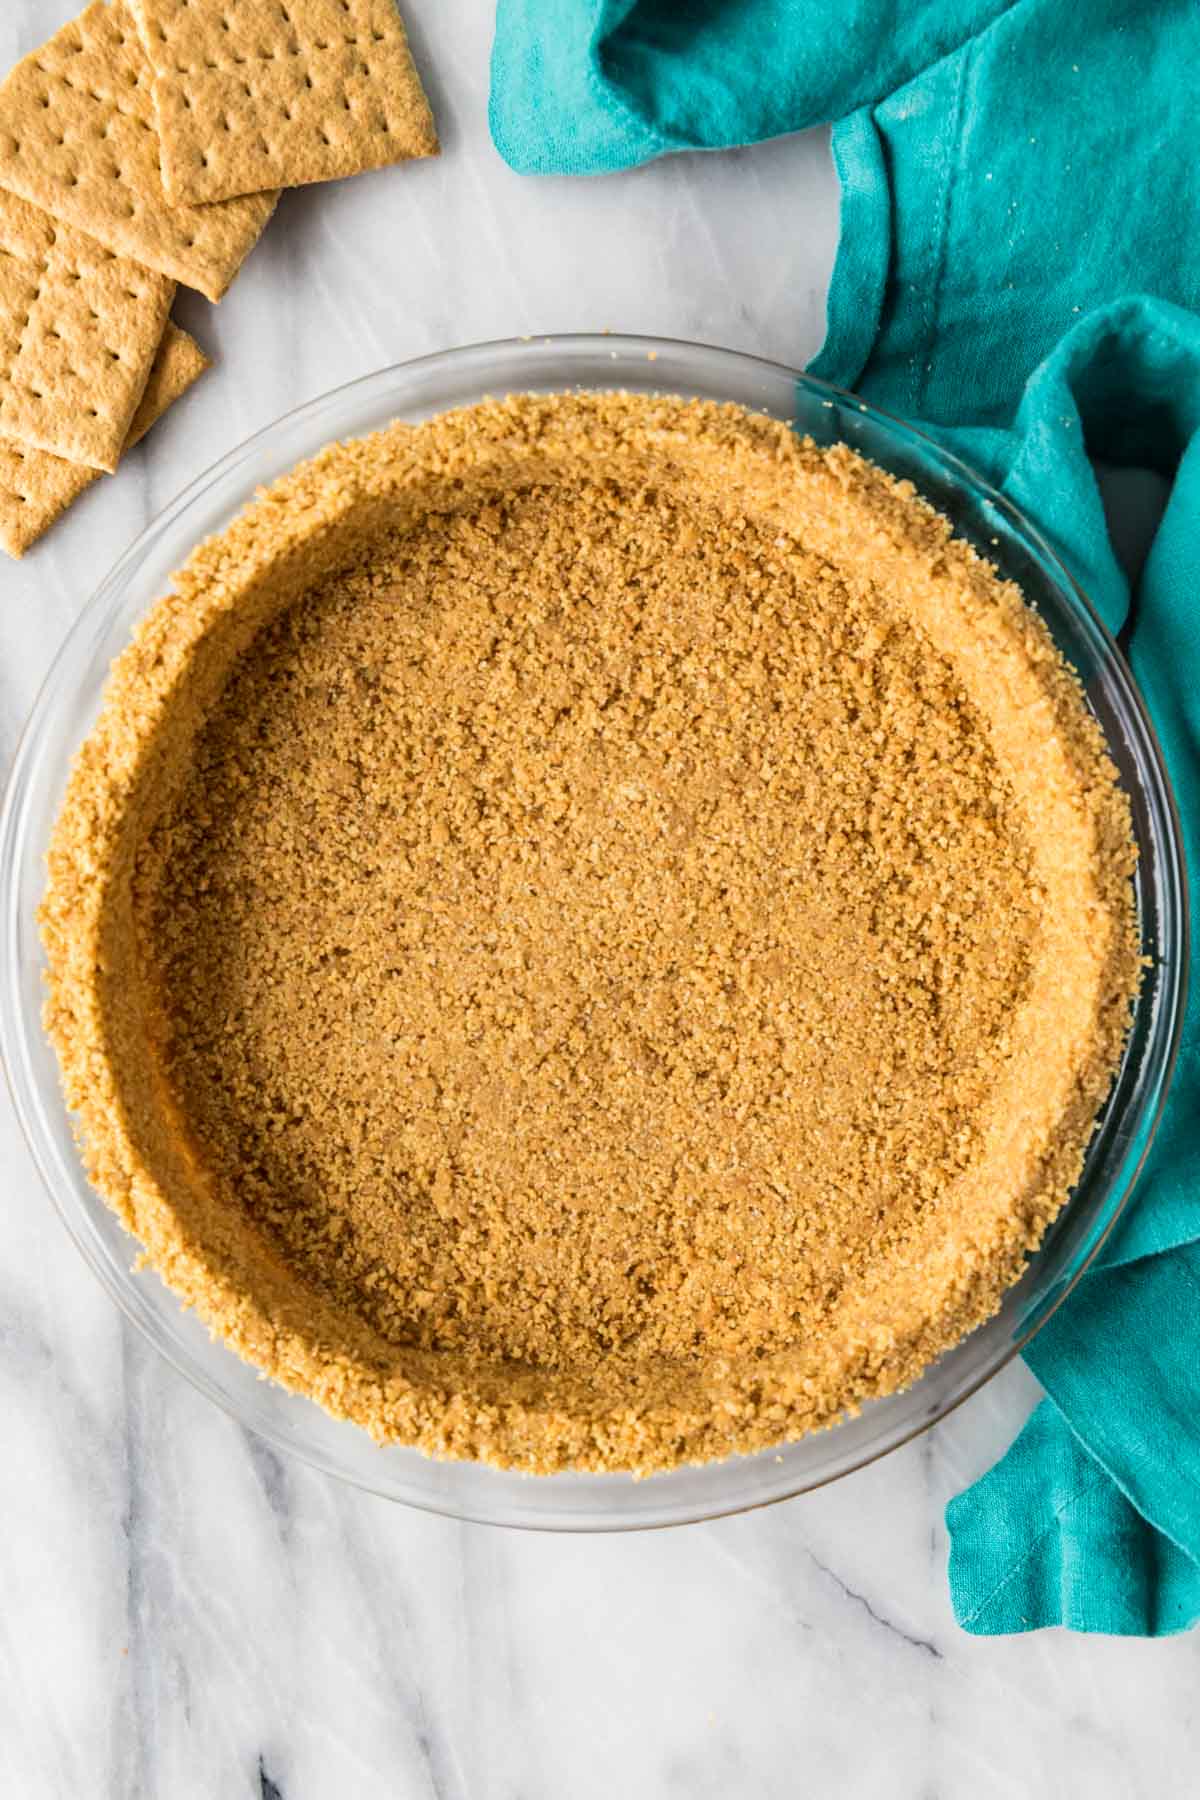
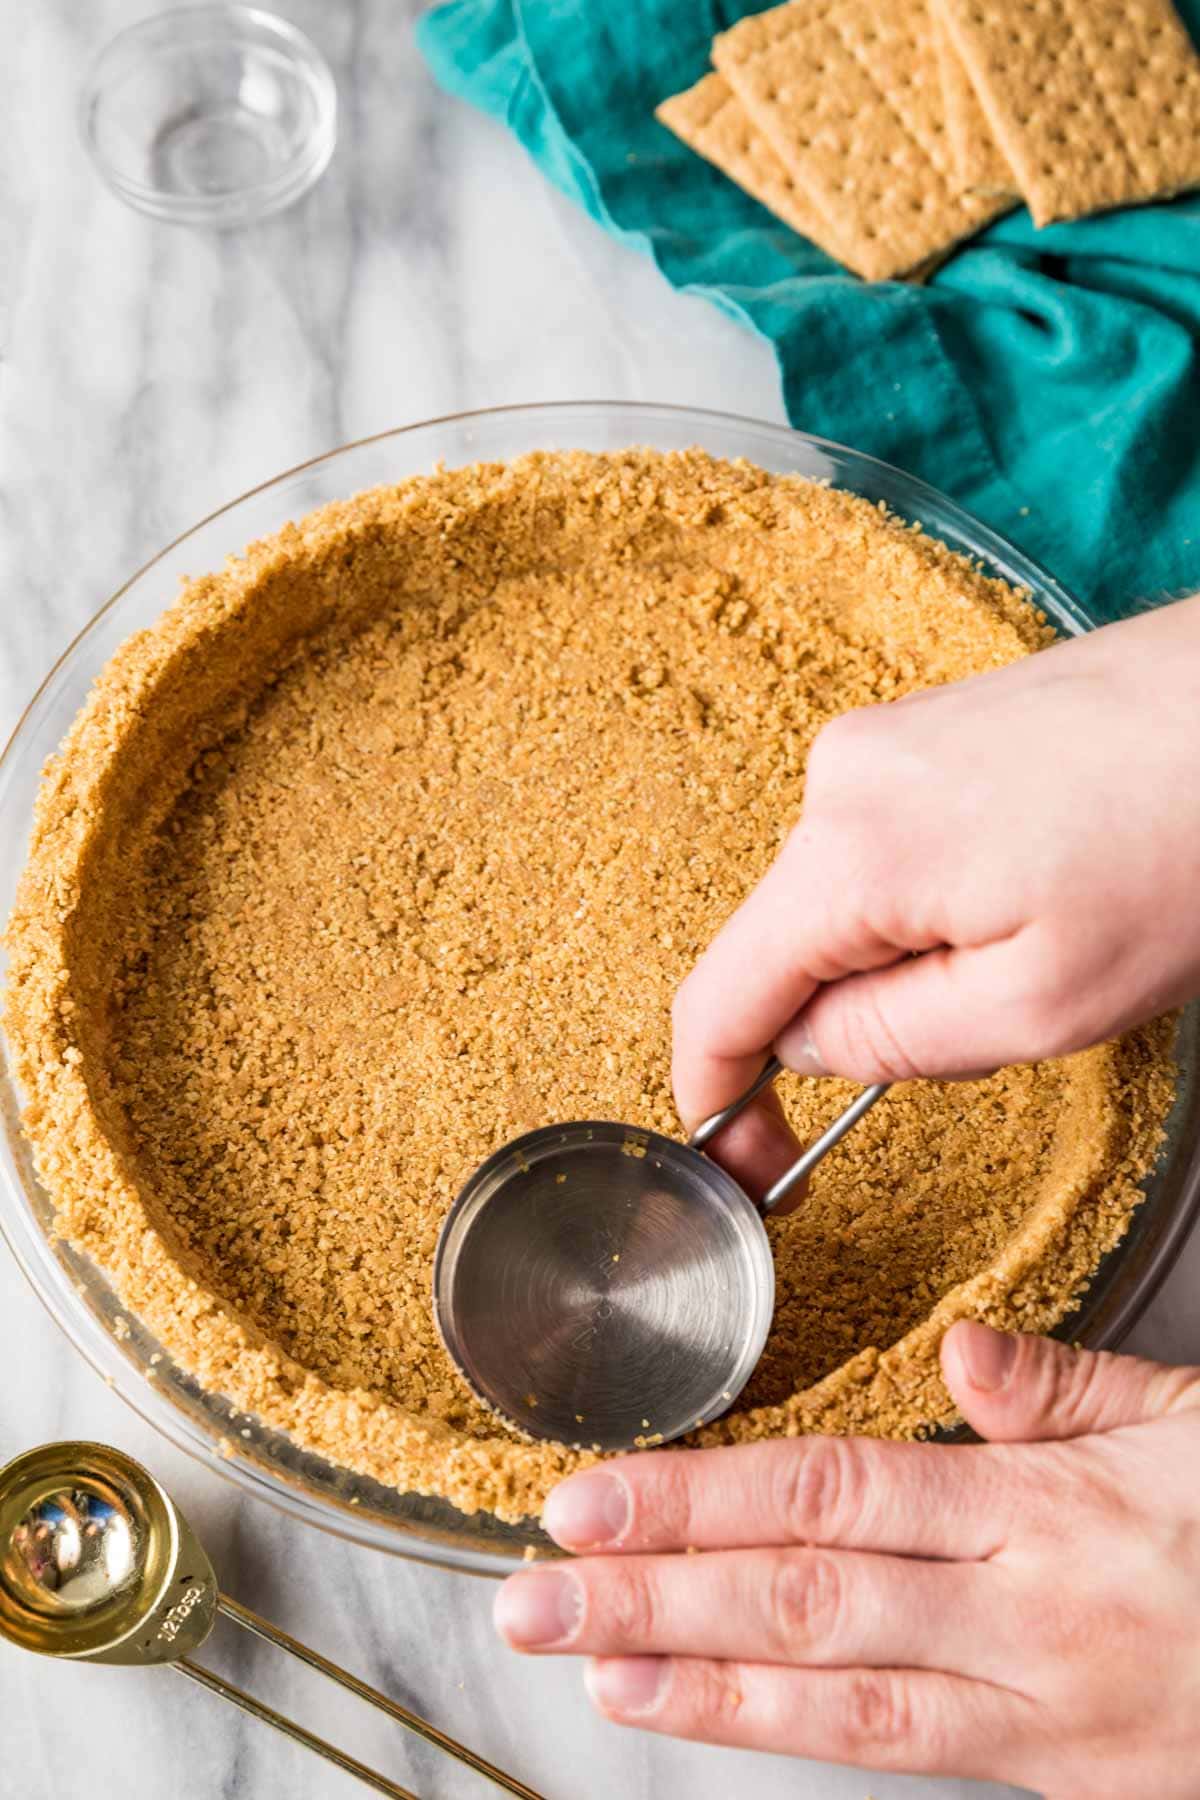
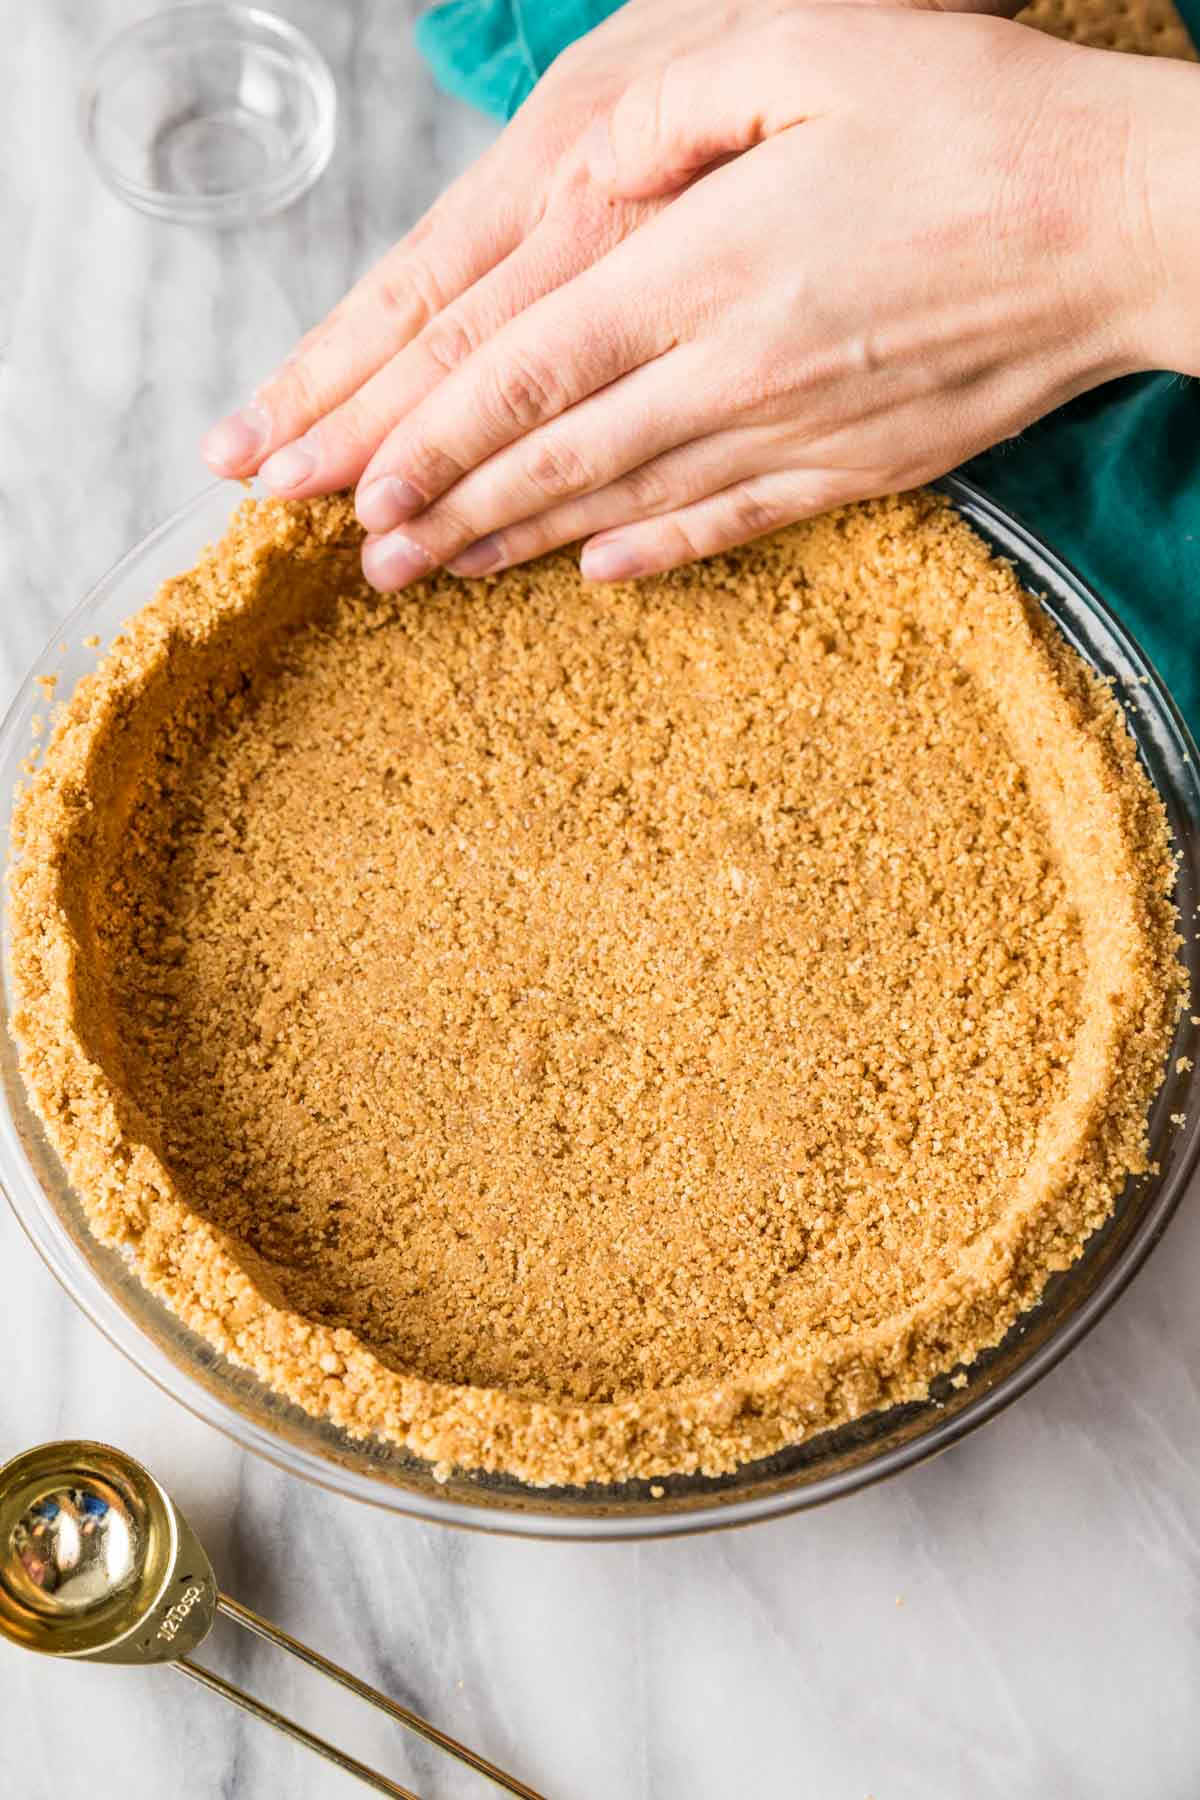
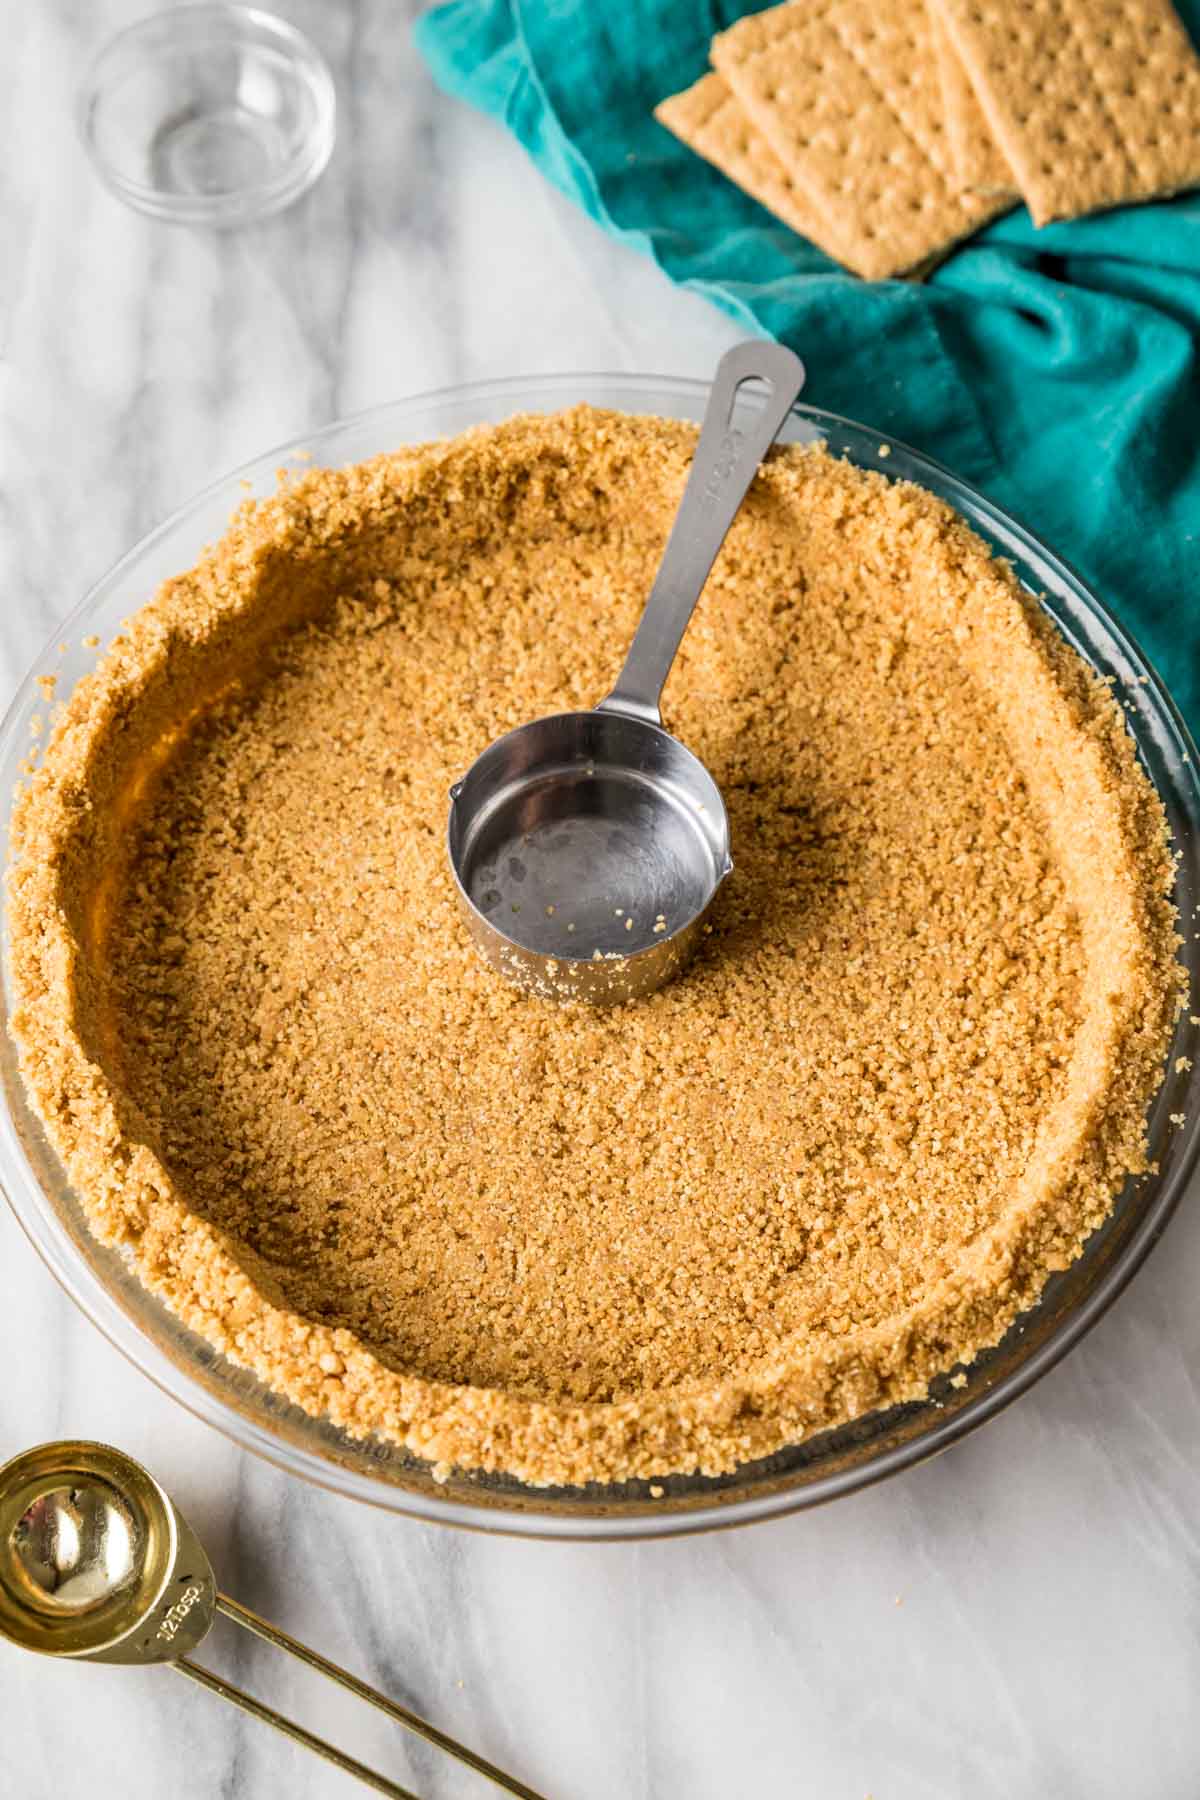
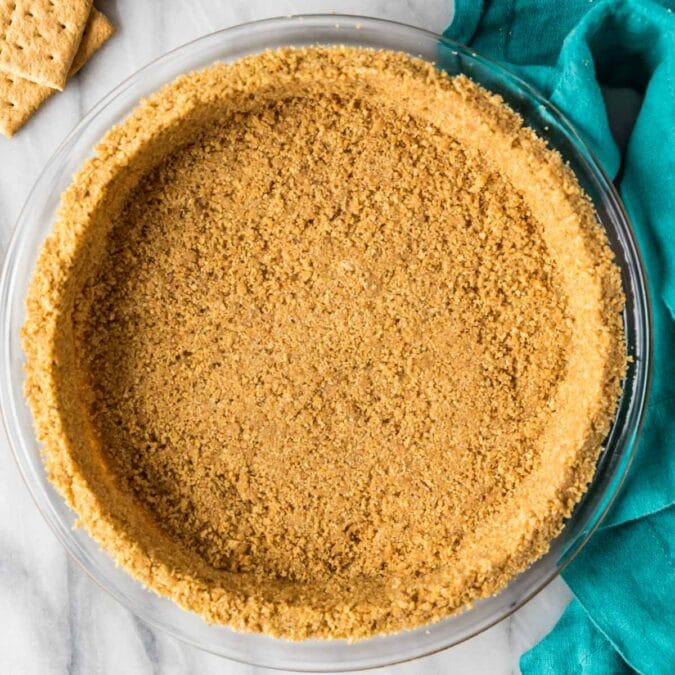
- Press into your pan – Transfer your crumbs to your pie plate or springform pan and press them tightly into the bottom of the pan and up the sides.
- Smooth the sides – Use your fingers to press the crumbs firmly all around the sides of the pie pan to make a nice even edge.
All that’s left is to use as directed! Follow your recipe for any baking instructions, or place in the fridge/freezer for a no-bake recipe.
SAM’S TIP: I like to use the (clean) bottom of one of my measuring cups to press the crumbs into the pan for a smooth, even surface. You can also use the bottom of a small drinking glass for this.
Frequently Asked Questions
It really depends on the recipe, so follow that first. Pre-baking isn’t usually necessary, but many bakers like to pre bake their crust so it is extra crisp.
Now, if you are making a crust for a no bake recipe (like my no-bake cheesecake!), you can just slip the pie plate/springform into the fridge or freezer for a few minutes before adding the filling. The crust will still cut nicely without baking it!
If you didn’t make any substitutions (reducing the sugar, swapping the butter, etc.) then the issue most may lie in how tightly you packed your crust into the pan. You want to make sure your crust is firmly packed into the sides and bottom of your pie plate/springform pan.
Another issue could be if you waited too long to press your crumbs into the pie plate. As the butter cools, it re-solidifies and if the crust hasn’t been pressed, it won’t cling together but will stay crumbly. If this happens you can always toss your crumbs back in the microwave in 5 second intervals, stirring in between, until the butter is warmed and the crumbs will cling together again.
Yes! If you don’t have graham crackers where you live, you can absolutely use pulverized digestive biscuits instead. You will need 12 digestive biscuits to get 170g of crumbs (you will have a bit extra after weighing).

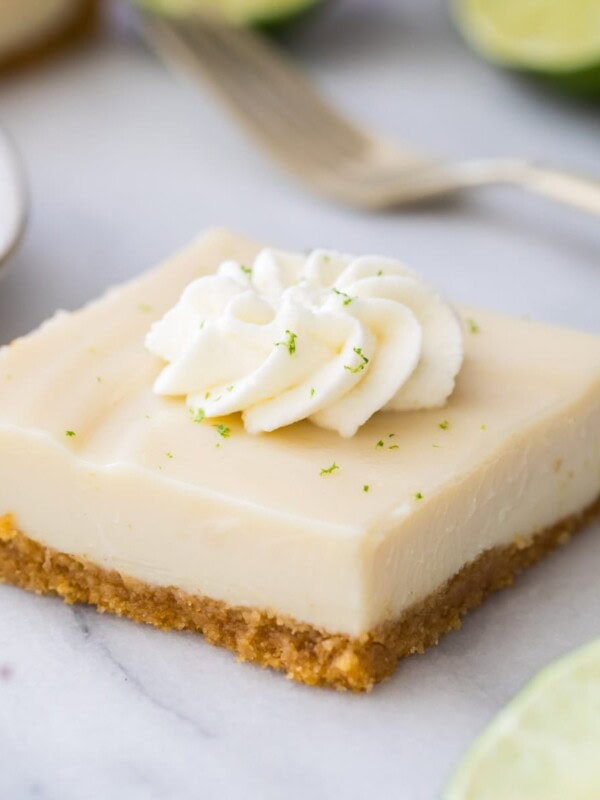
This recipe isn’t just for pies! I use it in many of my cheesecake recipes as well, like my key lime cheesecake (pictured above!).
Enjoy!
Let’s bake together! I’ll be walking you through all the steps in my written recipe and video below! If you try this recipe, be sure to tag me on Instagram, and you can also find me on YouTube and Facebook
Easy Graham Cracker Crust Recipe
Equipment
Ingredients
- 1 ½ cups (170 g) graham cracker crumbs, (or 11 graham cracker sheets pulverized to crumbs in a food processor)
- 2 Tablespoons sugar
- 1 Tablespoons brown sugar, packed
- 7 Tablespoons (100 g) butter, melted
Instructions
- Pulverize graham crackers in food processor until finely ground into crumbs (skip this step if starting with graham cracker crumbs).1 ½ cups (170 g) graham cracker crumbs
- Stir together graham cracker crumbs and sugars in a medium-sized bowl. Add melted butter and use a fork to combine ingredients well until crumbs are all moistened.2 Tablespoons sugar, 1 Tablespoons brown sugar, 7 Tablespoons (100 g) butter
- Pour mixture into pie plate or springform pan. Use the (clean!) bottom of a measuring cup to firmly pack crumbs into the bottom of the pan and (if using a pie pan) gently press up the sides. Use your fingers to pack crumbs tightly into the sides of the pie pan.
- If the crust needs to be pre-baked, bake on 350F (175C) for 10-13 minutes and allow to cool before filling. If using this crust as part of a different recipe, bake according to your recipe's instructions. If this crust is for a no-bake recipe, refrigerate or freeze for 10-20 minutes before filling.
Notes
Sugar
You can substitute more granulated sugar if you do not have brown.Video note:
I accidentally say the wrong oven temperature in the video. Always follow my written recipe.Nutrition
Nutrition information is automatically calculated, so should only be used as an approximation.
Like this? Leave a comment below!


Made this and got so many compliments! thank you for showing it to us!!!!
this crust is perfect, I made it a couple weeks ago and today looked for this recipe for 15 minutes before finding it, worth it! I’ve bookmarked it so i never lose it again
Thank you so much for trusting my recipe so much! I’m so glad you’ve enjoyed it so much! 🙂
I used Biscoff cookies for the crust and it was so very good. I made a no bake Biscoff cheesecake.
I tried your recipe on Christmas for my keylime pie bars, and omg it was sooooo good that added brown sugar made a great difference. I will definitely add this to my forever crust!
Finally, the perfect Graham cracker crust!! Much better than any other recipe I’ve tried.
How do i store this if making day before? in fridge or on counter?
Hi Danielle! I would put it in the refrigerator. 🙂
Help! I baked this crust, thinking I needed to, for your pumpkin cheesecake recipe but now see there was no need to prebake. should I break, reblend and form the crust again?
Hi Jessica! You can just use it as is. 🙂
Of course! lol I thought that was just too easy of an option… I was prepared to smash that crust up and turn it into buckeyes. Thank you for your support!
I used this pie crust recipe along with a homemade keylime pie and it was a huge hit! Way better than store bought and doesn’t take long to set. I keep graham crackers on hand now just in case I need to make a quick pie.