
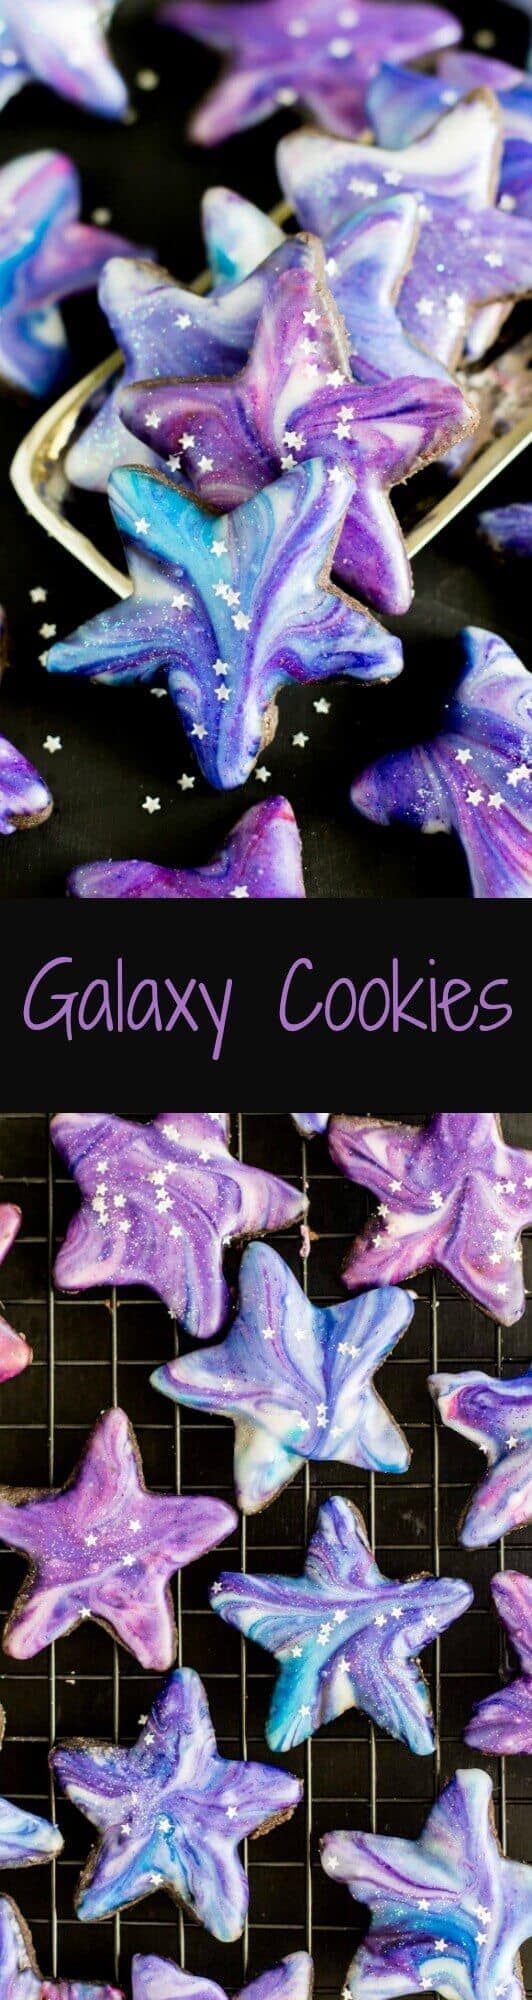
Galaxy Cookies
This post may contain affiliate links. As an Amazon Associate I earn from qualifying purchases. Please read my disclosure policy.
Galaxy Cookies: Star shaped cutout cookies with a galaxy glaze
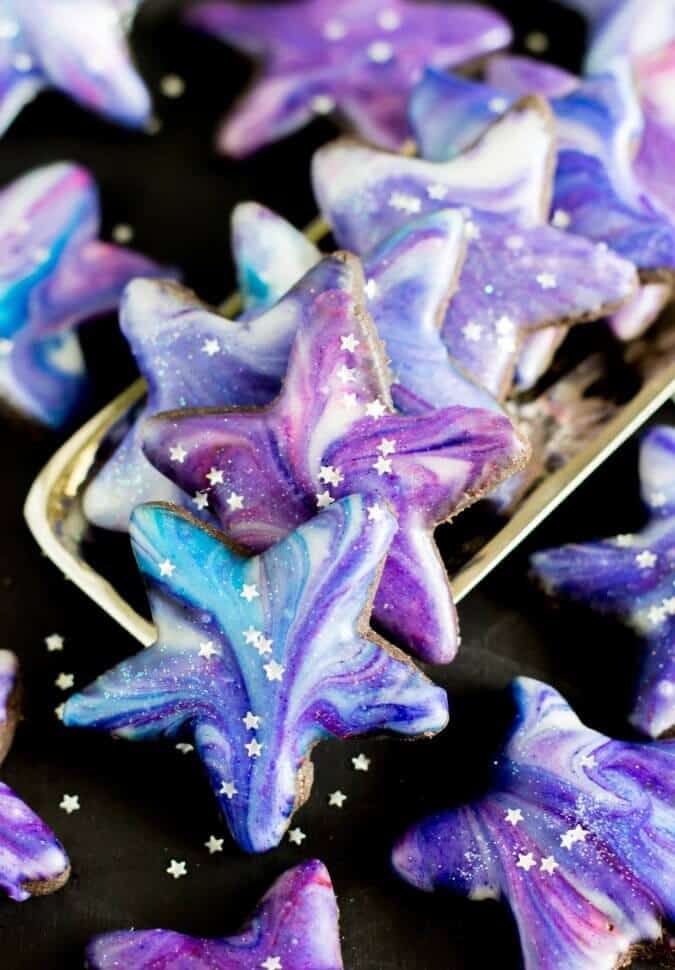
It’s taken me every ounce of self restraint with these cookies to not say something super cheesy like “they’re outta this world”. Because, while they totally, absolutely are, you don’t need cute quips to inform you of that, do you? These cookies make their own statements, and none of them are mundane.
I’ve been seeing some pretty incredible galaxy desserts all over the internet recently, and wanted to offer up my own spin on these out of this world desserts. They’re not difficult to make, but there are quite a few steps involved, so let’s get started.


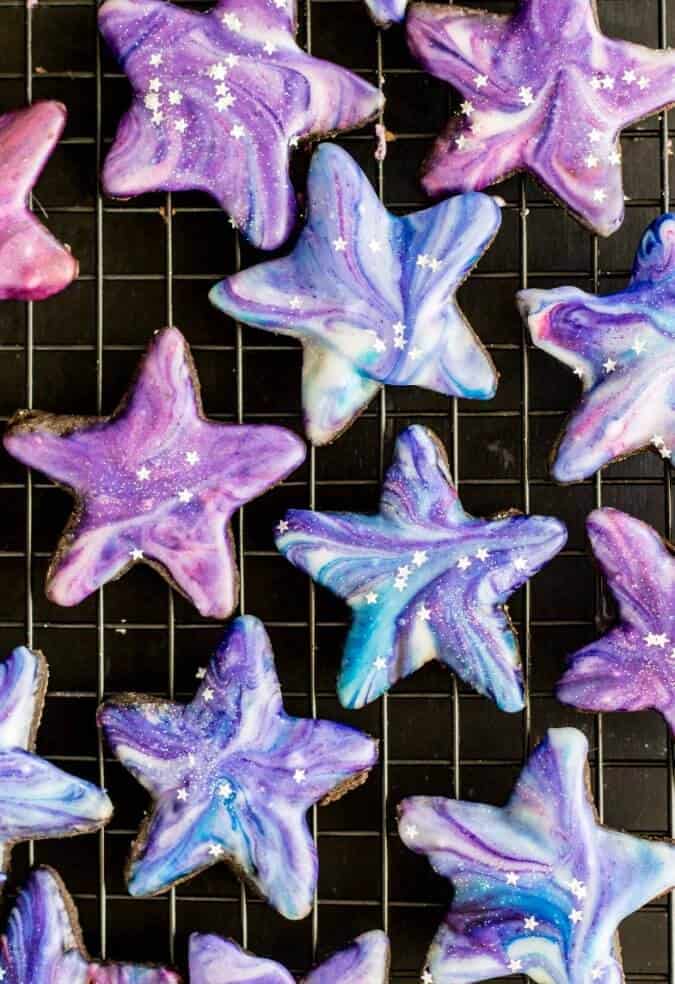
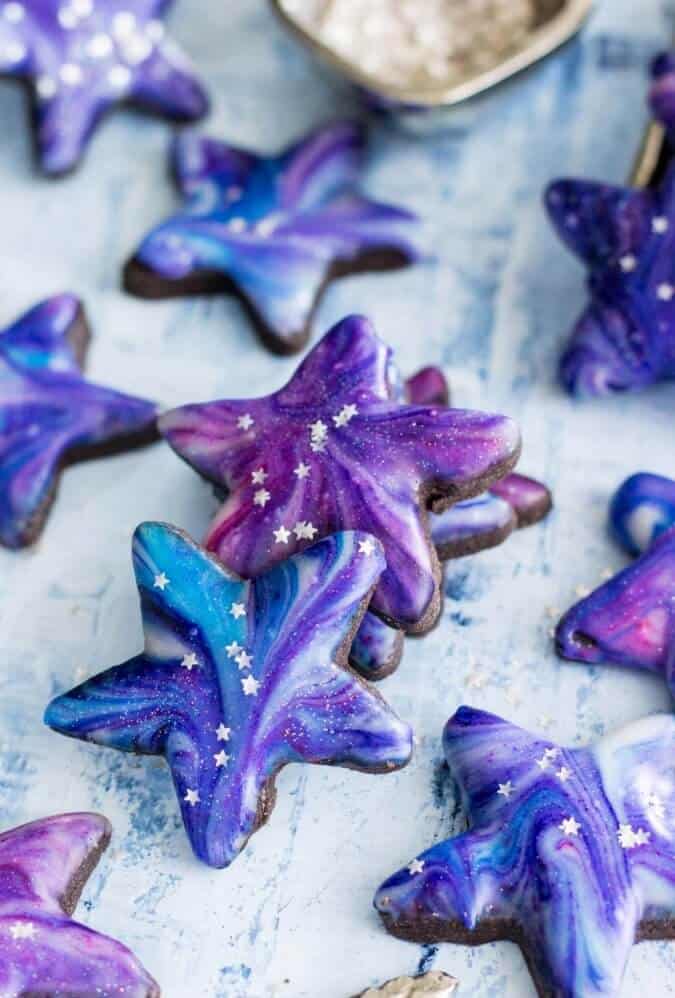
The patterns and whorls of these galaxy cookies look complex and intricate, but the process for making them is actually really, really simple.
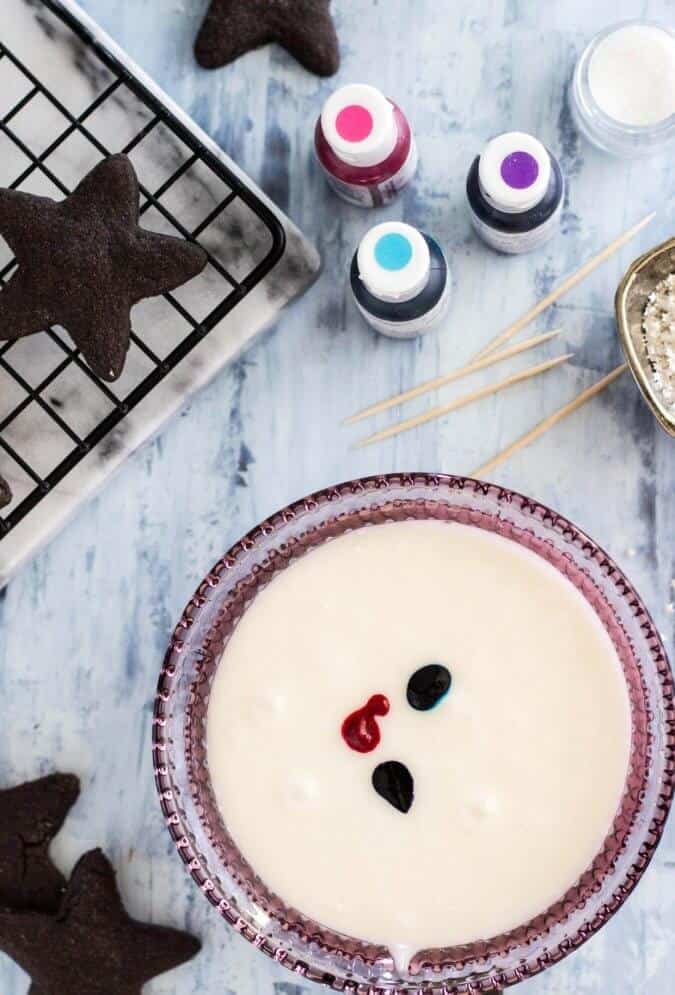
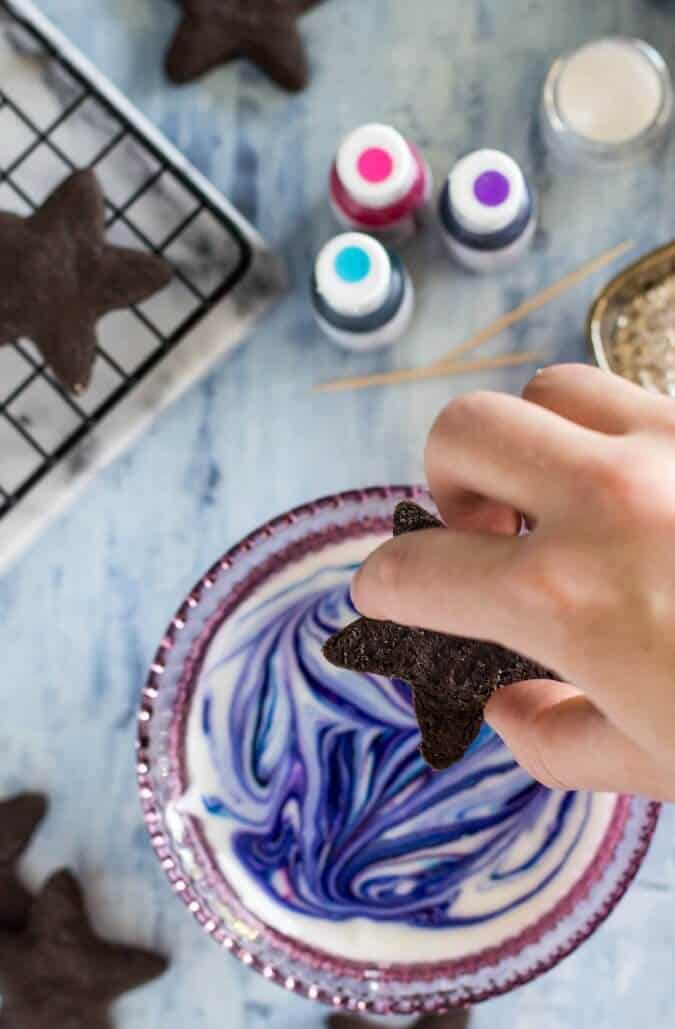
Use a toothpick to dab bright pink, blue, and purple food coloring into a simple vanilla glaze, and then drag the toothpick around the surface until the swirls look spacey enough. You literally cannot mess this step up — every slip of the toothpick just makes things more interesting (just… don’t over stir or all the colors will run together).
Then dip the face of each cutout cookie into the surface of the glaze until it is completely coated, remove, and allow it to set on a cookie sheet until hardened. I’ve said this before, but for a person with as little patience as me this is completely true — the hardest part is waiting.
I let my cookies set overnight so I know the glaze is fully set, but you can wait as little as 30 minutes if you don’t mind slightly soft glaze.
There are some important notes about these cookies that I want to make; be sure to go over these before you begin. They are simple tips that will make this process even easier:
- Choose an extract that you really like to flavor the glaze. I found simply using vanilla to be too plain and it left too much space for that bitter food coloring flavor. I recommend using half a teaspoon of vanilla and then 1/4-1/2 teaspoon of an extract of your choice. My favorite is almond, but I think mint or coconut would also be delicious. Taste test before swirling and dipping!
- The less food coloring the better. The more white glaze you have swirled in, also the better. Food coloring has a pretty pungent flavor. Use gel colorings for the most vibrant color, and dip a clean toothpick into the well of each and then into glaze. Repeatedly if needed. This allows you more control than just squirting the coloring directly into the bowl.
- Food coloring stains everything! Any porous surface it comes into contact with — wood, plastic, skin. I always lay out a sheet of wax paper to protect the surface I’m working on from becoming permanently stained.
I used dark chocolate cocoa powder to color these cookies nice and dark (you know, like the night sky…) without any additional food coloring. They don’t have a very strong chocolate taste to them, though, and you can easily substitute regular cocoa powder or use this (non-chocolate) cutout cookie recipe to use as your base instead.
Enjoy!
Galaxy Cookies
Ingredients
Cutout Cookies
- 1 cup (226 g) unsalted butter, softened
- ⅔ cup (135 g) granulated sugar
- 1 tsp vanilla
- 1 large egg yolk, lightly beaten
- 2 cups (270 g) all-purpose flour
- ⅓ cup (35 g) dark cocoa powder
- ½ tsp salt
Galaxy Glaze
- 3 cups (375 g) powdered sugar, sifted
- 3-4 Tbsp milk
- 3 Tbsp light corn syrup
- ½ tsp vanilla
- ¼ tsp almond extract, or your preferred flavoring
- gel food coloring, pink, blue, and purple
Instructions
Cookies
- In stand mixer fitted with paddle attachment, cream butter.1 cup (226 g) unsalted butter
- Add granulated sugar and beat until light and fluffy.⅔ cup (135 g) granulated sugar
- Add vanilla and stir well.1 tsp vanilla
- Stir in lightly beaten egg yolk. Scrape down sides of bowl as needed to evenly incorporate all ingredients.1 large egg yolk
- In separate bowl, combine flour, cocoa powder and salt.2 cups (270 g) all-purpose flour, ⅓ cup (35 g) dark cocoa powder, ½ tsp salt
- With mixer on medium-low speed, gradually add flour until well-incorporated (you will definitely need to scrape down the sides and the bottom of the bowl several times for this, as the mixture is fairly dry and crumbs tend to settle at the bottom of the bowl).
- Transfer dough to clean surface and use your hands to form it into a cohesive ball.
- Flatten into a disk (about 1" thick), cover with clear wrap, and chill for 30 minutes.
- Preheat oven to 350F and line cookie sheet with parchment paper.
- Once dough has chilled, transfer it to a clean, lightly floured surface and use a lightly floured rolling pin to roll out to about ¼" thickness.
- Lightly flour your star cookie cutters and cut out your shapes, transferring them to ungreased cookie sheet.
- Once you have cut out all of the shapes that you can, be sure to re-combine the scraps and roll out and cut out again to get the maximum number of cookies from your dough.
- Bake on 350F for 10-12 minutes (longer if you are using larger cookie cutters) and allow cookies to cool completely before dipping
Glaze
- In a large bowl, combine sifted powdered sugar, 3 Tbsp milk, and light corn syrup. Whisk until smooth. If mixture is too dry, add additional milk, one teaspoon at a time until mixture can be stirred.3 cups (375 g) powdered sugar, 3-4 Tbsp milk, 3 Tbsp light corn syrup
- Stir in extracts (be sure to taste test to ensure you are happy with the flavor!)½ tsp vanilla, ¼ tsp almond extract
- Glaze should be thick, to test that it is the right consistency drop a few droplets on top of a test cookie. If the glaze remains stiff, it needs to be thinned. If it runs off the cookie, it is too thin and needs more powdered sugar. If it settles down smoothly, it is just right.
- Divide glaze into four small bowls.
- Working with one bowl at a time, use a toothpick (a different toothpick for each color) and dip it into the food coloring bottle and then into the glaze. You want a small pool of food coloring about the size of a mini chocolate chip or two.gel food coloring
- Drag a toothpick through the food coloring and glaze until it is prettily swirled (like a galaxy).
- Holding your cookie at the base, dip the surface of each cookie into the glaze (take a look at your first cookie -- are you satisfied with the pattern? Adjust whorls with additional food coloring as needed).
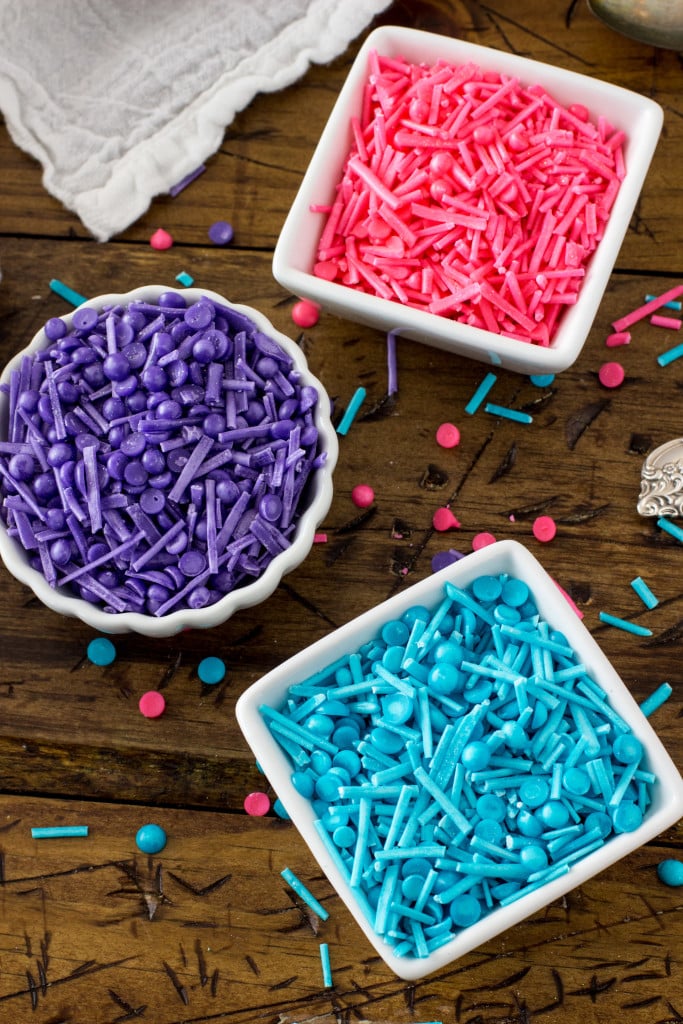
- Optional: Before glaze can harden, immediately after dipping sprinkle cookies with disco dust and silver stars. These make them look extra pretty but are not required for stunning cookies.
- Once the first bowl runs out or the colors become too muddled together from dipping, move onto your next bowl of food coloring (you will probably need to stir as the surface may have begun to harden).
- Repeat steps 5-7 until all cookies have been dipped. Allow them to harden at least 30 minutes (may take longer) for glaze to set. Enjoy!
- Keep uneaten cookies in an airtight container at room temperature.
Nutrition
Nutrition information is automatically calculated, so should only be used as an approximation.
Like this? Leave a comment below!
Recommended Items:
This post may contain affiliate links, which means that if you purchase anything through these links I will get a small commission at no extra cost to you. Please view the disclosure policy for more information.
PIN IT:
You Might Also Like:
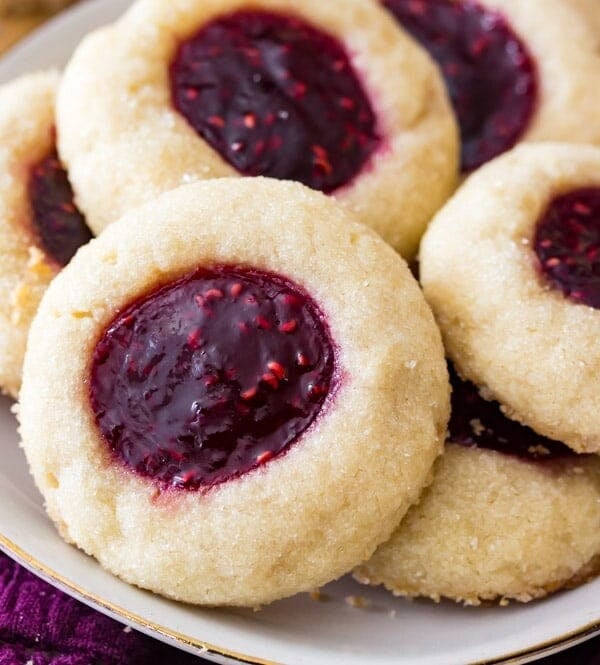
Chocolate Covered Sprinkle Cookies


I just used this technique on my own cookie recipe–they are amazing! Can’t wait to use this approach with a variety of shapes and colors. Thanks!
Yay! So glad you liked the glaze, it’s really so simple, isn’t it!? 🙂
I intend to try these for New Years. Made your nonyeast cinnamon rolls yesterday and they were great. I am sure this one will be as well.
Awesome, I hope you love them, Lana!
Does the glaze dry completely hard or will it be soft? They are so beautiful but I need a hardened icing top!! I look forward to hearing from you 🙂
Hi Madison! It dries completely hard but I would give it a couple hours to set completely if you intend to package them up/stack them. Maybe add an extra tablespoon of powdered sugar in the mix for good measure, too. Hope that helps! Let me know if you have any more questions 🙂
are these soft?
Chewy?
just curious
These are not, the cookies are very similar to a shortbread cookie, more crisp.
I think I am going to try making these as snowflakes instead of stars for the holidays. They are so beautiful! I can’t wait to play in the kitchen 🙂
That sounds great! If you want to use a lighter/non-chocolate cookie instead, you could also use this recipe for the cookie portion: https://sugarspunrun.com/chocolate-covered-sprinkle-cookies/
Hope you love them! 🙂
Such a creative idea!
These cookies look amazing — and your photography is gorgeous! Was wondering if you use Tailwind — because I am starting a new tribe called CHRISTMAS COOKIES and I’d love for you to participate! If you’re interested, send me an e-mail and I’ll invite you! Thanks — these cookies are going on my MUST TRY list this year!
Thank you so much, Lisa! I do use Tailwind, I will send you an e-mail!
Do you know roughly how many cookies this recipe makes? Thank you!
Hi Paula! I would say roughly 3 dozen, though it could vary if you use a larger or smaller cookie cutter, of course. Hope you love them!! 🙂
After decorating can they be placed in freezer?
Would this glaze work for Boeing sugar cookies?? I’ve been trying to find a good glaze and this looks super fun:)
I’m looking forward to making these though 🙂
Hi Bri! I’v only used this glaze on these cookies, but it would definitely work on any stiff cookie that you could otherwise glaze. I hope that helps, and I hope you love the cookies! 🙂
These are AWESOME!! I think I have all the ingredients in the pantry so I will be making with my daughter 🙂 Thank you!
I hope you guys love them!!! Thanks Mindy!
Happy Labor Day
Thank you, Happy Labor Day to you, too!
AHHH! These are so cool!! And so, so pretty. That’s crazy that they’re so easy to make. They look very impressive. 🙂
These cookies are works of art! I am just loving the look of them and I am sure the taste is even better 🙂
Thank you, Medha!
Okay. You are officially my favorite blogger and that is saying… so much. I read so many. These are beautiful!!! I can’t wait to make mediocre versions, haha!
Stephanie you are so sweet! Thank you, I’m so glad you like the cookies and I bet they’ll turn out better than you expect! 🙂
These cookies are beautiful! I recently discovered your blog and there are quite a few recipes I want to try. I’m so glad I found you on Instagram.
Thank you, Annette! I’m so glad that you found my site, too! ☺️☺️