
How to Make Peanut Butter
This post may contain affiliate links. As an Amazon Associate I earn from qualifying purchases. Please read my disclosure policy.
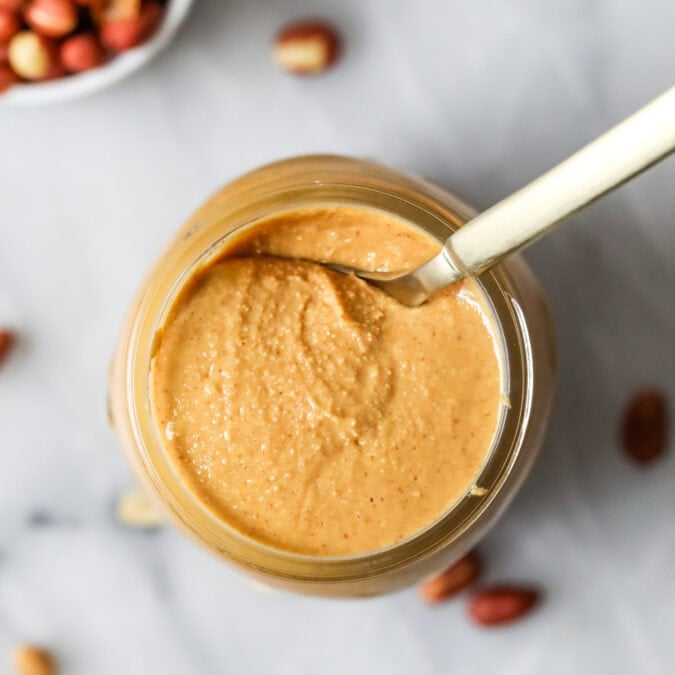
Learn how to make peanut butter with just 2 ingredients and a food processor! You won’t believe how fast and simple it is to make at home. Recipe includes a how-to video!
2-Ingredient Homemade Peanut Butter
It’s no secret that I love baking from scratch. Take a brief look through my recipes and you’ll find homemade versions of so many staples, from homemade Oreos to cheese crackers. This recipe is yet another addition to my growing list, and I am just a *tiny* bit excited about it! Today, I’m sharing how to make peanut butter right in your own kitchen!
What’s to love about it:
- Only 2 ingredients. Just peanuts and salt! No additives like you will find in store-bought peanut butter. I make this for my kids all the time (it makes a tasty PB&J on sourdough bread), and I love knowing exactly what’s in it.
- Customizable. Feel free to add your favorite flavorings or sweeteners, or keep it as-is. It tastes great either way! Roasting the peanuts first really builds flavor without needing any additional ingredients.
- Easily scales up or down. As written, this recipe stores nicely in a pint-sized mason jar. You can easily double or halve it though, depending on how much you need.
- Fast! Less than half an hour from start to finish. And you can use it right away!
What You Need
You can make peanut butter with one single ingredient: peanuts. However, I never make mine without at least a pinch of salt and there are a few other optional ingredients people occasionally add that I’ll talk about further down in the FAQ section. But first let’s talk the basics:
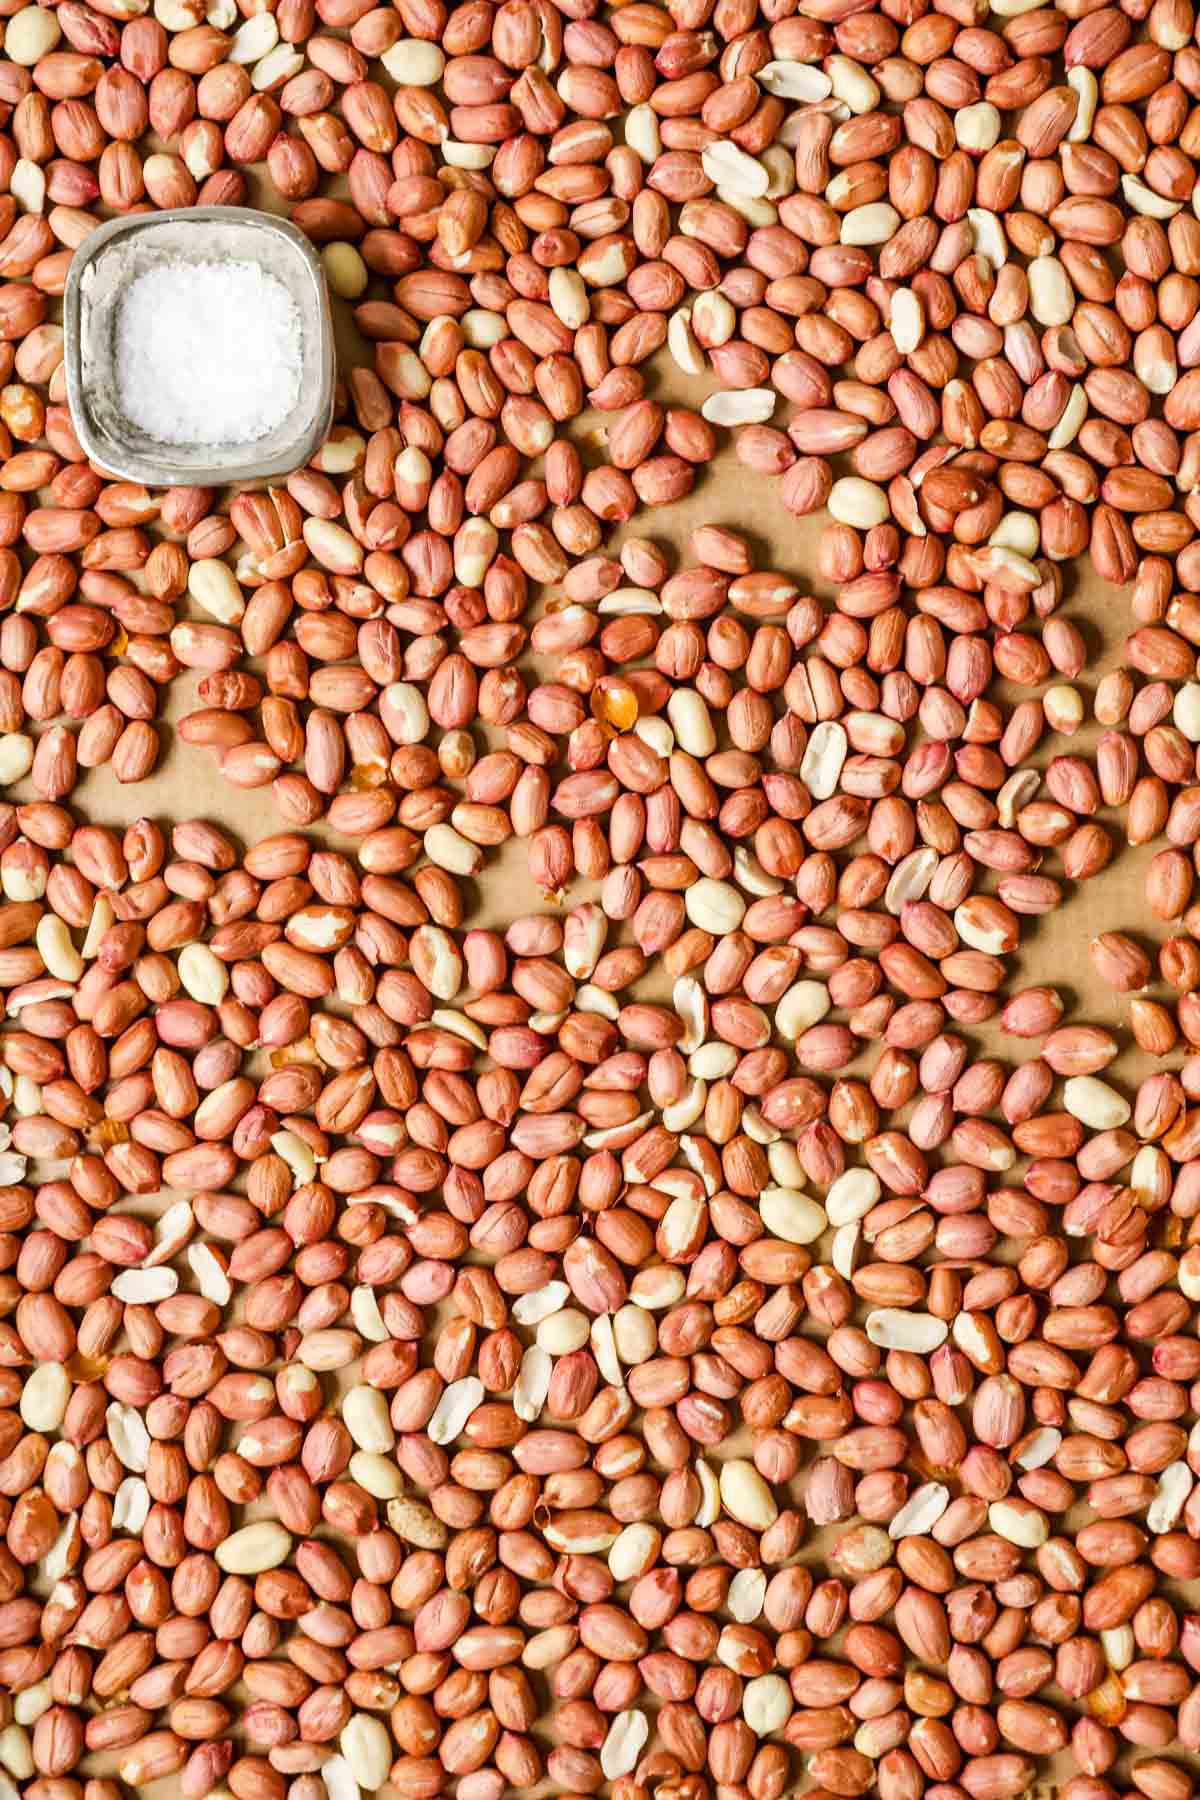
Peanuts & salt. That’s it, that’s all you need. For the salt, I recommend a fine sea salt but regular table salt would be OK.
The best peanuts for homemade peanut butter:
You can use your favorite variety, Spanish, runner, and Virginia peanuts are all common choices but my personal preference is to use Valencia peanuts, as they’re less likely to contain mold. While you can buy pre-roasted peanuts from the store, they often contain other ingredients and I recommend buying raw and roasting them yourself.
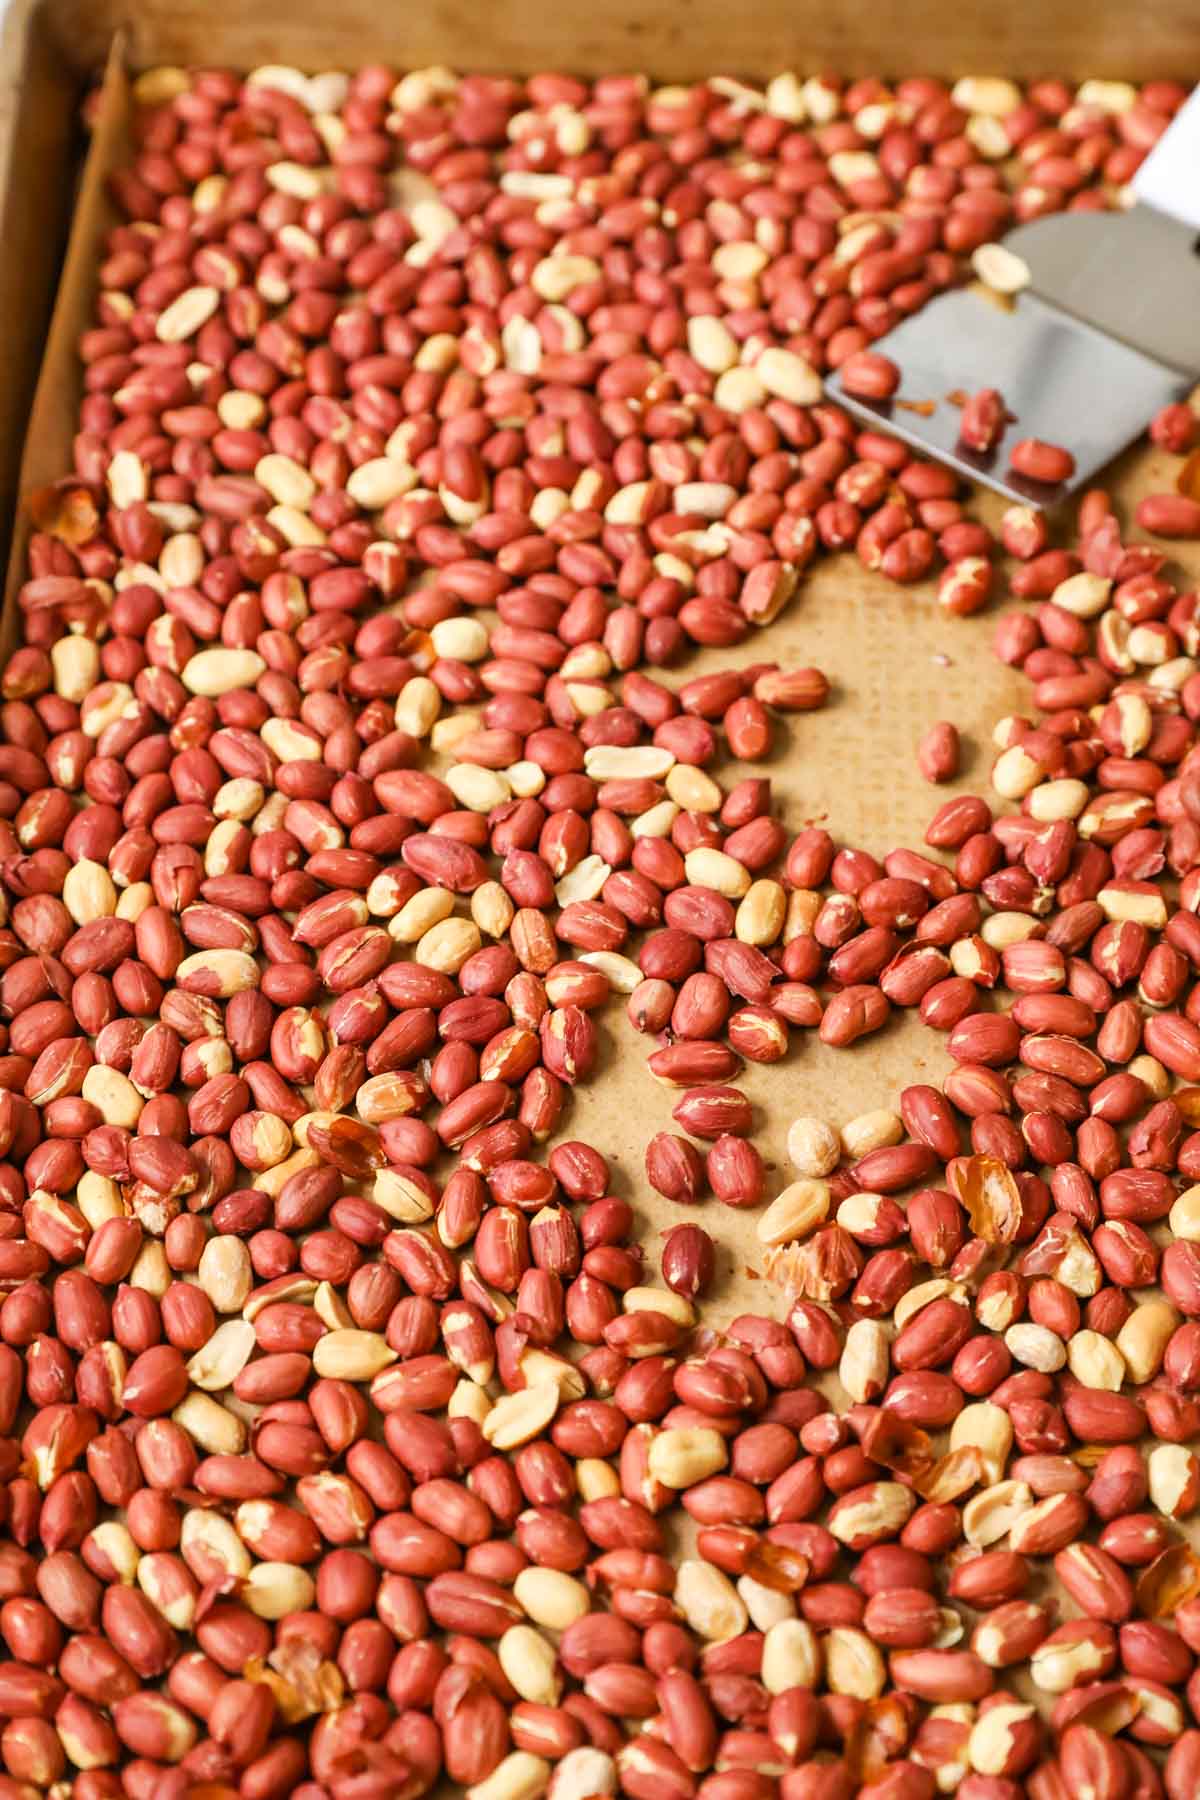
The peanuts I buy aren’t blanched, meaning they still have the tight red skins on them. This is not a problem and will even add more fiber to the peanut butter, but if you want your peanut butter to look smoother/more traditional (I know how important that can be if you have kids!) you can remove the skins. Blanching would probably work fine for this, but I prefer to roast the peanuts, then drop them in a colander and rub them between my hands and swirl them around the collander . The skins fall off and through the colander–it’s very easy! Note: The skins won’t come off easily before roasting, you have to do it after.
SAM’S TIP: Roast your peanuts! While you could make peanut butter without roasting the peanuts first, the flavor won’t be as rich. I like to roast mine a little extra for a deep roast–just keep a careful eye on them so they don’t burn. This process is very similar to my tutorial on how to toast pecans.
This is just an ingredient overview. For the full recipe please scroll down to the bottom of the post!
How to Make Peanut Butter
Roast the Peanuts
Scatter the peanuts on a baking sheet and roast at 350F for 10 minutes. Stir, then bake in 5 minute intervals until the peanuts smell lightly toasted and look a bit darker. Make sure to keep a close eye on them and don’t let them burn!
Remove the skins (Optional)
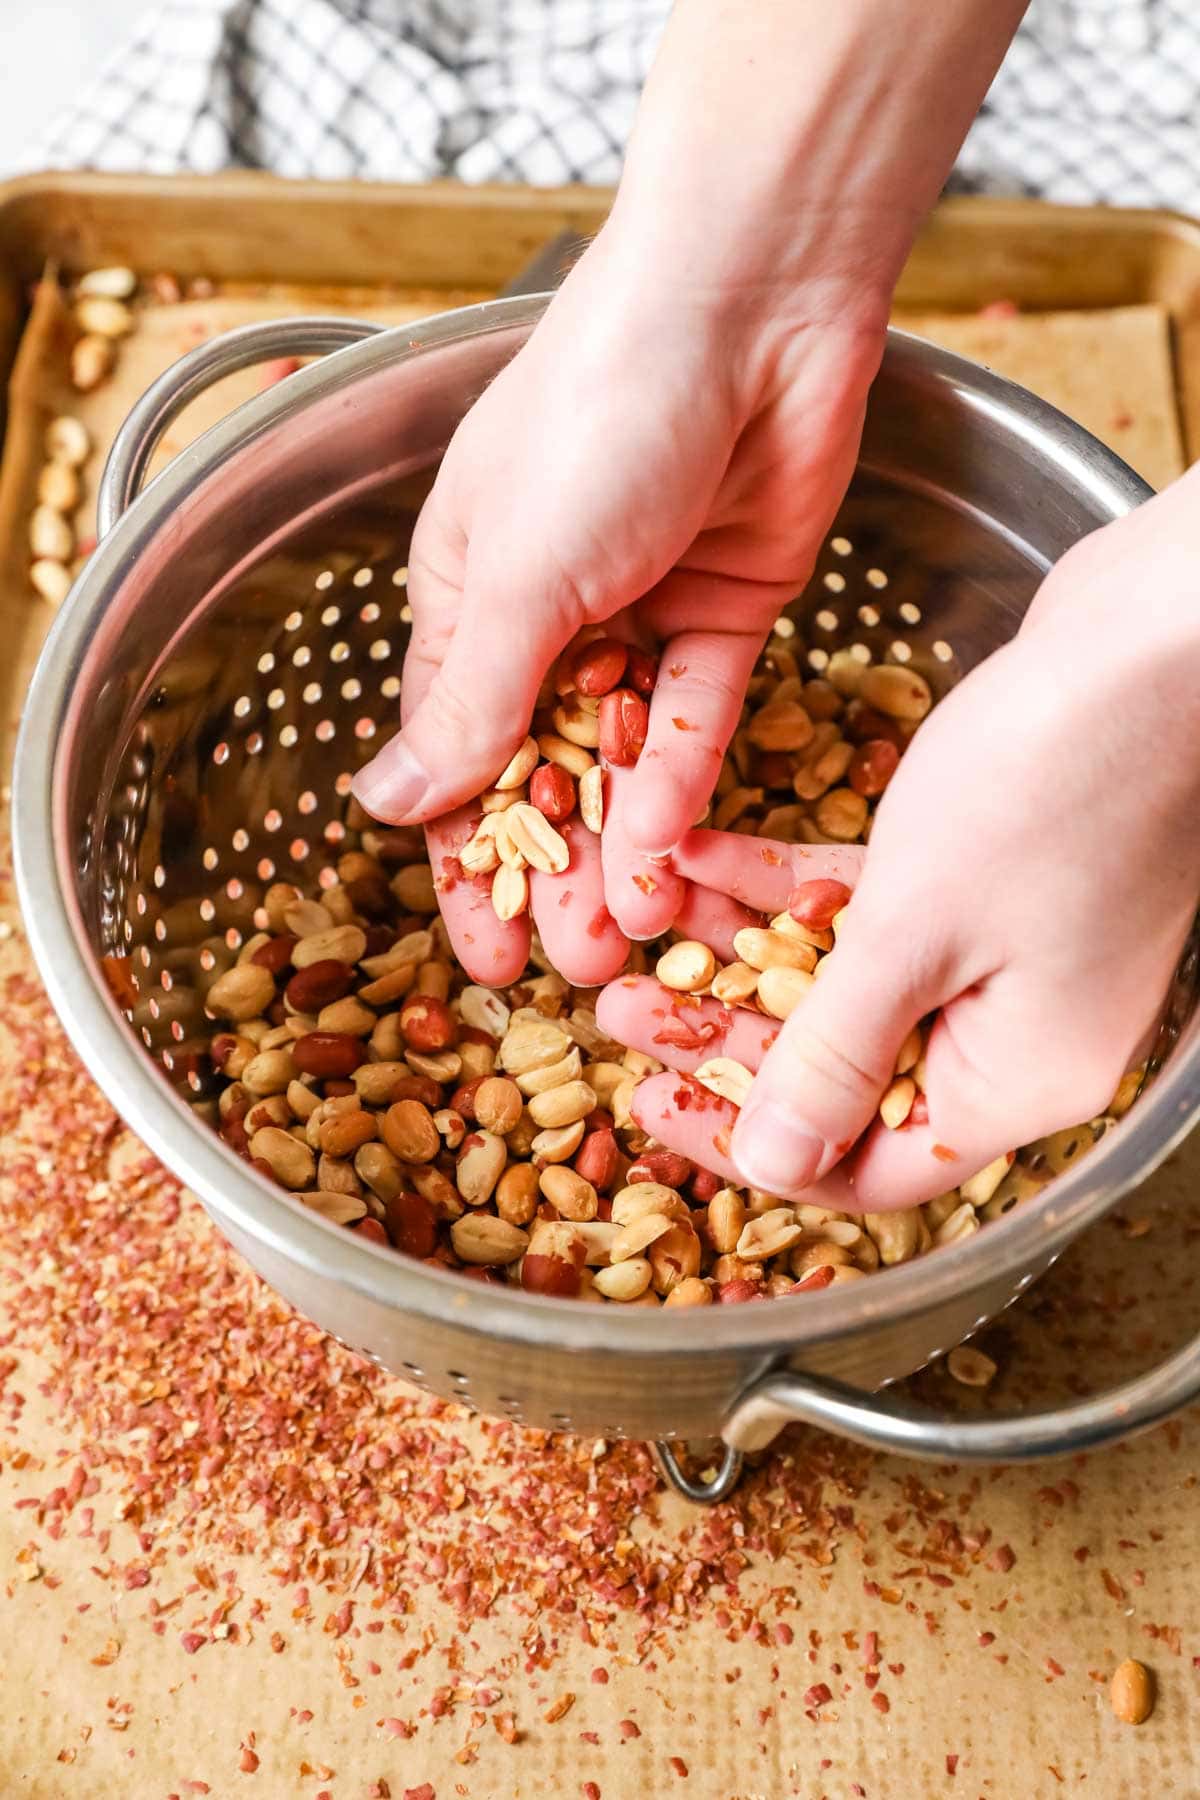
If you want to remove the skins, place the peanuts in a colander and swirl them around with your hands/rub them between your palms and against the side of the colander. The skins should fall off and through the colander. Personally, I just leave the skins on, but if you have picky eaters (I had to take it slow introducing my homemade peanut butter to the kids so I couldn’t alter the appearance too much!) or want a more traditional look, you can remove them.
Sprinkle the peanuts generously with sea salt and I always let them cool before processing them.
Blend
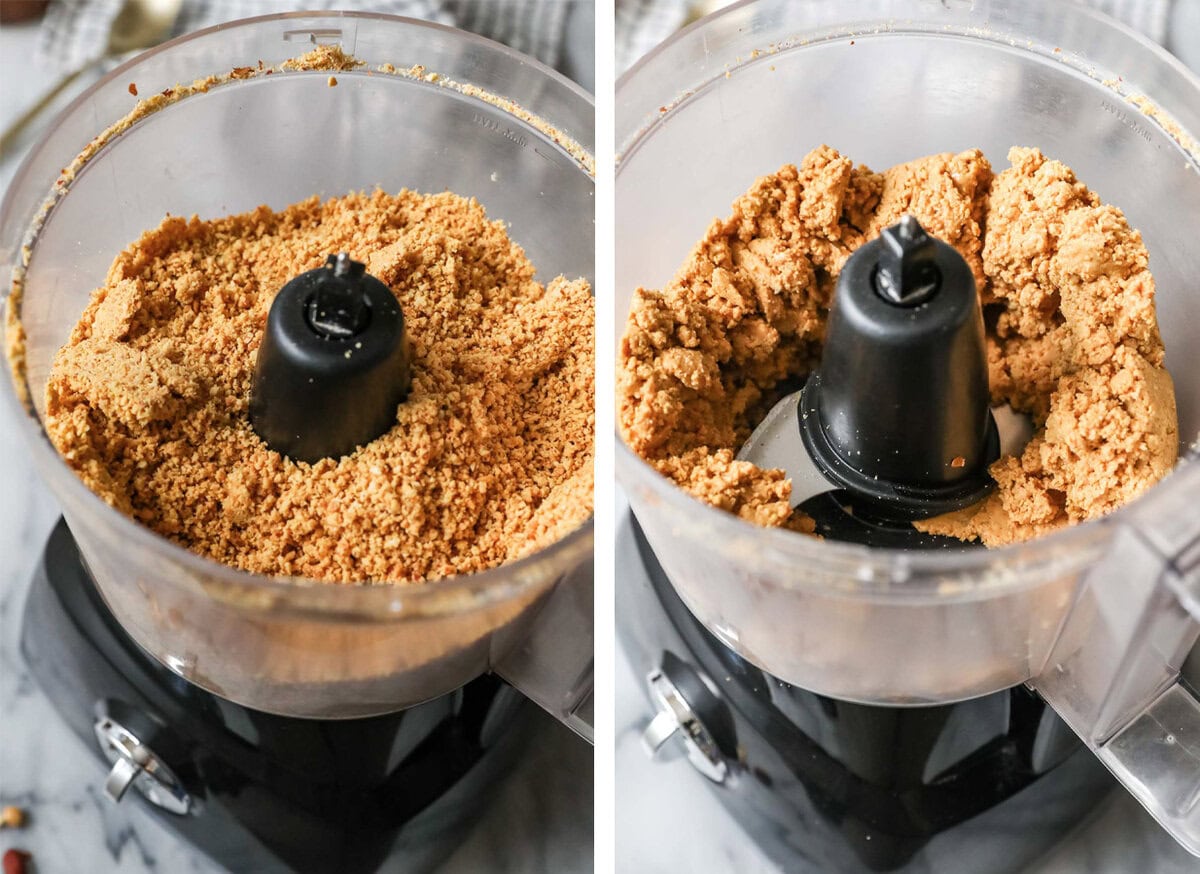
Add the peanuts to your food processor and pulse in 1-second intervals. The mixture will be dry and powdery at first but keep going! It’ll change from powdery to clumpy but will still seem too dry — just keep going!
Finish the job

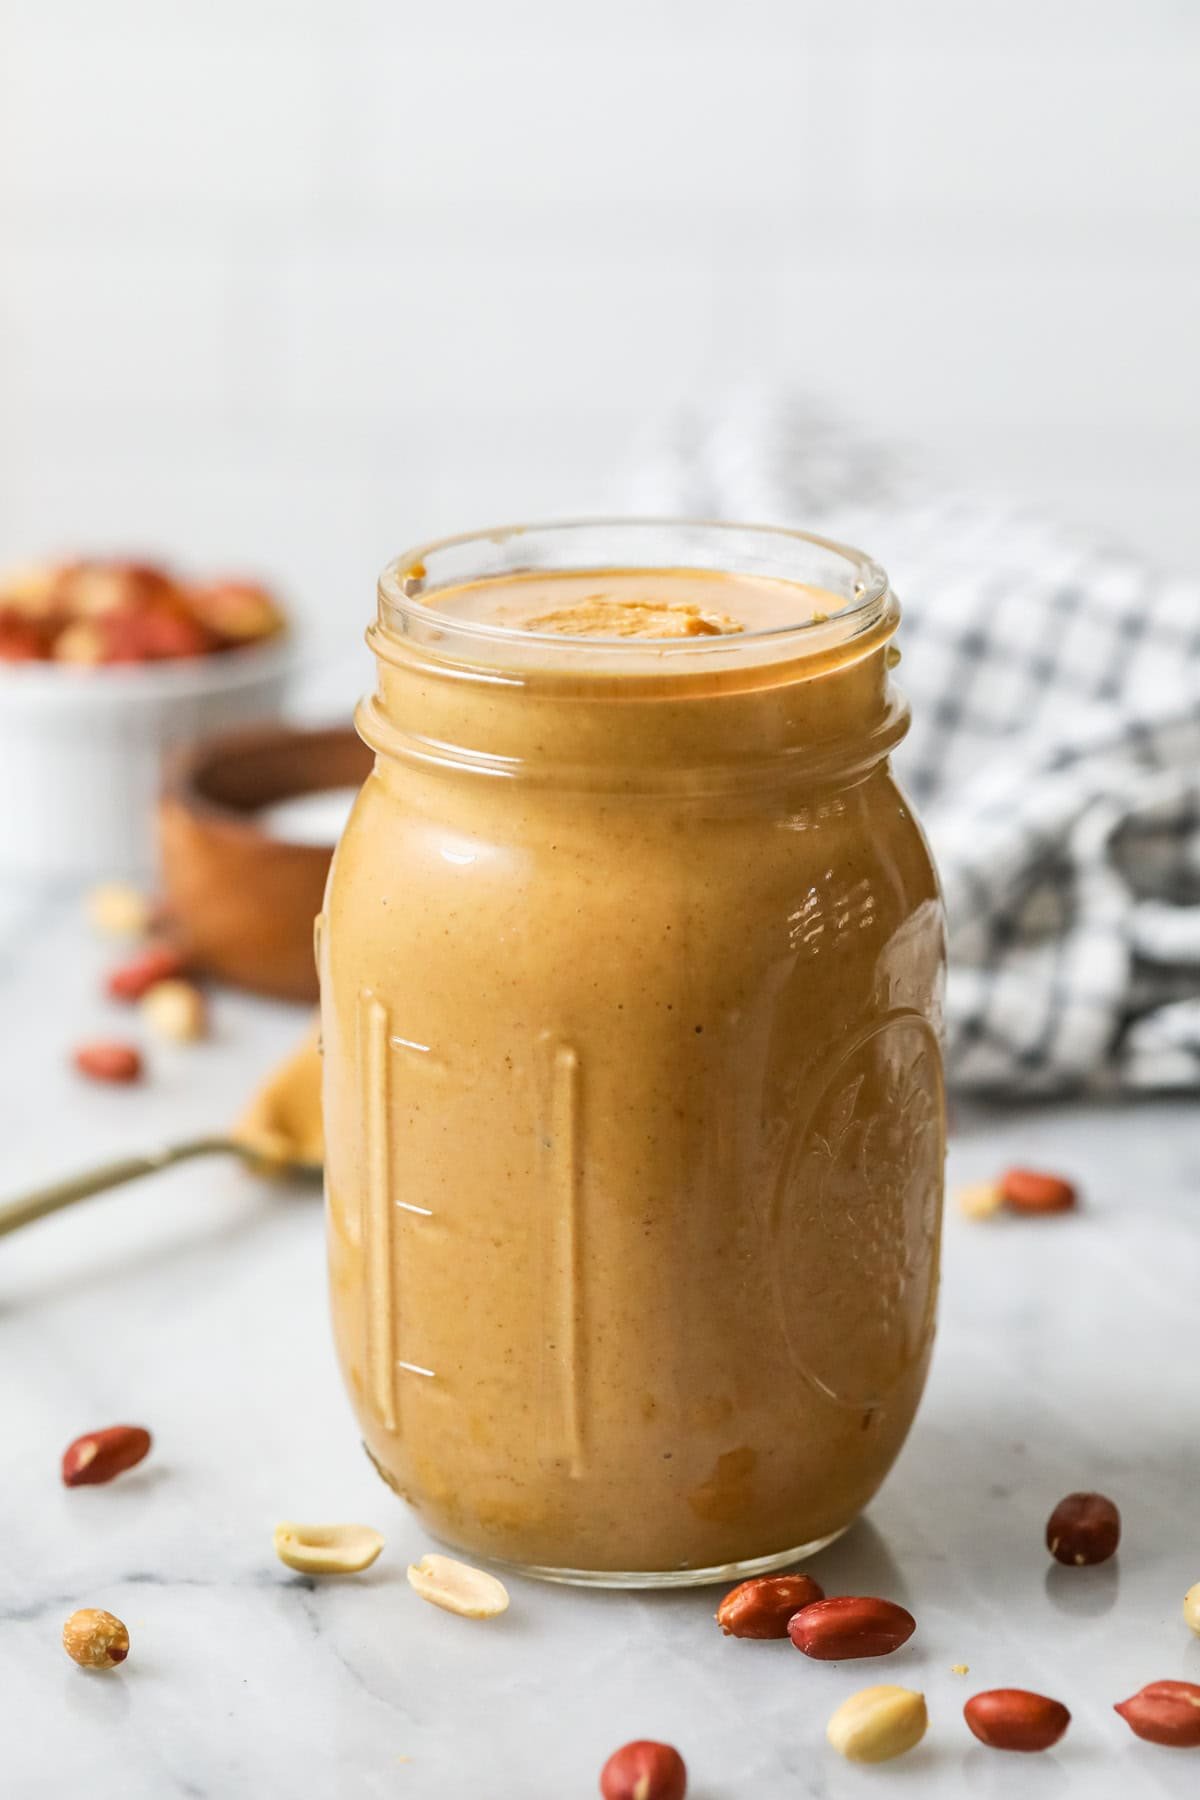
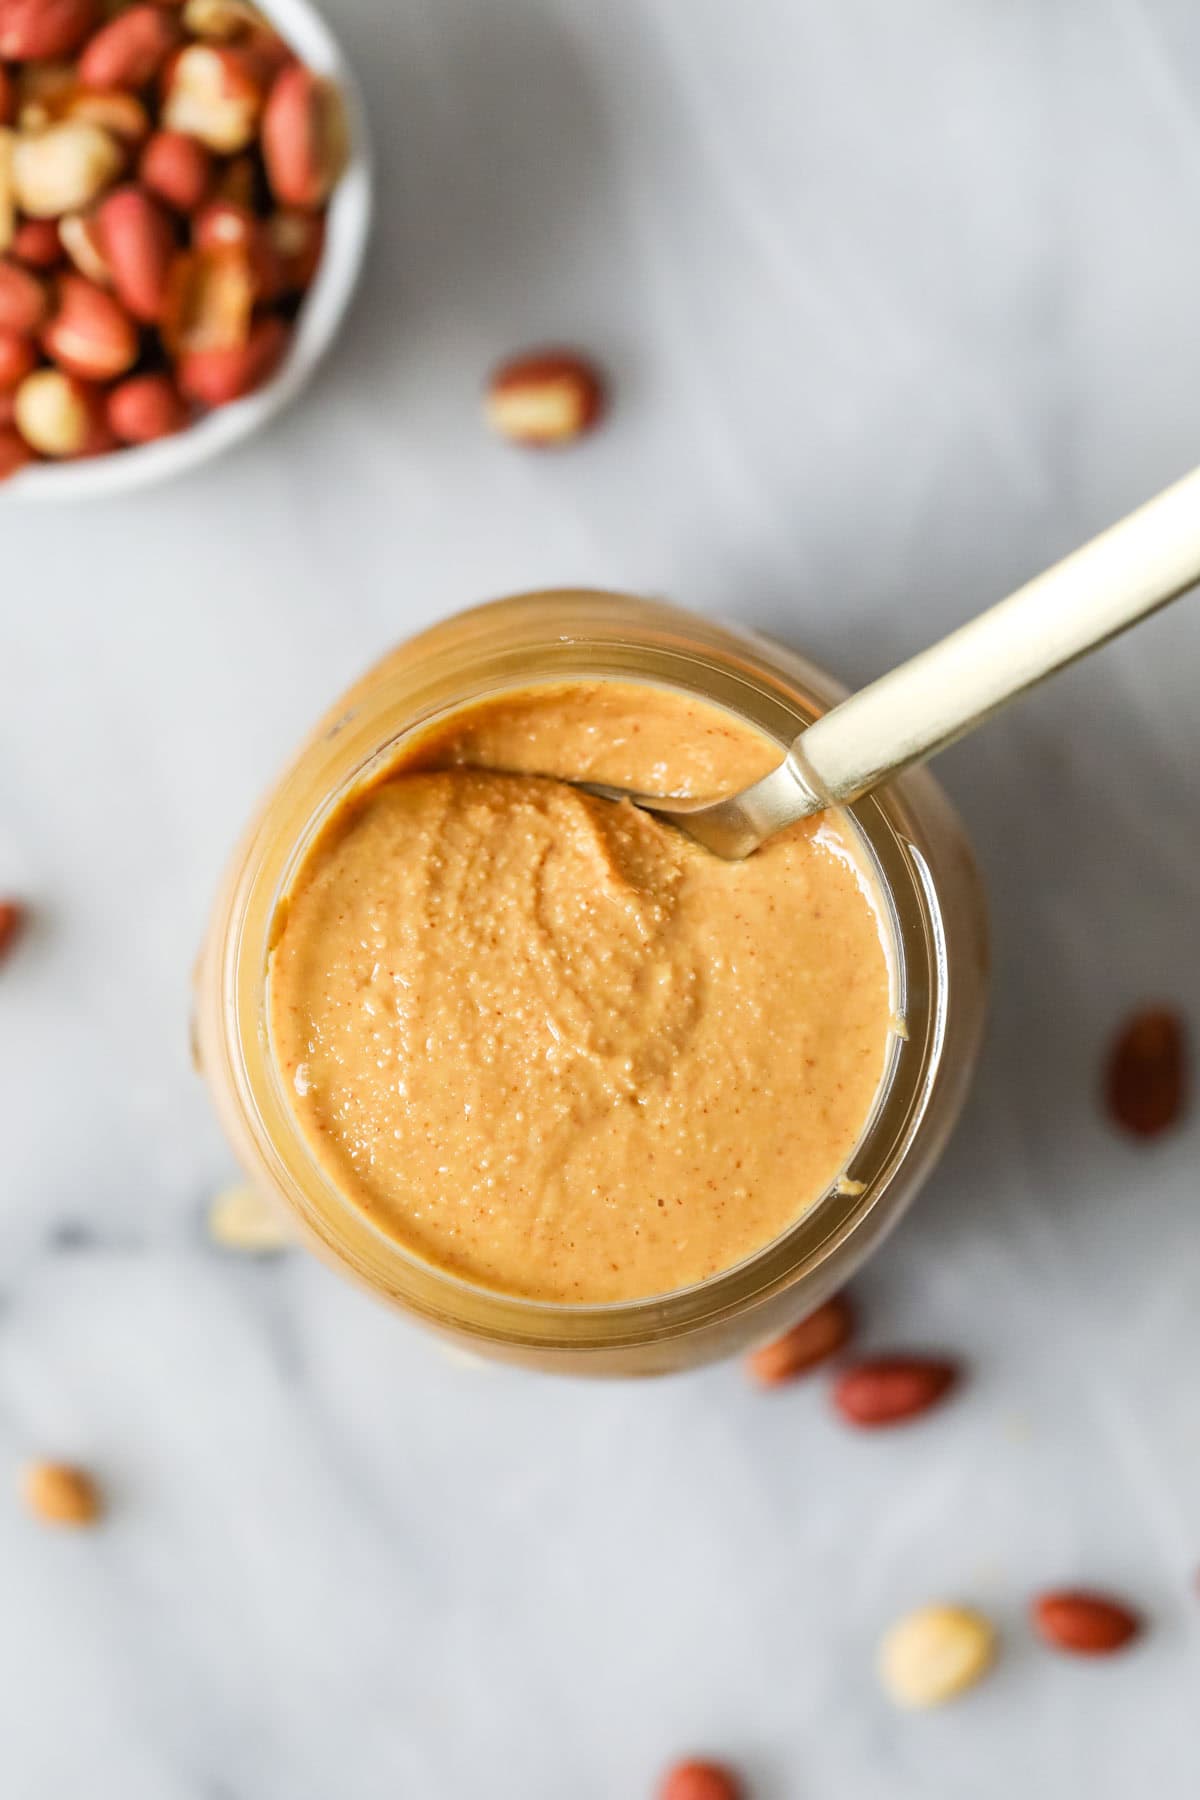
Once the peanuts become clumpy, blend continuously (so no need to pulse) until smooth. It won’t seem like the peanut butter will come together at first, but just keep blending and it will reach the proper consistency (it may not be completely 100% smooth, but it’ll be close and should be as smooth as any “natural” peanut butter in the store). Do NOT add water–this will make it more likely to spoil.
Taste-test and add more salt if needed. If you want to add any other flavorings (like a sweetener) blend these in here as well.
SAM’S TIP: If you want to make a crunchy peanut butter, reserve some of the peanuts for tossing in at the end. You will only need to pulse them briefly to distribute them through the peanut butter.
Frequently Asked Questions
While homemade peanut butter is a delicious and less-processed and more whole ingredient than traditional store-bought options, it’s not always ideal for baking. Many recipes rely on the added ingredients in store-bought peanut butter to work properly (like my peanut butter cookies or peanut butter cheesecake), so it won’t always work.
That being said, I have successfully used it to make puppy chow, so I think it should work fine in a lot of no-bake recipes.
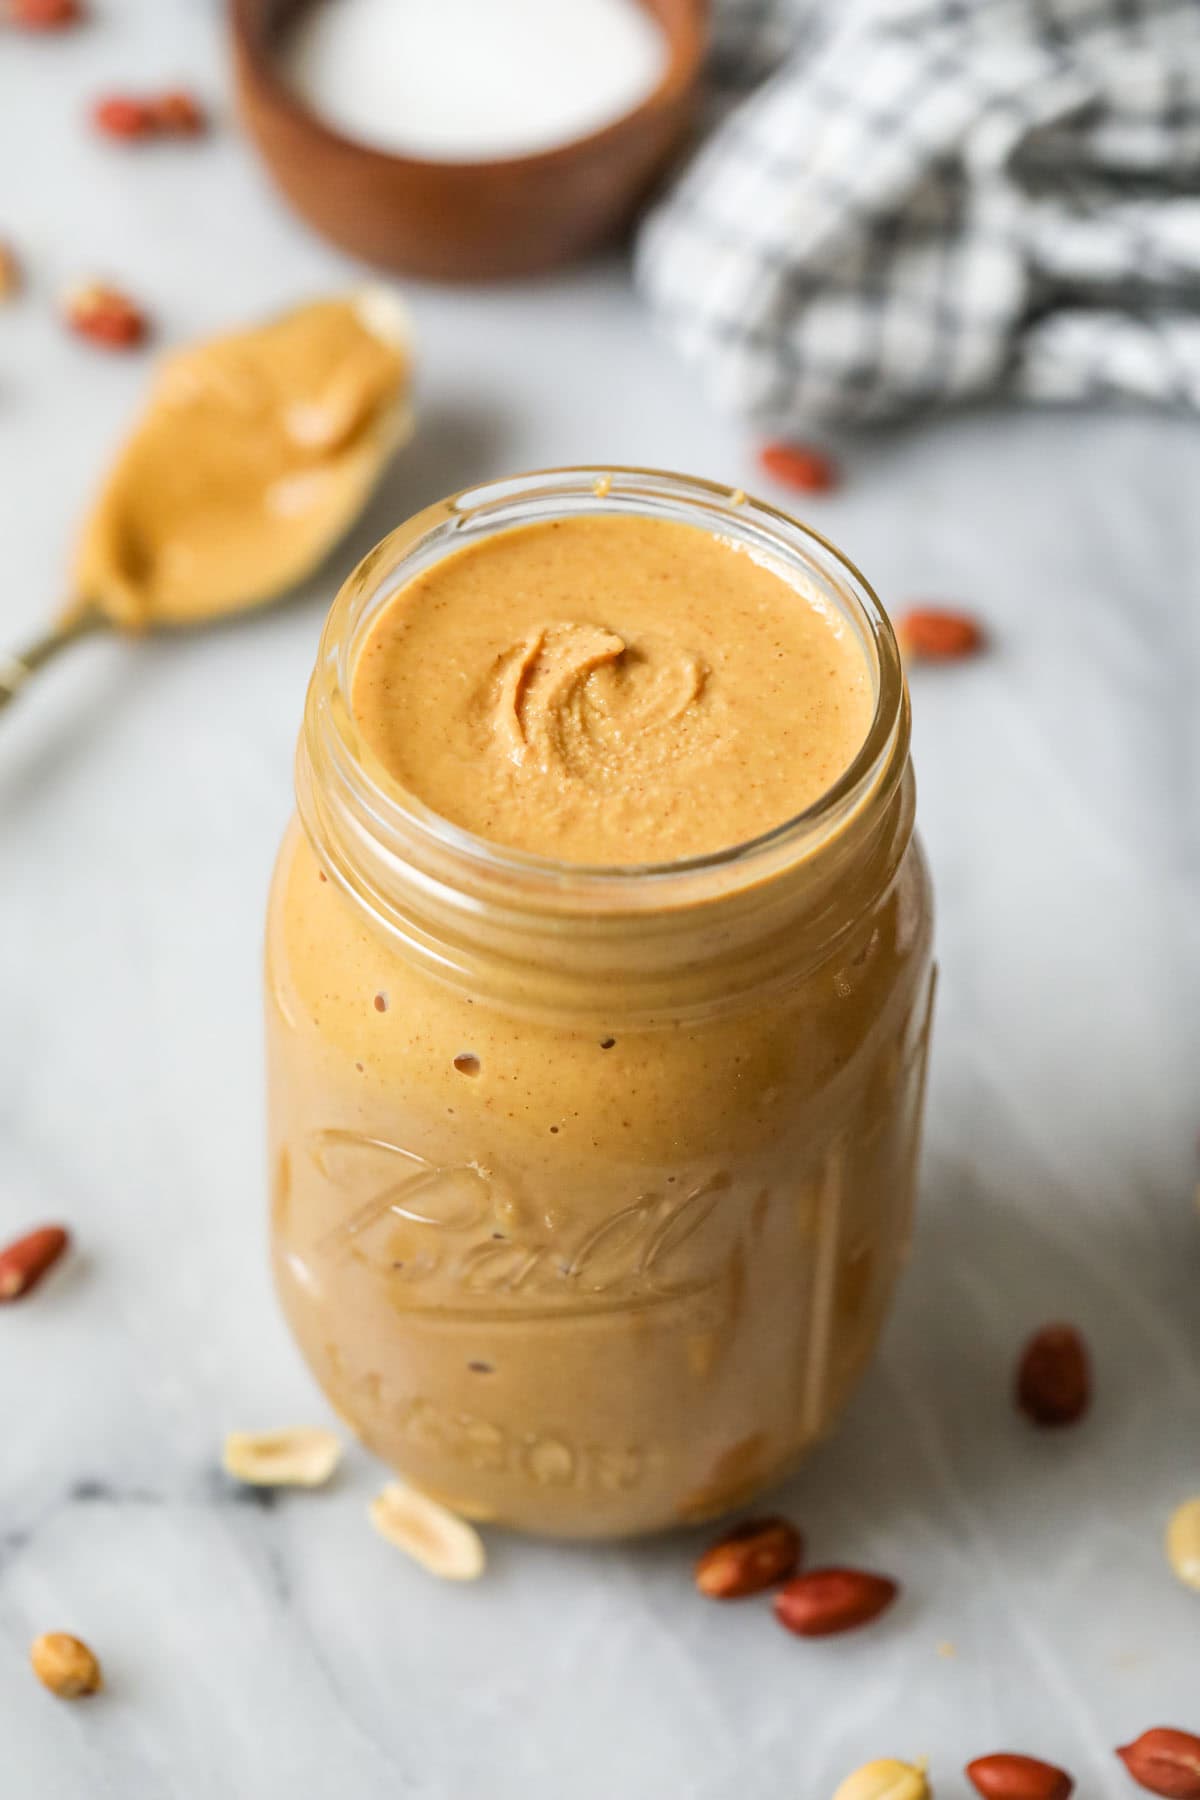
If you want to lightly sweeten it with a touch of honey or maple syrup, feel free. For flavor, a bit of vanilla extract, cocoa powder, or even ground cinnamon works nicely. You can also reserve a few peanuts and add them at the end for a chunky peanut butter.
This recipe will last for a few months in the fridge or up to two weeks at room temperature. I usually recommend the fridge, since most people won’t finish a whole jar in two weeks (my kids do but I think we may not be typical!).
We make this all the time in my house so I hope it’s helpful to you!
Enjoy!
Let’s bake together! Subscribe to my newsletter to be notified of all the newest recipes, and find my free recipe tutorials on YouTube 💜
How to Make Peanut Butter
Equipment
Ingredients
- 3 cups (480 g) raw peanuts
- Sea salt
Instructions
- Preheat oven to 350F (175C).
- Spread peanuts over the baking sheet in an even layer. Transfer to center rack of 350F (175C) preheated oven and bake for 10 minutes. After 10 minutes, stir peanuts on the baking sheet and return to the oven and bake for another 10 minutes. If needed, continue to bake in 5 min intervals until they smell lightly roasted and are slightly darkened in color.3 cups (480 g) raw peanuts
- Remove from oven and sprinkle with sea salt. Allowing peanuts to cool before blending isn’t mandatory, but I prefer to do so as I don’t like to put hot peanuts in the plastic basin of my food processor.Sea salt
- Place peanuts in basin of food processor.
- Pulse the peanuts repeatedly in 1-second intervals. The mixture will become dry and crumbly first, then will become more stiff and begin to clump together as you pulse. Switch from pulsing to blending continuously and continue to blend until peanut butter has reached a smooth, lump-free consistency. Store in an airtight container (I recommend a pint-sized mason jar!).
Notes
Crunchy peanut butter
To make crunchy peanut butter, reserve a handful of peanuts until you are done blending, and then throw in at the end and pulse a few times to break up the peanuts.Removing the skins (for a more uniform peanut butter)
Oftentimes peanuts come blanched/without the red skins on. If yours don’t, there is no need to remove the skins (they actually add fiber) but if you want to, you can do so. I recommend doing so after baking. Let the peanuts cool until then toss them in a colander and use your hand to roll them around the bowl and the skins will come right off. I demonstrate this in my video.Storing
Homemade peanut butter will keep in an airtight container at room temperature for up to 2 weeks or in the refrigerator for 2-3 months.Nutrition
Nutrition information is automatically calculated, so should only be used as an approximation.
Like this? Leave a comment below!


Thank you for the great peanut butter recipe. I love to make food for my children and this one is perfect. I have used raw peanuts and baked them. I have also used unsalted peanuts from the grocery store and they worked just as well. Next time I’ll try adding a bit of raw honey just to be different. Thanks again.
I’m so glad you enjoyed it so much! 🙂
I’m making this recipe tomorrow and I was wondering if I could use Redskin peanuts , as they have a slightly different taste to normal nuts? I’ll update as soon as I’ve made this recipe!
Hi Ivy! Redskin peanuts should work fine. ☺️
This recipe is SO much better than store-bought! I love using different kinds of nuts, like cashews and almonds, to change it up. It’s even better with a splash of olive oil for some extra flavor. So good and addictive! Doesn’t compare to Jif!
I’m so happy you enjoyed it, Stella! Thank you for commenting, I appreciate it 🙂