
Make-Ahead Dinner Rolls
This post may contain affiliate links. As an Amazon Associate I earn from qualifying purchases. Please read my disclosure policy.

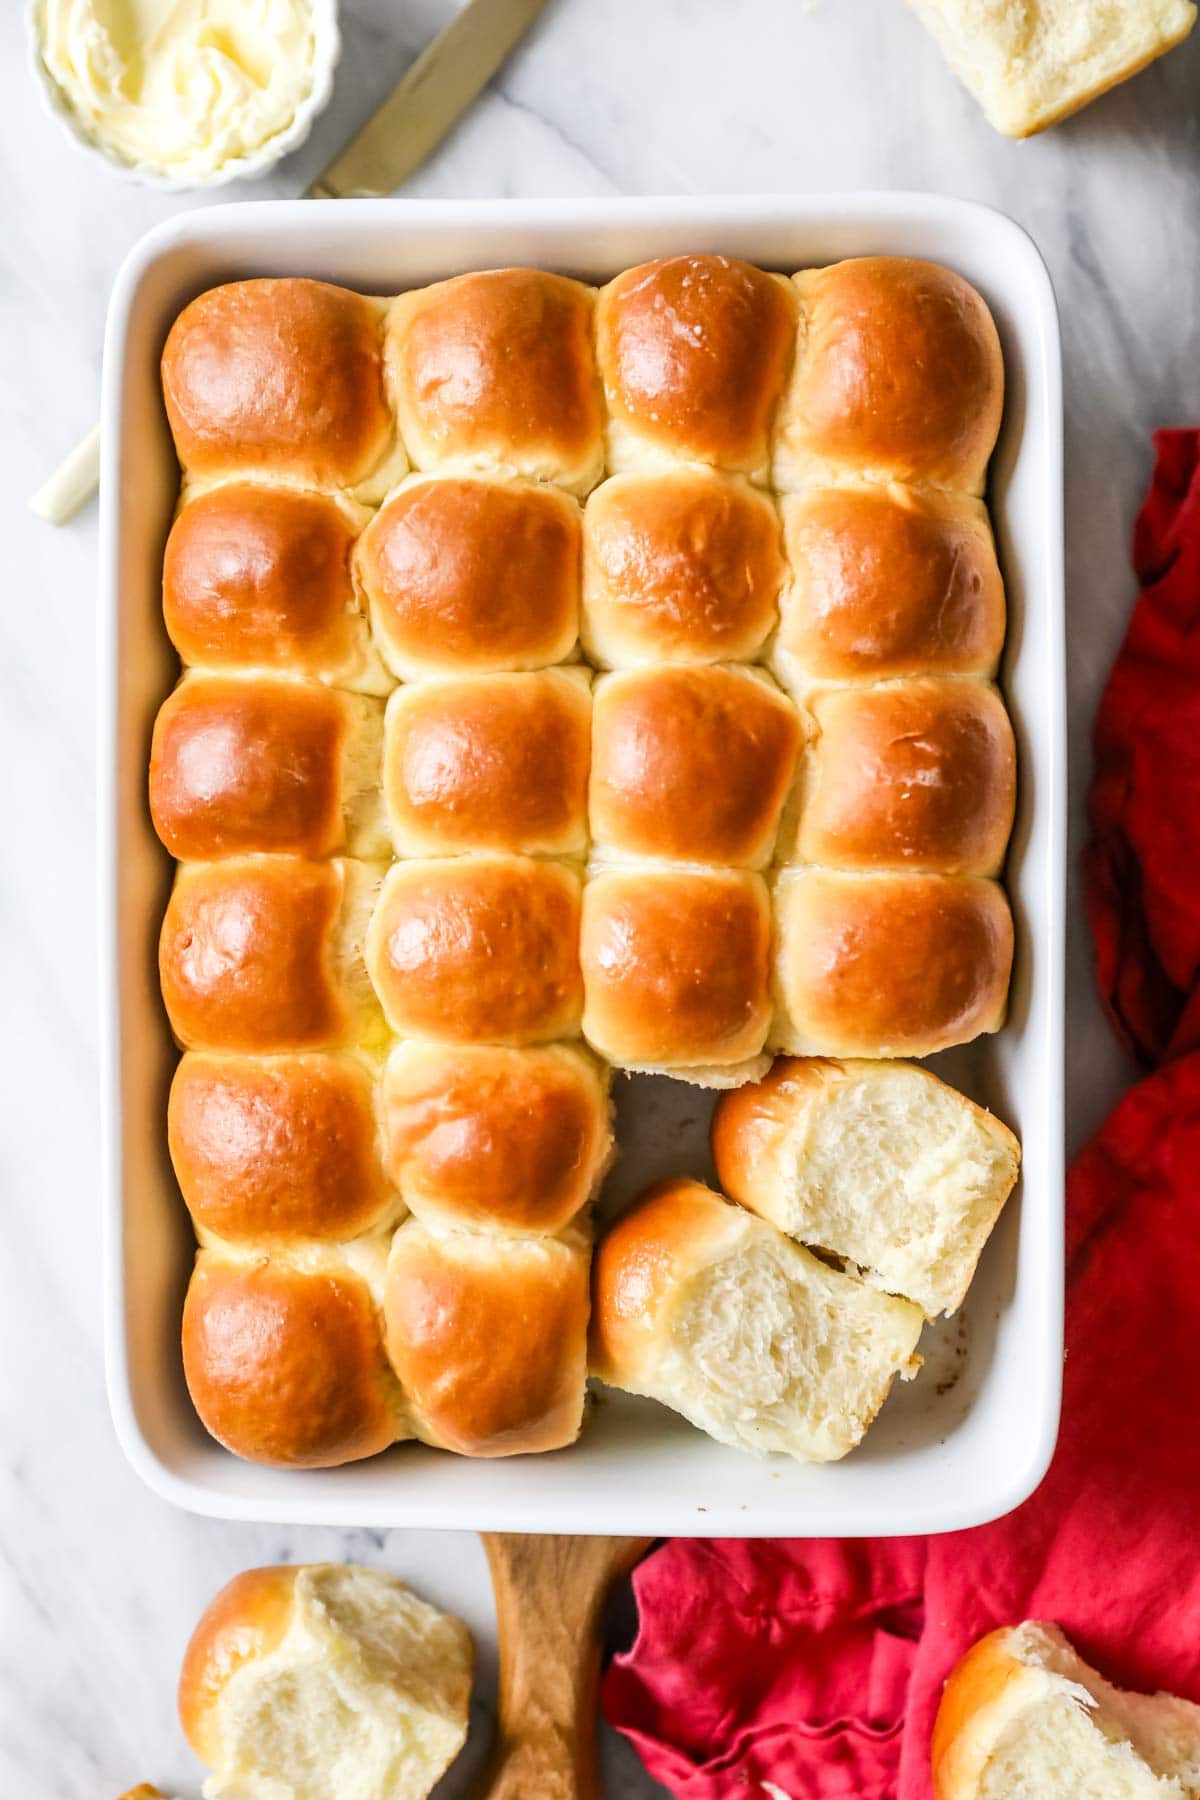
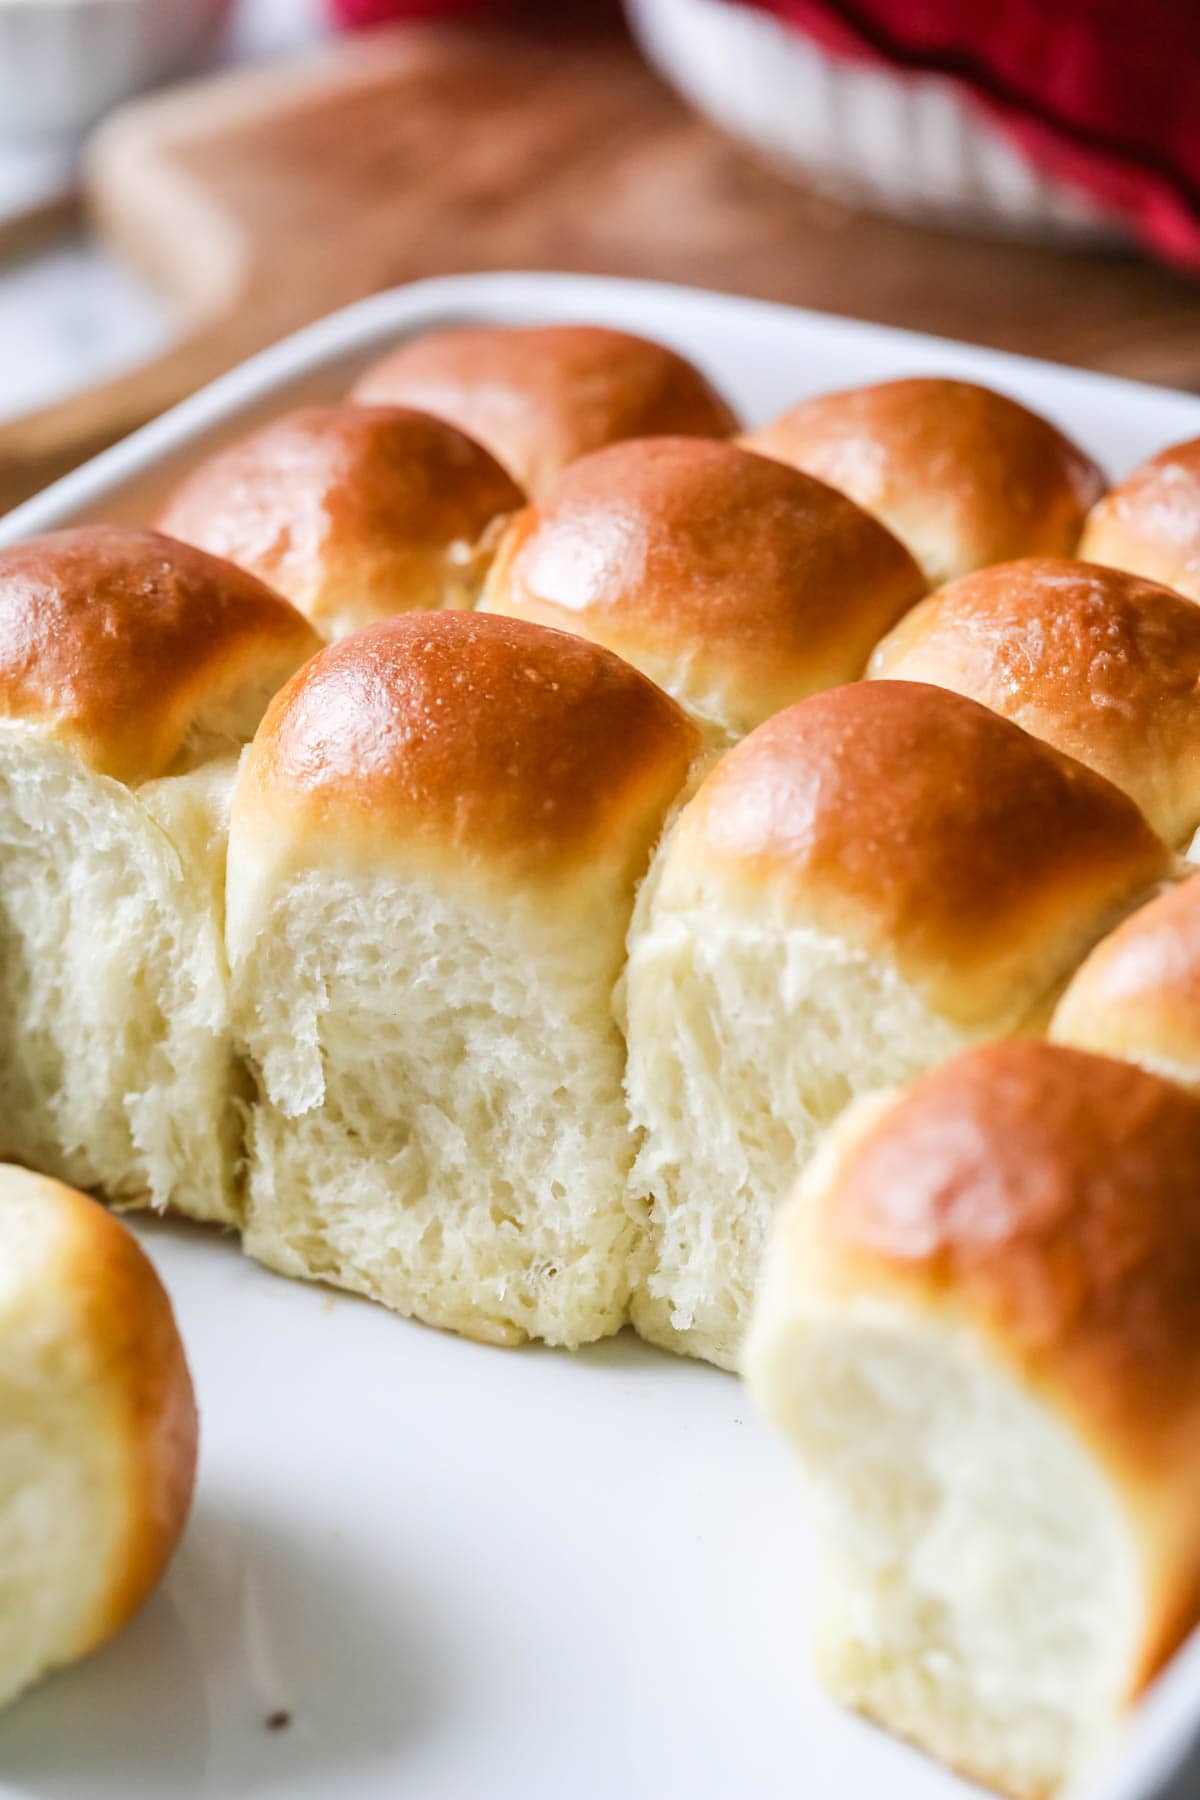
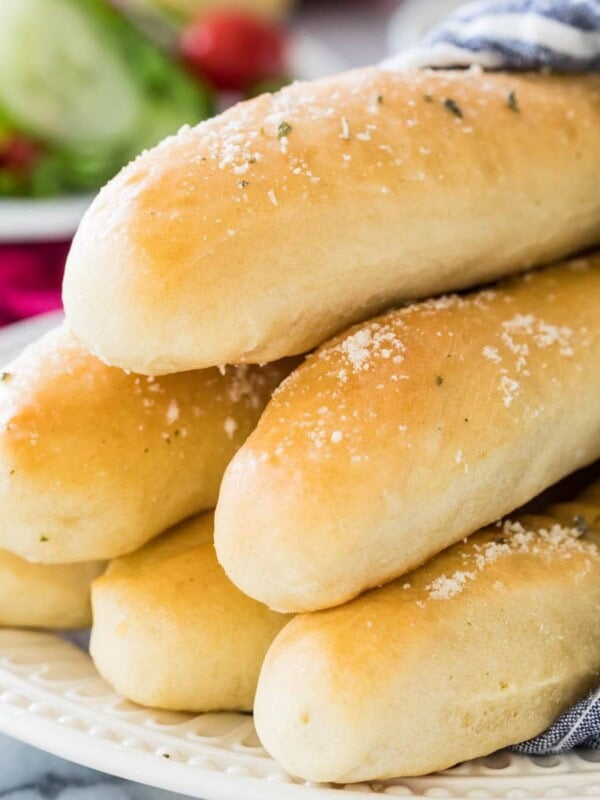
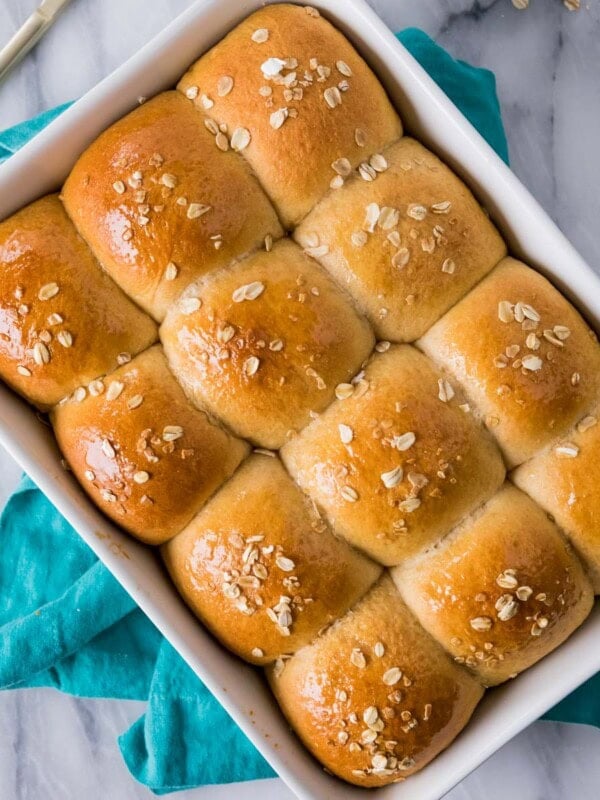
These soft, fluffy dinner rolls are the perfect companion to your holiday dinner (or any dinner)! My version can be prepped in advance or baked the same day. They bake up with a beautiful golden brown color and incredibly soft texture. So much better than store-bought!
Plush, Golden Brown Dinner Rolls–The Easy Way!
Today’s dinner roll recipe is perfect for people who want warm-from-the-oven dinner rolls without the last-minute scrambling.
The beauty of this recipe is that you can do all the heavy lifting in advance (but I still include options to bake the rolls same day, if preferred). Similar to my overnight cinnamon rolls, they are equally pillowy soft and tender if allowed to rest overnight or if baked the same day, so take your pick!
Be prepared for everyone at the dinner table to fight over who gets to pull out the first roll–and be even more prepared for the whole batch to be gone in a matter of minutes (especially if you serve them with honey butter!). They’re that good!
What You Need
You can make these gorgeous rolls with just 8 ingredients! Let’s talk about the important ones before we get started.
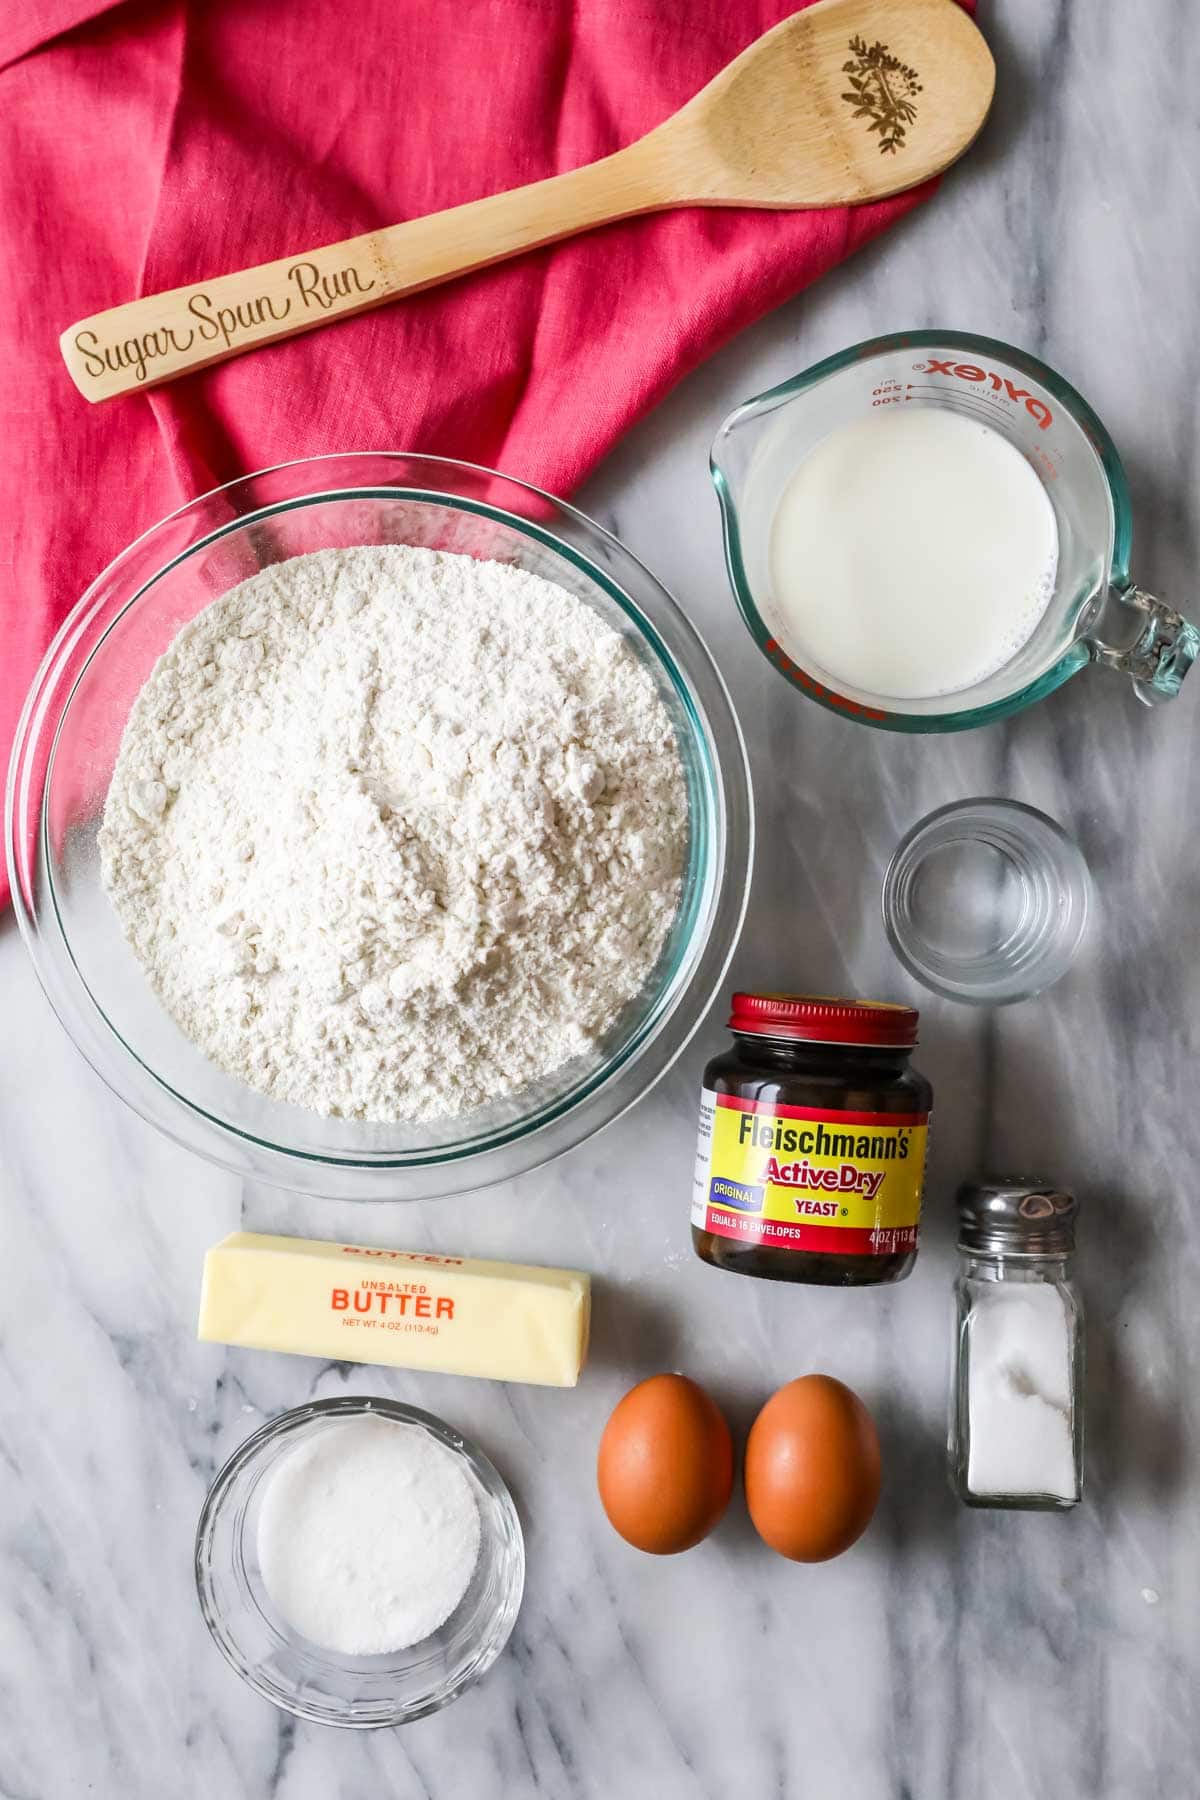
- Bread flour. Bread flour is a better choice than all-purpose as it yields a more chewy roll, which is exactly why I recommend it here (and in my pizza dough and sourdough). Note that I include a range for the flour here; this because yeast doughs can come together differently depending on the kitchen, so you may need more or less than a standard measurement. You’ll know your dough has enough flour when it starts to cling to itself and pull away from the sides of the bowl.
- Yeast. Stick with active dry yeast and make sure it’s fresh. If your yeast doesn’t foam after 5-10 minutes in the warm milk/water/sugar mixture, it’s likely dead and you will need to start over. Do not proceed with the recipe if your yeast doesn’t bloom! And if you’re looking for an instant yeast version, see my other dinner roll recipe instead.
- Butter. We’ll use unsalted butter and in the dough and brush salted butter on top of the rolls after they finish baking. The butter topping is optional, but I highly recommend it for best flavor (and don’t think that stops me from adding a giant slice of butter to my roll, either, we’re big butter fans around here 😉).
- Milk. I prefer to use whole milk in my baking. If you need to substitute a lower fat or non-dairy milk, you can, but your rolls might not be as tender.
- Sugar. We’re using a small amount of sugar here, but not enough to make the rolls distinctly sweet (we want dinner rolls, not a sweet bread). Instead, the sugar will feed our yeast, enrich the dough, and encourage soft, tender results.
SAM’S TIP: Make sure your milk and water mixture isn’t too hot or cold, otherwise your yeast may not bloom properly. Aim for 115F or 46C.
This is just an overview of the ingredients I used and why. For the full recipe please scroll down to the bottom of the post!
How to Make Make Ahead Dinner Rolls
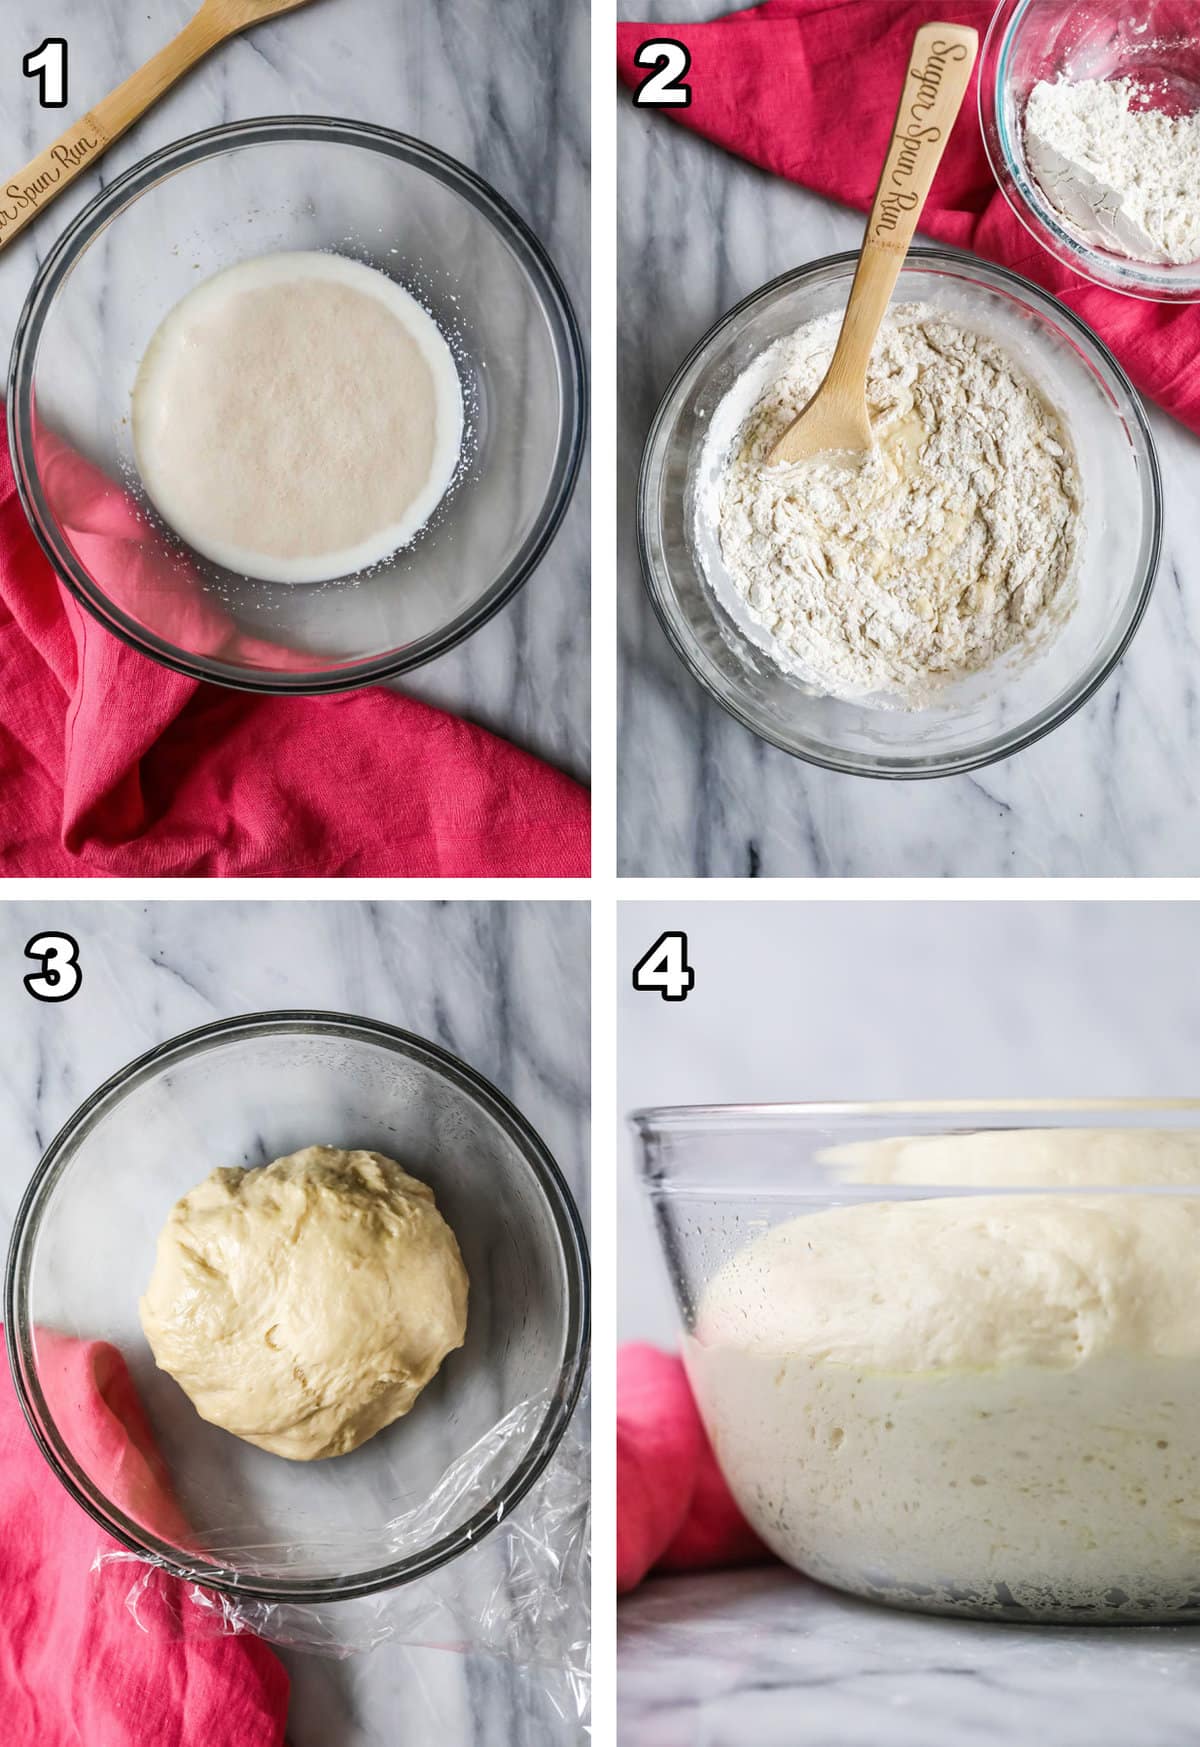
- Heat the milk and water to 115F (46C), then pour into a large bowl. Stir in the yeast, add one teaspoon of the sugar, and let sit until foamy. If your mixture doesn’t foam, you will need to start over with fresh yeast!
- Stir in 2 cups of the bread flour as well as the remaining sugar, salt, melted butter, and eggs. Once this mixture is well combined, gradually add more flour until the dough clings to itself and pulls away from the sides of the bowl.
- Knead the dough on a lightly floured surface until it is smooth and elastic, adding more flour if needed. Place in a greased bowl and turn to coat all sides in oil.
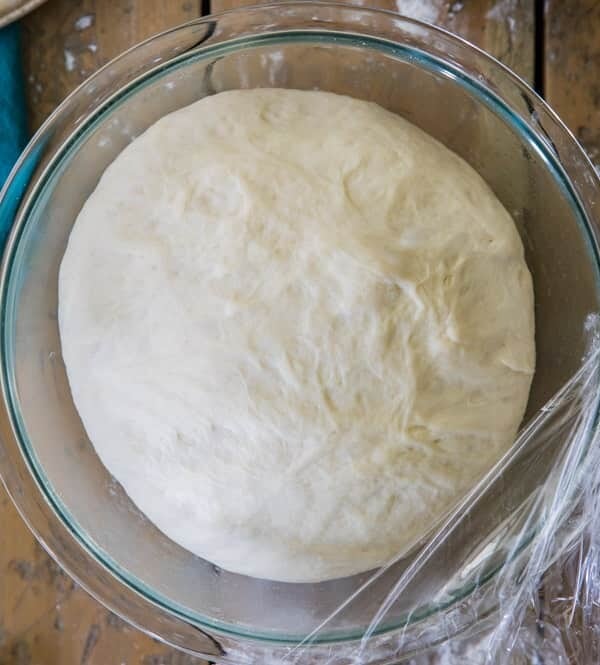
- Cover the bowl with plastic wrap and let the dough rise in a warm spot until it doubles in size.
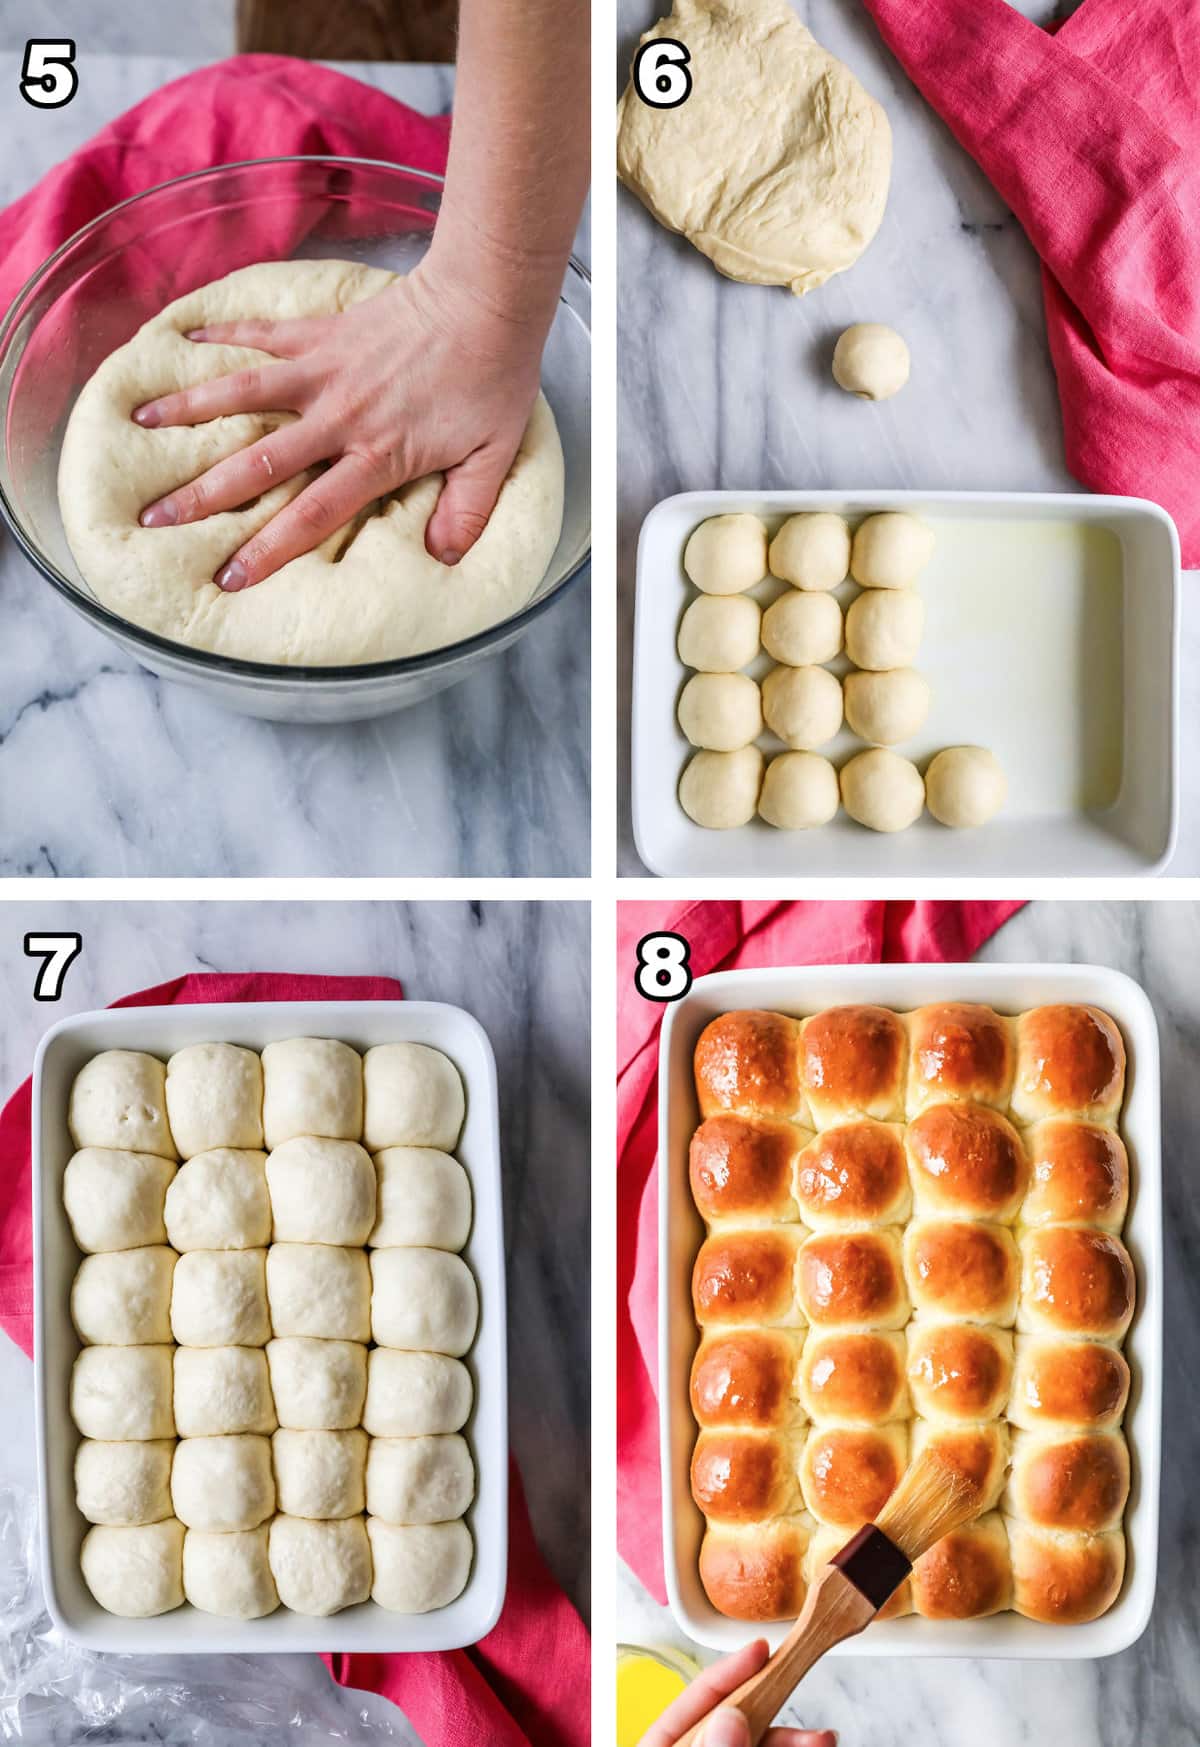
- Deflate the dough with your hands, then divide into 24 equal portions on a lightly floured surface.
- Form the dough into balls. To make them nice and smooth, pull down the sides to create tension before placing in the baking dish.
- Cover the rolls with plastic wrap and place in the fridge overnight. When you are ready to bake, remove them from the fridge (leave them covered) and let sit at room temperature while your oven preheats.
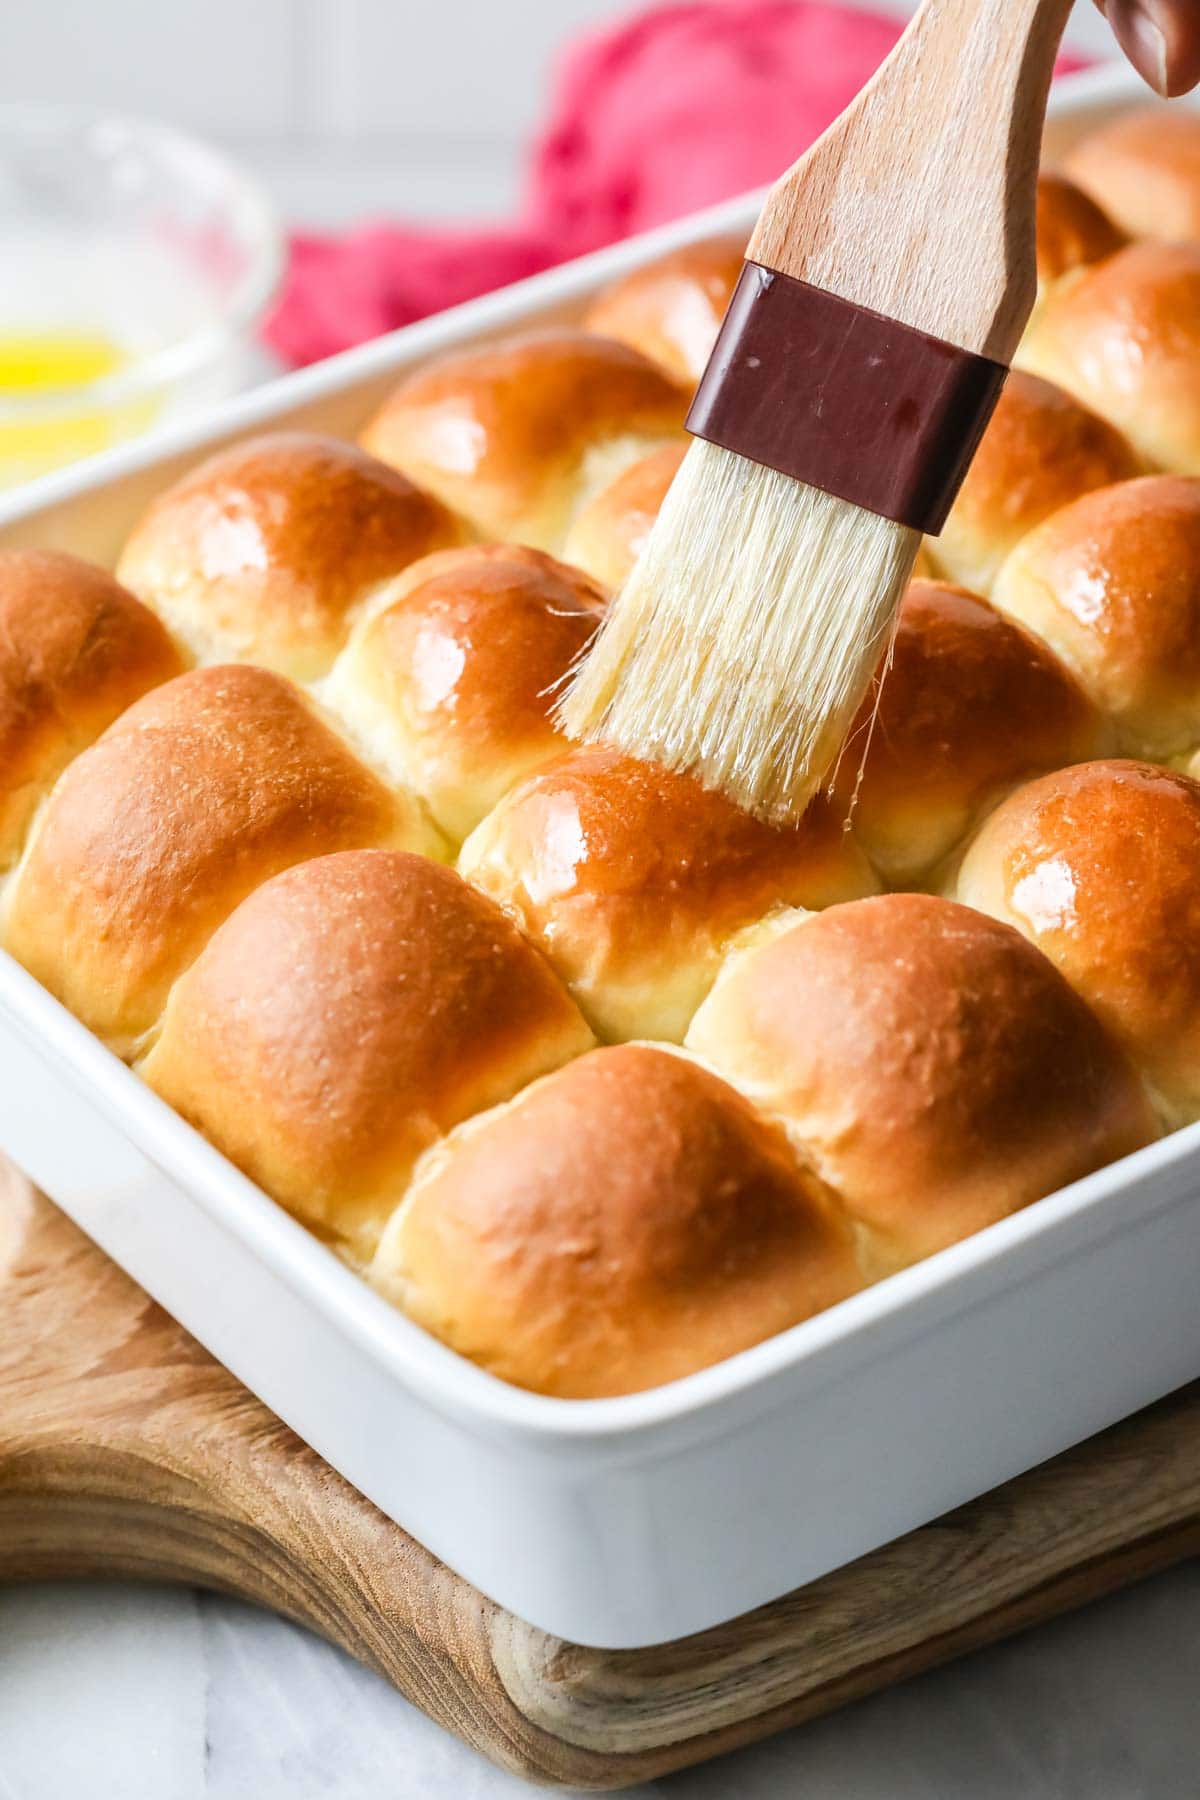
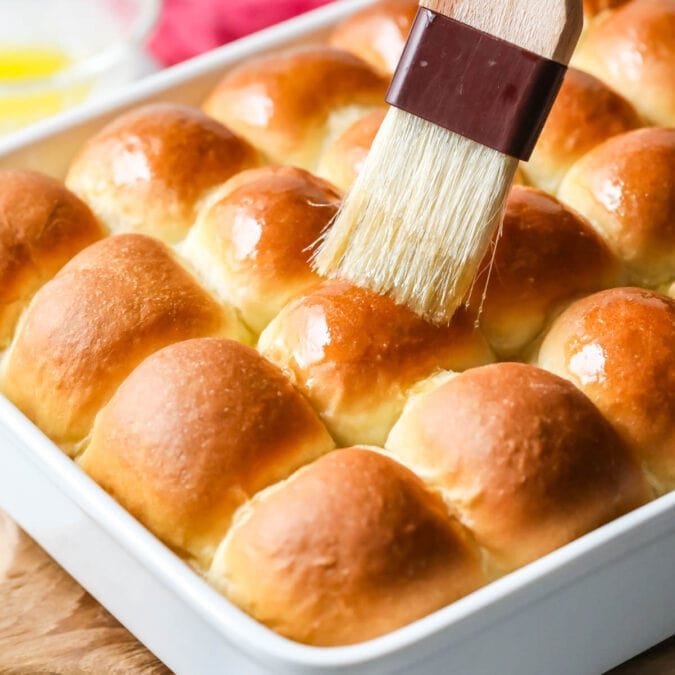
- Bake the rolls at 375F (190C) for 25-30 minutes or until golden brown on top. Brush with melted butter before enjoying.
SAM’S TIP: I highly recommend brushing your rolls with salted butter after baking to make them even more mouth-watering…I mean seriously, just look at them!
Frequently Asked Questions
You can freeze the dinner rolls after baking. Let them cool, wrap them tightly and place in an airtight container and they will keep in the freezer for several months.
Now, if you want to freeze the rolls before baking, I have not tried with this recipe personally but here is a good resource on how to freeze rolls before baking.
Yes! If you do, you’ll want to double all ingredients, including the yeast. Also, make sure you have two 9×13″ pans on hand before you start. Also note that if you use a glass pan, your rolls will take longer to bake than if you use a metal pan (just in case you only have one of each!).
I don’t recommend it. If you want to use instant yeast, I recommend making my regular dinner rolls instead (that’s the main difference between the two recipes!). They finish in under an hour!
Looking for an even faster, yeast-free carb-y side? Try my buttermilk cornbread or biscuits!
Enjoy!
Let’s cook together! Subscribe to my newsletter to be notified of all the newest recipes and follow along on YouTube where I share hundreds of free recipe tutorials! 💜
Make-Ahead Dinner Rolls
Equipment
- 9×13 baking dish
Ingredients
- ¾ cup whole milk
- ⅓ cup water
- 2 ½ teaspoons active dry yeast
- ¼ cup (50 g) + 1 teaspoon granulated sugar, divided
- ⅓ cup (75 g) unsalted butter, melted
- 2 large eggs, room temperature preferred
- 1 ½ teaspoon salt
- 4 – 5 cups (500-625 g) bread flour, plus additional as needed
- 2 Tablespoons butter, softened (for greasing baking dish)
- 3 Tablespoons melted salted butter, for brushing rolls after baking, optional
Instructions
- Combine milk and water in a microwave-safe bowl and heat to 115F (46C). Pour into a large mixing bowl, add yeast and 1 teaspoon of sugar and stir well to combine. Let sit until yeast is foamy, 5-10 minutes.¾ cup whole milk, ⅓ cup water, 2 ½ teaspoons active dry yeast, ¼ cup (50 g) + 1 teaspoon granulated sugar
- Add remaining sugar, melted butter, eggs, salt, and 2 cups (250g) of bread flour. Stir until well combined.⅓ cup (75 g) unsalted butter, 2 large eggs, 1 ½ teaspoon salt, 4 – 5 cups (500-625 g) bread flour
- Gradually stir in remaining flour, adding more as needed. Dough should begin to cling to itself in a ball and pull away from the sides of the bowl when mixing.
- Transfer dough to a clean, lightly floured surface. Knead until dough is smooth and elastic, adding additional flour if dough becomes too sticky to manage. (This should take about 10 minutes by hand, or about 5 minutes if using a stand mixer with a dough hook attachment).
- Lightly grease a large bowl with oil. Place dough in bowl, turn to coat dough all over with oil, and cover with plastic wrap. Let dough rise in a warm place until doubled in size (about 1-2 hours).
- Preheat oven to 375F (190C) (if baking same day). Generously grease a 9×13” dish with 2 Tablespoons of butter. Punch down dough to deflate. Transfer dough to a lightly floured surface and divide into 24 equal portions. Form each portion into a ball, pulling down the sides to create tension on the surface, and place in baking dish. Balls of dough will be barely touching each other.2 Tablespoons butter
- If baking same day: Cover baking dish with plastic wrap and set in a warm place to rise again until dough has increased 50% in size. Once increased in size, remove plastic wrap and bake in 375F (190C) oven for 22-24 minutes. Rolls will be golden brown on top.
- If baking next day: Cover baking dish with plastic wrap and refrigerate overnight. The next day, remove rolls from refrigerator, leave covered and let rest at room temperature while oven preheats to 375F (190C). Remove plastic wrap and bake in 375F (190C) oven for 25-30 minutes. Rolls will be golden brown on top.
- After removing from oven, brush tops of rolls with melted butter, if desired, and enjoy.3 Tablespoons melted salted butter
Notes
Storing
After baking, store in an airtight container at room temperature for up to 4 days. Rolls may also be tightly wrapped and frozen for up to several months.Nutrition
Nutrition information is automatically calculated, so should only be used as an approximation.
Like this? Leave a comment below!


Is there a video for this recipe? I love watching the video before making your recipes.
Unfortunately I did not make a video for this one. 🙁
How long can they rise in the fridge? I plan on making them up in the evening and not baking them until the next afternoon. Is that too long?
Hi Kristie! They will be fine to bake the next afternoon. 🙂
Outstanding! My first experience with overnight rolls and it won’t be my last. Thank you so much for a great recipe.
We’re so glad you loved them, Sandra! 🙂
Do you grease the pan before putting in the rolls?
Hi Eileen! You will want to see step 6 for dish preparation. 🙂
I have tried a few different recipes and these were a hit on Christmas.I topped half with Asiago cheese for an added flavor. Trying them in a batch of 12 larger roll soon for sandwiches.
Thank you so much for trying my recipe, Kim! I’m so glad they were such a hit! 🙂
This was our first experience, making dinner rolls. They were phenomenal, both in texture and taste. After mixing, we stored them in the refrigerator overnight. Again, outstanding.
I’m so glad you enjoyed them so much, Nancy! 🙂
I made these for Thanksgiving and they were a huge hit. I made them the day before and kept them in the fridge, as directed, until the morning. I had to bake them before the turkey, so that was the only bummer, as I would have loved to have them hot out of the oven–but even cold they were delicious (and I ate one for breakfast with leftover meat). It makes quite a lot of rolls, so I wonder if I could manage cutting the recipe in half to make it in the future for just my husband and me, or if I can just freeze the leftovers. Definitely a keeper!
I’m so glad they were such a hit, Liz! 🙂
Do you let rise before putting in fridge? Thanks
If refrigerating over night, no you do not need to let them rise before refrigeration. 🙂
Can I use my bread oven? or should I just use a glass pan?
Hi Kristy! I’m not familiar with using a bread oven so I can’t advise how it would be done. 🙁
Can these rolls be frozen individually into a different shape after the first rise to be baked later?
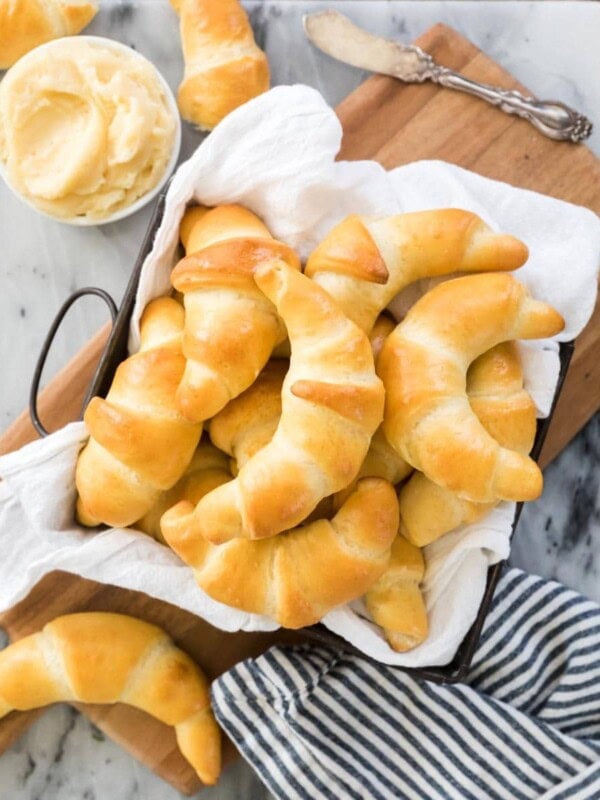
Hi Brenda! What kind of shape are you trying to make? A bread stick or a crescent roll would probably work fine. 🙂