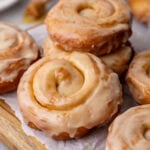
Homemade Honey Buns
Once you try homemade honey buns, you won't go back to store-bought! My honey bun recipe can be baked or fried, and both methods yield incredibly tender, tasty buns. Perfect with a cup of coffee! Recipe includes a how-to video!
Servings 16 buns
Calories 349kcal
Equipment
- Heavy-bottomed pot for frying, optional
Ingredients
For activating the yeast
- ¾ cup (180 ml) whole milk
- ⅓ cup (80 ml) water
- 2 ½ teaspoons active dry yeast
- 1 teaspoon honey or granulated sugar
For the dough
- ¼ cup (84 g) honey
- 1 large egg
- 1 large egg yolk
- 4 cups (500 g) bread flour divided, plus additional as needed
- 1 ½ teaspoons table salt
- 6 Tablespoons (85 g) unsalted butter, softened and cut into 6 pieces
For the filling
- 2 Tbsp granulated sugar
- ½ tsp ground cinnamon
- ¼ cup (57 g) salted butter softened (if using unsalted butter, add ⅛ teaspoon table salt)
- 2 Tablespoons (42 g) honey
For frying (optional, see note)
- Neutral cooking oil for frying (I recommend canola, vegetable, or refined avocado oil)
For the honey glaze
- ½ cup (113 g) salted butter melted (if using unsalted butter add ¼ teaspoon table salt)
- ¼ cup (84 g) honey
- 1 tsp vanilla extract
- 2 cups (250 g) powdered sugar
- warm water if/as needed
Instructions
- Activate the yeast. Combine milk and water in a microwave-safe measuring cup and heat until it reaches a temperature between 110-115F (43-46C). Pour into the bowl of a stand mixer (or large mixing bowl), add yeast and 1 teaspoon of sugar or honey, and stir to combine. Allow to sit for 5-10 minutes, until foamy. If your yeast doesn’t foam, it is likely dead and you’ll need to start over.¾ cup (180 ml) whole milk, ⅓ cup (80 ml) water, 2 ½ teaspoons active dry yeast, 1 teaspoon honey or granulated sugar
- Begin the dough. Add ¼ cup (84 g) honey, egg, egg yolk, and approximately 3 cups (375 g) of bread flour, then sprinkle salt over the flour. Use the paddle attachment or a wooden spoon to stir until well combined.¼ cup (84 g) honey, 1 large egg, 1 large egg yolk, 1 ½ teaspoons table salt
- Add the butter. Add softened butter, one Tablespoon at a time, mixing on low-speed (or with a wooden spoon) until completely incorporated into the dough before adding the next Tablespoon.6 Tablespoons (85 g) unsalted butter, softened and cut into 6 pieces
- Add remaining flour. If using a stand mixer, swap the paddle attachment for dough hook attachment and, with mixer on low-speed, gradually add remaining 1 cup (125 g) flour as needed until the dough begins to cling to itself and pull away from the sides of the bowl. The dough should be soft and slightly tacky, but should not stick to a clean fingers when gently pressed.
- Knead the dough. If using a stand mixer, continue to knead with the dough hook until dough is smooth and elastic (about 10-12 minutes). If making by hand, turn dough out onto a clean, lightly floured surface and knead by hand until smooth and elastic (about 15 minutes). If needed, add additional flour sparingly, only as needed to keep the dough manageable.
- First rise. Transfer dough to a large, lightly oiled bowl, cover tightly with plastic wrap and place in a warm, draft-free place to rise until nearly doubled in size (about 1-2 hours).
- Prepare the filling. Whisk together sugar and cinnamon and set aside.2 Tbsp granulated sugar, ½ tsp ground cinnamon
- Roll. Once dough has risen, use your hand to gently deflate the dough and transfer to a clean, lightly floured surface. Use a rolling pin to roll out into an 18” x 10” (46 x 25 cm) rectangle.
- Fill & shape. Spread the softened butter evenly over the dough, then sprinkle the cinnamon-sugar evenly over the butter, then drizzle the honey evenly overtop. Cut the dough into 16 even strips (each 10” long and approximately 1 ⅛” wide) and roll firmly but not too tightly into a spiral, pressing the edges together to (very tightly) seal and prevent unraveling. If you plan to fry the honey buns, you can cut the parchment into large squares around each bun and allow the buns to rise on the parchment squares; this makes it easy to transfer them into the hot oil without deflating or distorting them.¼ cup (57 g) salted butter, 2 Tablespoons (42 g) honey
- Second rise. Arrange the buns on two parchment paper lined baking sheets, spacing several inches apart so they don’t touch. Cover loosely with plastic wrap and allow to rise in a warm, draft-free place until noticeably puffed, about 30-45 minutes. Near the end of the rise, prepare to either bake or fry the honey buns (preheat the oven to 350F/175C or begin heating the oil over medium-low heat to 355F/179C).
IF FRYING:
- Heat the oil. While the buns are rising, pour 3-4” of oil into a medium-sized, heavy-bottomed pot (making sure the pot is no more than ⅔ full). Heat the oil over medium heat to 355-360F (179-182C). Monitor the temperature closely and adjust the heat as needed while frying.Neutral cooking oil
- Gently flatten the buns. Immediately before frying, use your hand to very gently press each bun so the raised center is level with the rest of the bun. Don’t press out all of the air or flatten the bun completely (or they could become dense and oily), this gentle flattening just helps the honey buns cook more evenly and prevents the centers from being too thick and remaining under-baked and doughy after frying. Double-check that the seam is tightly pinched and re-seal if needed so the bun doesn’t unravel in the oil.
- Fry. Working with just one or two buns at a time, carefully lower into the hot oil using a spider strainer (or the parchment square). Fry approximately 60 seconds per side, until deep golden brown. If using parchment squares, lower each bun into the oil with its parchment attached, and once the parchment releases carefully remove it with tongs.
- Drain (and check for doneness). Use a spider strainer to carefully remove from the oil, drain and transfer to a wire cooling rack set over paper towels or a baking sheet (for easy cleanup!). Check to ensure the center is fully cooked, it should reach 185F-190F (85-88C). Monitor the oil temperature as you fry to make sure it stays in the proper range (355-360F (179-182C)). Repeat with the remaining buns, then glaze them while they’re still warm.
IF BAKING:
- Bake. Once buns are puffed and oven is preheated to 350F (175C), bake the honey buns, one tray at a time, on the center rack of the oven, until baked through and internal temperature reads 185-190F (85-88C) when temped with an instant read thermometer, about 11-13 minutes. These rolls do not get very golden and stay quite pale when baked. Prepare the glaze – it’s best applied warm!
GLAZE
- Make the glaze. In a medium bowl, whisk together melted butter, honey, and vanilla extract. Gradually whisk in the powdered sugar until glaze is completely smooth and flows easily from the whisk. If glaze is too thick, add warm water, a teaspoon at a time, until proper consistency is reached.½ cup (113 g) salted butter, ¼ cup (84 g) honey, 1 tsp vanilla extract, 2 cups (250 g) powdered sugar, warm water
- Glaze the honey buns. Spoon the glaze generously and evenly over the honey buns while they’re still warm (but not piping hot!). Allow it to set briefly before serving. Honey buns are best enjoyed warm.
Video
Notes
Stand mixer vs making by hand
I recommend a stand mixer for best results because this a very soft, slightly sticky dough which can be difficult to manage by hand. Kneading by hand typically requires a little extra flour to make the dough manageable, while a mixer helps keep the dough softer and allows you to use less flour, which makes the resulting honey buns even softer and more tender. However, you can still make great honey buns without a stand mixer, just add the flour sparingly and expect the dough to be a bit sticky as you work with it.Flour
The full 4 cups of flour may not always be necessary (or you may need more than called for). Add the last bit of flour gradually and stop once the dough is soft, elastic, and slightly tacky but doesn’t stick to a clean finger when pressed. Try to avoid adding too much flour, which can make the honey buns dense or dry.Frying vs baking
Traditionally, honey buns are fried, but I think they’re almost just as good baked (and they’re certainly easier to bake). They do stay quite pale when baked, and look more classic and golden brown when fried.Storing
Honey buns are best enjoyed the same day they are made. Store any leftovers in an airtight container at room temperature for up to 2 days. They taste best slightly warm, so I recommend briefly microwaving before serving (though the honey glaze can melt a bit when reheating!).Nutrition
Serving: 1bun | Calories: 349kcal | Carbohydrates: 51g | Protein: 5g | Fat: 14g | Saturated Fat: 9g | Polyunsaturated Fat: 1g | Monounsaturated Fat: 4g | Trans Fat: 1g | Cholesterol: 58mg | Sodium: 298mg | Potassium: 70mg | Fiber: 1g | Sugar: 28g | Vitamin A: 448IU | Vitamin C: 0.1mg | Calcium: 28mg | Iron: 0.4mg